

Posted by: Filipe Alves
With the appearance of edge-to-edge screens and gesture navigation, it can be frustrating to implement behaviours for all cases and combinations. While developing we tend to use adjustWindowInsets, but to provide a good fullscreen support by adding space between navigation bar and status bar may not always be the only way to go.
We wrote before about Android’s Gesture Navigation support, how to handle conflicting gestures and extending app content from edge-to-edge. That said we discovered an amazing library that makes the latter even easier!
Insetter can be used in multiple ways. There are even two extension libraries adding to the main library. Bellow you can find some examples we found useful. And we also recommend taking a look at the official documentation.
Main Library
The main library provides simple APIs for handling WindowInsets. To use the Library you can use its main entry point, the Builder
| Insetter.builder() | |
| .padding(windowInsetTypesOf(navigationBars = true)) | |
| .margin(windowInsetTypesOf(statusBars = true)) | |
| .applyToView(view) |
or with Kotlin extensions you can also
| view.applyInsetter { | |
| type(navigationBars = true) { | |
| padding() | |
| } | |
| type(statusBars = true) { | |
| margin() | |
| } | |
| } |
Example
At this point you may be wondering.
This is all great, but what does this really solve? — you
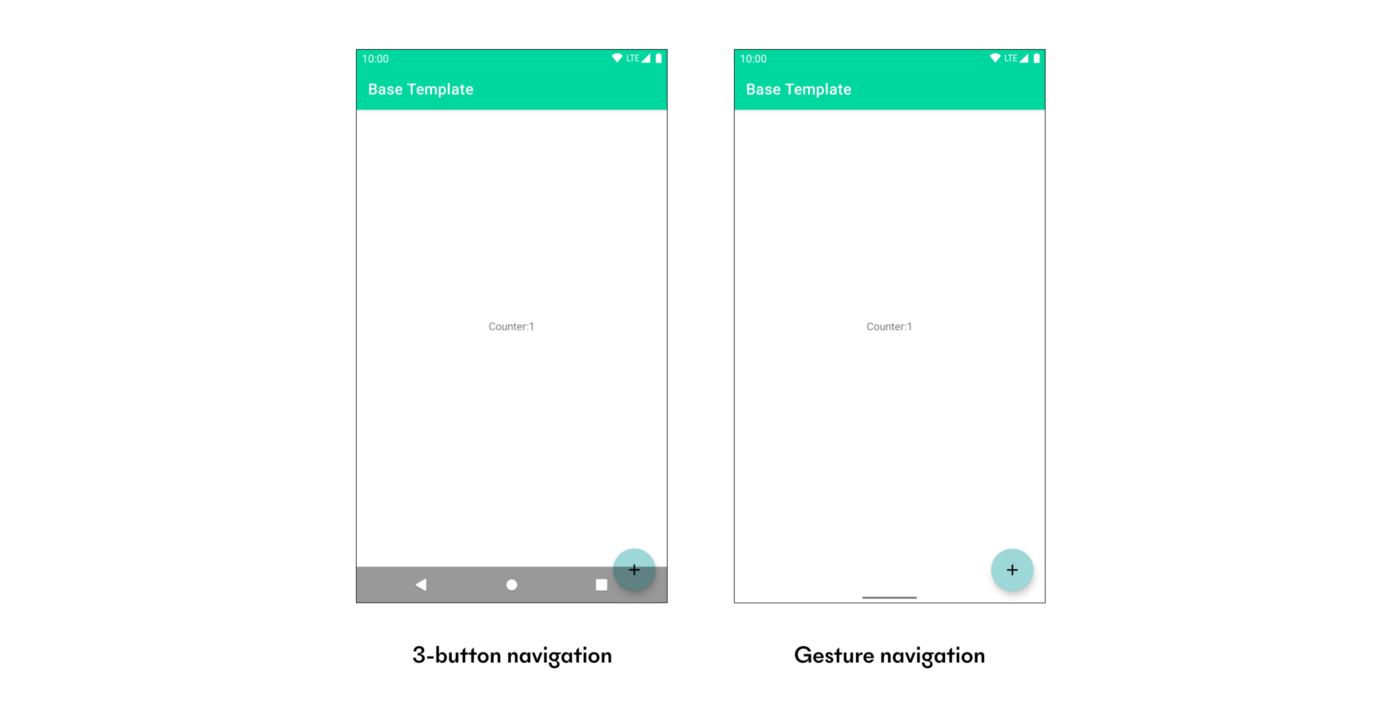
As good developers we are supporting Edge to Edge and making sure we are using most of our users’ screens.
We used both WindowCompact.setDecorFitsSystemWindows(window, false) and themes.xml for full support. We tested our screen with both Gesture Navigation and traditional navigation and we got this:
OUR VIDEO RECOMMENDATION


Jobs
Overlap! Well according to the official documentation we can make use of the view listener setOnApplyWindowInsetsListener and update the padding or margin as we see fit. It will end up being something like:
| ViewCompat.setOnApplyWindowInsetsListener(fabIncrement) { view, windowInsets -> | |
| val insets = windowInsets.getInsets(WindowInsetsCompat.Type.navigationBars()) | |
| // Apply the insets as a margin to the view. Here the system is setting | |
| // only the bottom, left, and right dimensions, but apply whichever insets are | |
| // appropriate to your layout. You can also update the view padding | |
| // if that's more appropriate. | |
| view.updateLayoutParams( | |
| leftMargin = insets.left, | |
| bottomMargin = insets.bottom, | |
| rightMargin = insets.right, | |
| topMargin = insets.top | |
| ) | |
| // Return CONSUMED if you don't want want the window insets to keep being | |
| // passed down to descendant views. | |
| WindowInsetsCompat.CONSUMED | |
| } |
It looks “OK-ish”, but this does not take into account current margins or paddings by default. It also only applies the insets when the system lifecycle calls it, meaning if you add a view programmatically afterwards you run the risk of weird behaviours. And who will remember to mark it as CONSUMED?
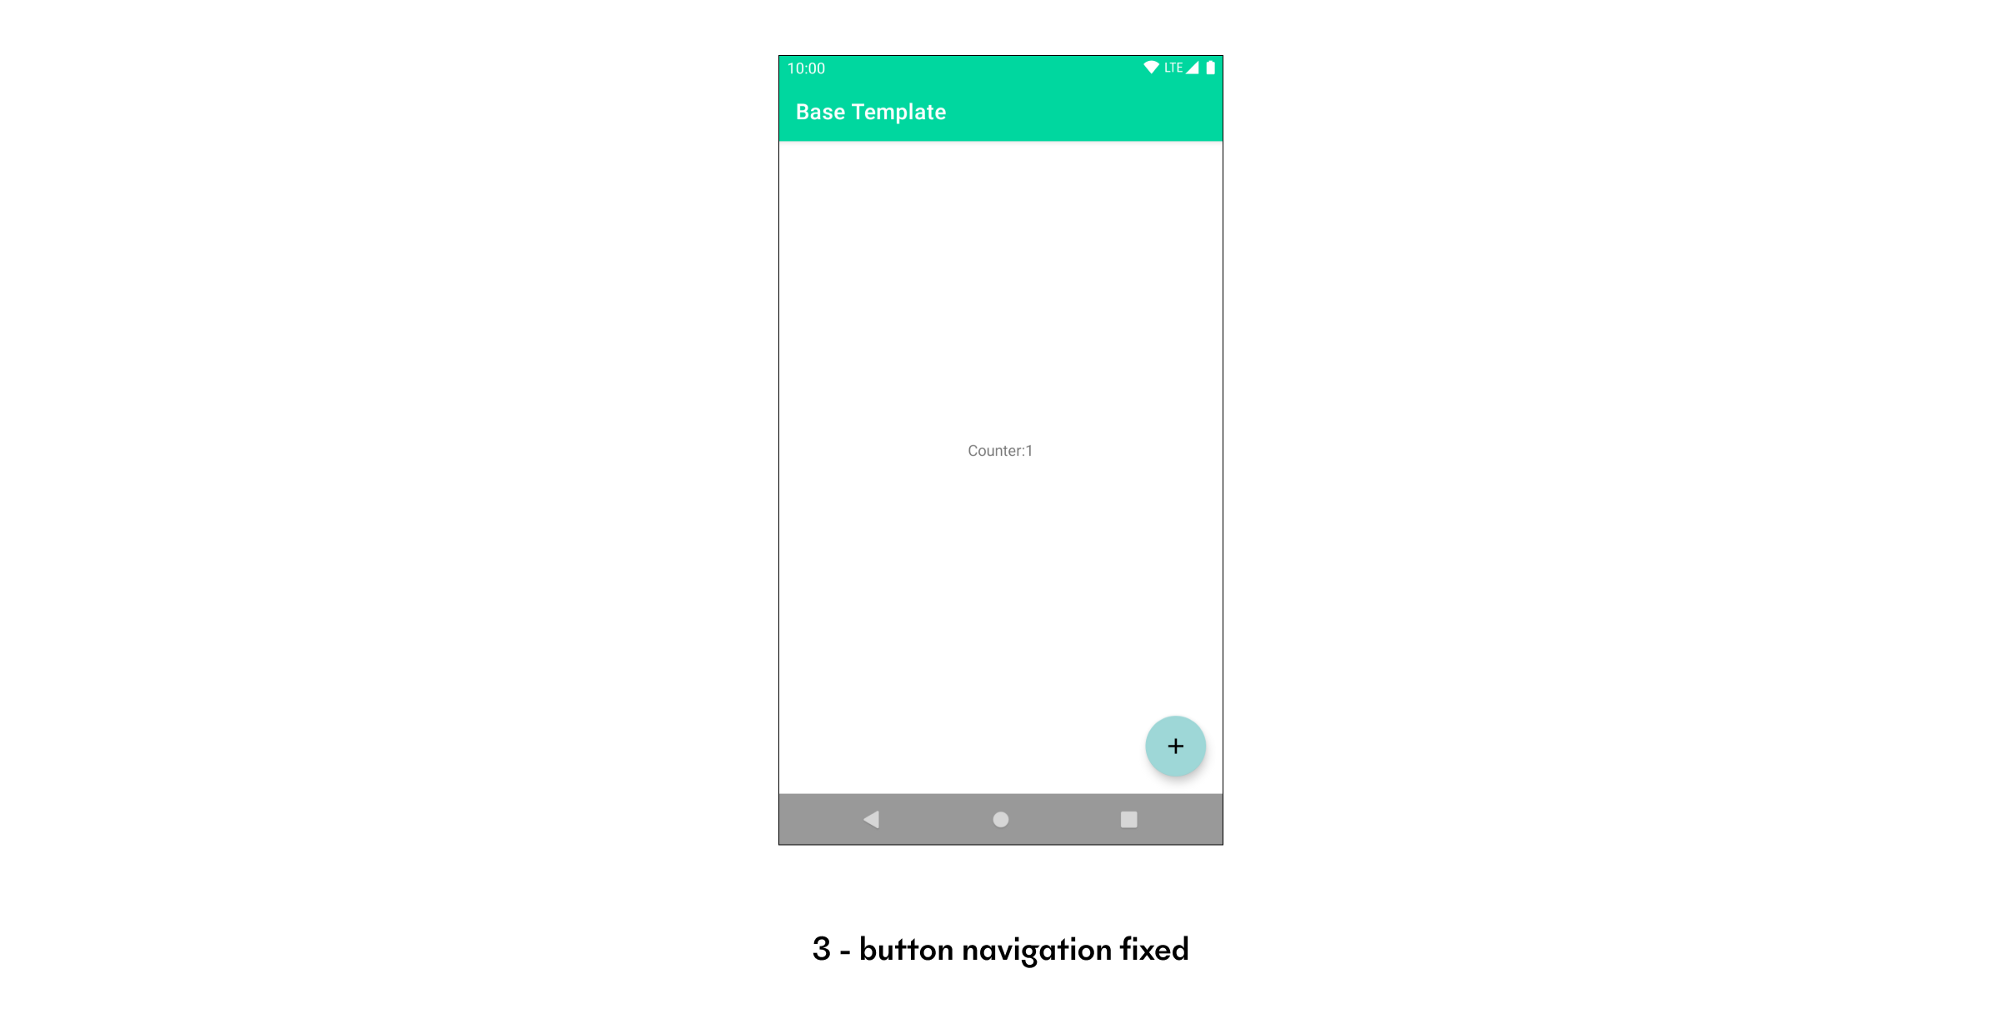
With Insetter Library, all this is automatically handled and simpler.
| fabIncrement.applyInsetter { | |
| // Apply the navigation bar insets... | |
| type(navigationBars = true) { | |
| // Add margin on all sides | |
| margin() | |
| } | |
| } |
and the end result is what we expected to happen on the old navigation.
This library offers a lot more functionality, below we go over another quick example, Data Binding but we recommend you to take a look at the official documentation.
Data Binding extension
Provides Data Binding-specific functionality that works with any view and makes the codebase cleaner. Using data binding, all you need is to modify your xml’s where you intend to
| <ImageView | |
| app:paddingBottomSystemWindowInsets="@{true}" | |
| app:paddingLeftSystemWindowInsets="@{true}" /> |
And to have a better full screen support you can also use the attribute app:layout_edgeToEdge that sets this view’s System UI visibility with the flags required.
? I am Filipe, an Android Developer at Bloco, a studio specialized in Android Products, there you can find other posts like our Android Template.
This article was originally published on proandroiddev.com on June 21, 2021


