

Gradle has a cool feature, it prompts a warning to us when our dependency has a newer version available. Here is an example:

But when we use Kotlin DSL in ourGradle files and manage dependency versions in a separate Kotlin file, it won’t prompt a warning.

I often search my dependencies on the internet to see if there are any updates.
This could be a time-consuming task in a large project. Also, we wouldn’t know which dependencies have updates unless we check all of them one by one.
Luckily there is a Gradle plugin that can check our dependency updates for us:
https://github.com/ben-manes/gradle-versions-plugin.
In this section, we will set up the plugin. Here is how to set it up:
Add it to project level build.gradle:
plugins {
    id("com.github.ben-manes.versions") version "0.38.0"
}
Then we can configure it like this inside project level build.gradle:
import com.github.benmanes.gradle.versions.updates.DependencyUpdatesTask
import com.github.benmanes.gradle.versions.updates.gradle.GradleReleaseChannel
tasks.named<DependencyUpdatesTask>("dependencyUpdates").configure {
    checkForGradleUpdate = true
    gradleReleaseChannel = GradleReleaseChannel.RELEASE_CANDIDATE.id
    revision = "integration" // See available revisions
    outputFormatter = "plain" // xml and json available too
    outputDir = "build/dependencyUpdates"
    reportfileName = "dependency_update_report"
}
Then run the ./gradlew dependencyUpdates task. The plugin will create a file named dependency_update_report.txt under build/dependencyUpdates directory after completed successfully.
Here is an example file:

In this section, we will automate the dependency update check process using Github Actions. First of all, let’s create a workflow file:
| name: Check Dependency Updates | |
| on: | |
| schedule: | |
| - cron: "37 13 * * SAT" | |
| workflow_dispatch: | |
| jobs: | |
| dependency-updates: | |
| runs-on: ubuntu-latest | |
| steps: | |
| # Removed some steps for brevity | |
| - name: Checkout code | |
| uses: actions/checkout@v2 | |
| - name: Check Dependency Updates | |
| run: ./gradlew dependencyUpdates | |
| - name: Log dependency update report | |
| run: cat build/dependencyUpdates/dependency_update_report.txt | |
| - name: 💌 Send email report | |
| if: ${{ github.event_name == 'schedule' }} | |
| uses: actions/github-script@v3 | |
| env: | |
| MAIL_USERNAME: ${{ secrets.MAIL_USERNAME }} | |
| MAIL_PASSWORD: ${{ secrets.MAIL_PASSWORD }} | |
| with: | |
| script: | | |
| const scriptPath = '/./.github/scripts/dependency-update-report-mail-sender.js' | |
| const script = require(`${process.env.GITHUB_WORKSPACE}${scriptPath}`) | |
| script({ }) |
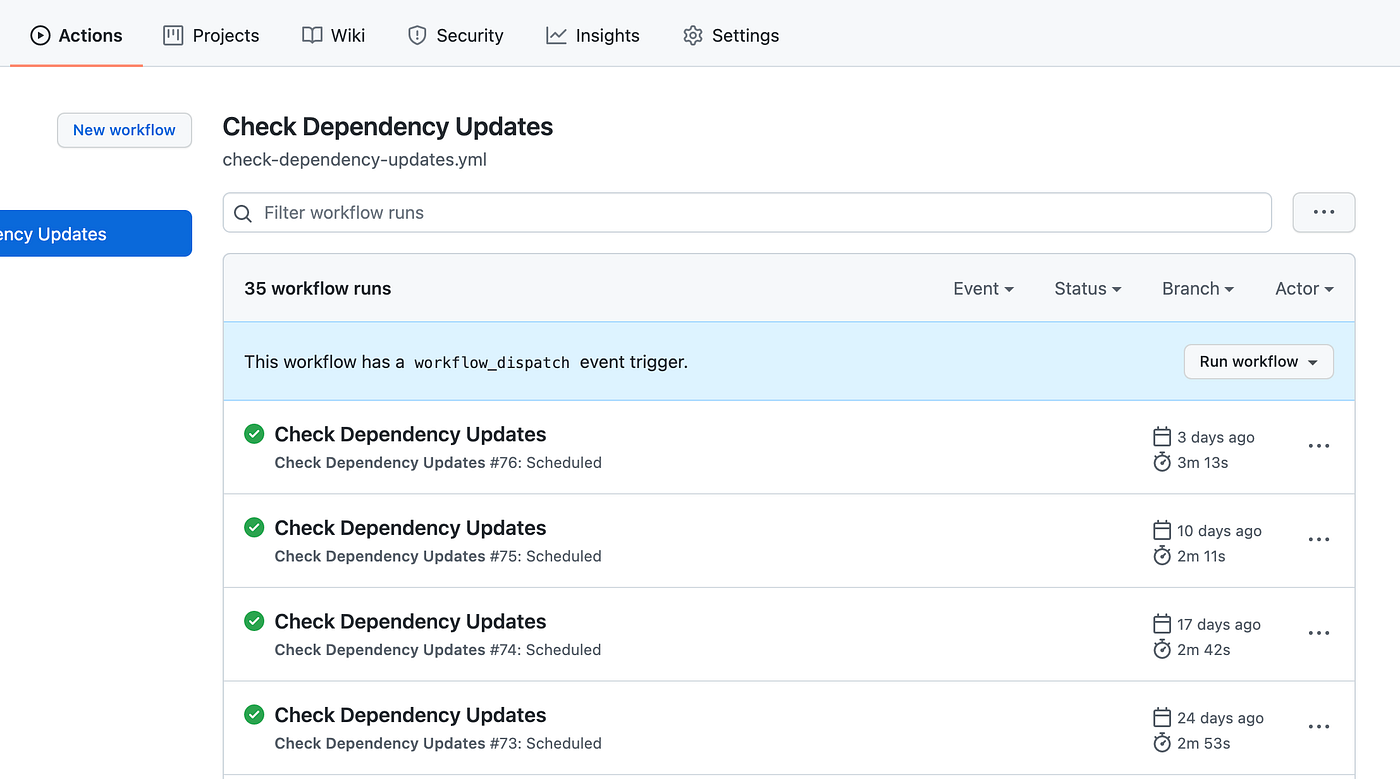
This workflow has two running options:
- workflow_dispatch: This means we can run it manually, as seen on the screenshot:
OUR VIDEO RECOMMENDATION


Jobs
To run it manually do the following: Go to Actions tab -> Click to workflow name -> Click to Run workflow
2. Schedule: This means it will run automatically with the given cron input. In our workflow, we are using 37 13 * * SAT cron configuration. It means our workflow will run at every Saturday 13:37 UTC. (Note that Github Actions can have delays, do not expect an exact time here)
Note: You can validate your cron by pasting it on the crontab.guru page.
In this section, we will send the email:
Our workflow sends the email if it runs scheduled. We can see that in the Send email report step. We will use the github-script action to send the email. This action is a node.js preinstalled Docker container and can run javascript codes.
We will create dependency-update-report-mail-sender.js javascript file under .github/scripts folder. In this script, we will use nodemailer to send the email:
| module.exports = ({ }) => { | |
| const execSync = require('child_process').execSync | |
| execSync(`npm install nodemailer`) // Install nodemailer | |
| const nodemailer = require('nodemailer') | |
| const transporter = nodemailer.createTransport({ | |
| host: "smtp.live.com", // Host for hotmail | |
| port: 587, | |
| secureConnection: false, | |
| auth: { | |
| user: `${process.env.MAIL_USERNAME}`, // I am using hotmail. You can use gmail, yandex etc. | |
| pass: `${process.env.MAIL_PASSWORD}` // You can use token too. I use mail and password | |
| }, | |
| tls: { | |
| ciphers: 'SSLv3' | |
| } | |
| }); | |
| const report = require('fs').readFileSync('build/dependencyUpdates/dependency_update_report.txt', 'utf8') | |
| const mailOptions = { | |
| from: { | |
| name: 'Jetflix', | |
| address: process.env.MAIL_USERNAME | |
| }, | |
| to: 'your_desired_mail@gmail.com', // Use your main account to get the email | |
| subject: 'Dependency update report of Jetflix ¯\\_(ツ)_/¯', | |
| text: `${report}` | |
| }; | |
| transporter.sendMail(mailOptions, (error, info) => { | |
| if (error) { | |
| console.log(error) | |
| } | |
| }); | |
| } |
Now we need to add our email and password to Github in order to send the email. For this, we will use Github Secrets. To add secrets go to your repository settings then click the Secrets tab as seen in the screenshot below:

Github encrypts our secrets and they do not appear in logs. I am using one of my weird high school emails. It doesn’t need to be an actively used email account, we are using it just to send the email.
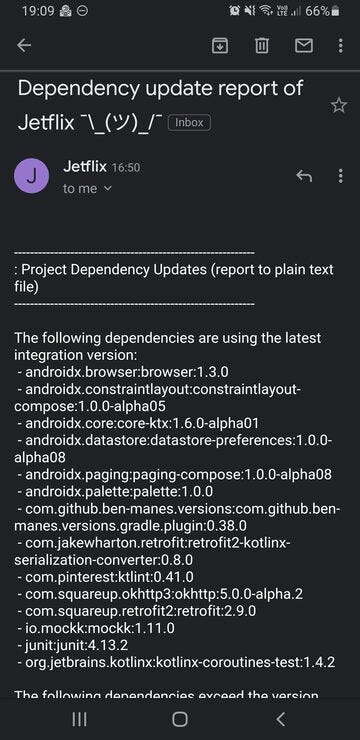
Here is the automated email that sent from Github:
Thanks for reading. Code examples in this post can be found at:


