

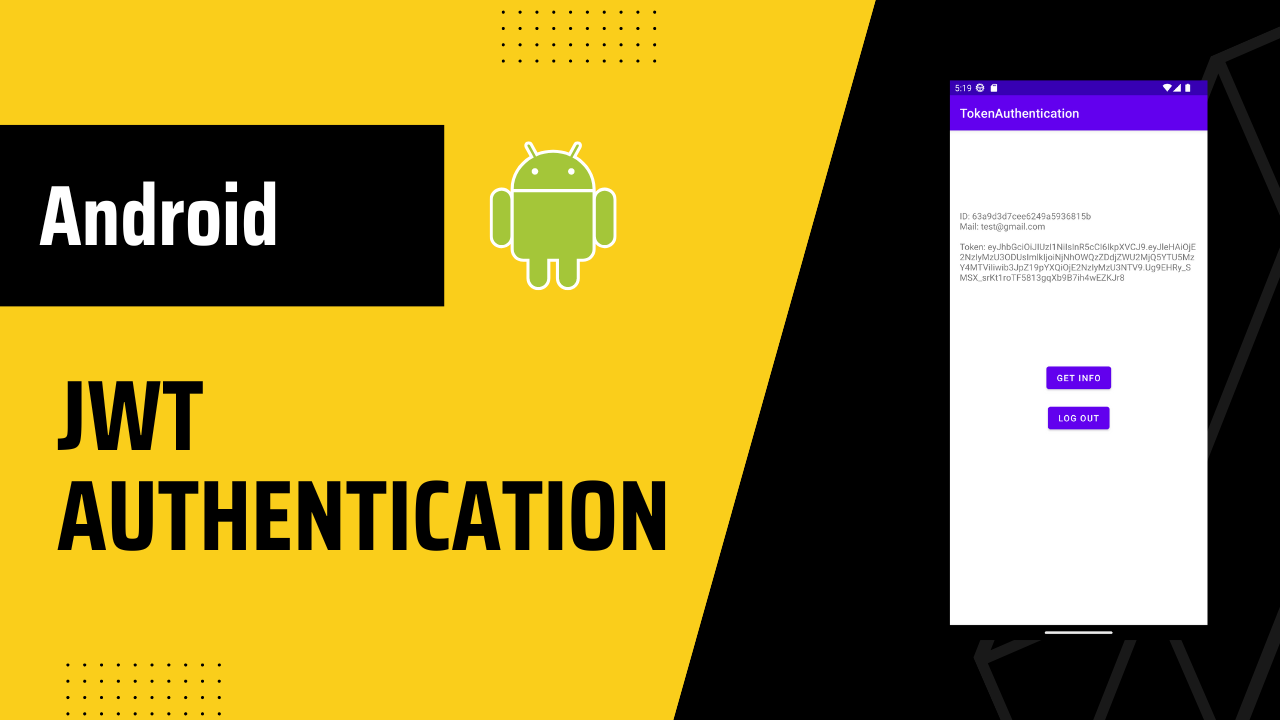
In this article, we’ll be implementing JWT (JSON Web Token) authentication and silent refresh with Retrofit Interceptor and Authenticator. Silent token refresh is necessary when token expires and response from the server is 401 Unauthorized. Instead of logging out the user, we’ll refresh token and continue the request.
Table of Contents
- Getting Started
- API Endpoint & Models
- Retrofit Setup
- Token DataStore
- Helpers
- Repository & View Model
- Interceptor & Authenticator
- Hilt Module
- UI
Prerequisites
We’ll use LiveData, Hilt, Retrofit, OkHttp and DataStore in this article, so it’s better you know how they work.
I’ll skip some parts of the Hilt setup, so if you want to see the source code, you can find the link at the bottom of this article.
Getting Started
App level build.gradle file,
//DataStore
implementation "androidx.datastore:datastore-preferences:1.0.0"

//Retrofit
def retrofit_version = "2.9.0"
implementation "com.squareup.retrofit2:retrofit:$retrofit_version"
implementation "com.squareup.retrofit2:converter-gson:$retrofit_version"

//Hilt
def hilt_version = "2.44"
implementation "com.google.dagger:hilt-android:$hilt_version"
kapt "com.google.dagger:hilt-compiler:$hilt_version"

//OkHttp
def okhttp_version = "4.10.0"
implementation "com.squareup.okhttp3:okhttp:$okhttp_version"
implementation "com.squareup.okhttp3:logging-interceptor:$okhttp_version"
Don’t forget to add Internet permission in AndroidManifest.xml,
<uses-permission android:name="android.permission.INTERNET" />
API Endpoint & Models
I’ve created my own backend to test token authentication. You can check it from this link. MrNtlu/JWT-Test-API (github.com)
Also, if you want to run it locally, you can follow these instructions. It’s very simple Rest API. Token will be refreshed in every 30 seconds and we’ll have to refresh the old token with the new one.
Note: You can get timeout error while testing. It’s free tier on render.com so it has limitations. Please keep trying until you get the result successfully.
We’ll need to create couple of request/response models for Rest API,
POST auth/login request,
data class Auth(
    @SerializedName("email_address")
    val email: String,
    val password: String
)
POST auth/login and GET auth/refresh response,
data class LoginResponse(
    @SerializedName("access_token")
    val token: String
)
GET user/info response,
Please put them into different files. I’ve put them into one code block to make it easier to read.
data class UserInfoResponse(
    @SerializedName("data")
    val userInfo: UserInfo,
    val message: String
)
data class UserInfo(
    val _id: String,
    val email_address: String
)
Finally ErrorResponse ,
data class ErrorResponse(
    val code: Int,
    val message: String
)
Retrofit Setup
We’ll have two separate API Service files. First one is AuthApiService ,
interface AuthApiService {
    @POST("auth/login")
    suspend fun login(
        @Body auth: Auth,
    ): Response<LoginResponse>

    @GET("auth/refresh")
    suspend fun refreshToken(
        @Header("Authorization") token: String,
    ): Response<LoginResponse>
}
Second one is MainApiService,
interface MainApiService {
    @GET("user/info")
    suspend fun getUserInfo(): Response<UserInfoResponse>
}
That’s it for now, we’ll create the Retrofit instance later in this article.
Token DataStore
When a user logged in and reopened the application, we’ll need a way to save that token and use it. DataStore will help us for this problem. We’ll save the token locally and use it when needed.
class TokenManager(private val context: Context) {
    companion object {
        private val TOKEN_KEY = stringPreferencesKey("jwt_token")
    }

    fun getToken(): Flow<String?> {
        return context.dataStore.data.map { preferences ->
            preferences[TOKEN_KEY]
        }
    }

    suspend fun saveToken(token: String) {
        context.dataStore.edit { preferences ->
            preferences[TOKEN_KEY] = token
        }
    }

    suspend fun deleteToken() {
        context.dataStore.edit { preferences ->
            preferences.remove(TOKEN_KEY)
        }
    }
}
That’s it. There is nothing special. Just a small note, context.dataStore won’t work and you’ll see error. Don’t worry. We’ll add it later on Hilt Module part.
Helpers
Before we start implementing Repository and View Model, we’ll create helper classes.
First ApiResponse , this will help us manage the API requests and UI state management. We’ll be able to show the necessary UI to the user and extract data easily.
sealed class ApiResponse<out T> {
    object Loading: ApiResponse<Nothing>()

    data class Success<out T>(
        val data: T
    ): ApiResponse<T>()

    data class Failure(
        val errorMessage: String,
        val code: Int,
    ): ApiResponse<Nothing>()
}
Second is apiRequestFlow , this class will help us to make API calls on the IO thread and emit the state. Currently the timeout is set to 20 seconds, you can change it depending on your needs.
fun<T> apiRequestFlow(call: suspend () -> Response<T>): Flow<ApiResponse<T>> = flow {
    emit(ApiResponse.Loading)

    withTimeoutOrNull(20000L) {
        val response = call()

        try {
            if (response.isSuccessful) {
                response.body()?.let { data ->
                    emit(ApiResponse.Success(data))
                }
            } else {
                response.errorBody()?.let { error ->
                    error.close()
                    val parsedError: ErrorResponse = Gson().fromJson(error.charStream(), ErrorResponse::class.java)
                    emit(ApiResponse.Failure(parsedError.message, parsedError.code))
                }
            }
        } catch (e: Exception) {
            emit(ApiResponse.Failure(e.message ?: e.toString(), 400))
        }
    } ?: emit(ApiResponse.Failure("Timeout! Please try again.", 408))
}.flowOn(Dispatchers.IO)
Finally BaseViewModel, this class will help us catch and present errors on correct thread and cancel the job when necessary.
open class BaseViewModel : ViewModel() {
    private var mJob: Job? = null

    protected fun <T> baseRequest(liveData: MutableLiveData<T>, errorHandler: CoroutinesErrorHandler, request: () -> Flow<T>) {
        mJob = viewModelScope.launch(Dispatchers.IO + CoroutineExceptionHandler { _, error ->
            viewModelScope.launch(Dispatchers.Main) {
                errorHandler.onError(error.localizedMessage ?: "Error occured! Please try again.")
            }
        }){
            request().collect {
                withContext(Dispatchers.Main) {
                    liveData.value = it
                }
            }
        }
    }

    override fun onCleared() {
        super.onCleared()
        mJob?.let {
            if (it.isActive) {
                it.cancel()
            }
        }
    }
}

interface CoroutinesErrorHandler {
    fun onError(message:String)
}
That’s it. Now we can start implementing Repository & ViewModel.
Repository & View Model
Since we’ve already implemented apiRequestFlow , repository classes will be very short.
class AuthRepository @Inject constructor(
    private val authApiService: AuthApiService,
) {
    fun login(auth: Auth) = apiRequestFlow {
        authApiService.login(auth)
    }
}
class MainRepository @Inject constructor(
    private val mainApiService: MainApiService,
) {
    fun getUserInfo() = apiRequestFlow {
        mainApiService.getUserInfo()
    }
}
Jobs
Same goes for view models, only thing that is extra is LiveData objects. Both view models extend BaseViewModel which we’ve created earlier.
@HiltViewModel
class AuthViewModel @Inject constructor(
    private val authRepository: AuthRepository,
): BaseViewModel() {

    private val _loginResponse = MutableLiveData<ApiResponse<LoginResponse>>()
    val loginResponse = _loginResponse

    fun login(auth: Auth, coroutinesErrorHandler: CoroutinesErrorHandler) = baseRequest(
        _loginResponse,
        coroutinesErrorHandler
    ) {
        authRepository.login(auth)
    }
}
@HiltViewModel
class MainViewModel @Inject constructor(
    private val mainRepository: MainRepository,
): BaseViewModel() {

    private val _userInfoResponse = MutableLiveData<ApiResponse<UserInfoResponse>>()
    val userInfoResponse = _userInfoResponse

    fun getUserInfo(coroutinesErrorHandler: CoroutinesErrorHandler) = baseRequest(
        _userInfoResponse,
        coroutinesErrorHandler,
    ) {
        mainRepository.getUserInfo()
    }
}
Finally, we are going to create one more view model for Token.
@HiltViewModel
class TokenViewModel @Inject constructor(
    private val tokenManager: TokenManager,
): ViewModel() {

    val token = MutableLiveData<String?>()

    init {
        viewModelScope.launch(Dispatchers.IO) {
            tokenManager.getToken().collect {
                withContext(Dispatchers.Main) {
                    token.value = it
                }
            }
        }
    }

    fun saveToken(token: String) {
        viewModelScope.launch(Dispatchers.IO) {
            tokenManager.saveToken(token)
        }
    }

    fun deleteToken() {
        viewModelScope.launch(Dispatchers.IO) {
            tokenManager.deleteToken()
        }
    }
}
In this view model, we have only 1 variable which is token live data object. When we initialize the view model, we are setting token value to tokenManager.token and listen for changes.
Whenever we call saveToken or deleteToken , token value will be updated on tokenManager.getToken().collect so we don’t have to worry about anything else.
That’s it! Now we can implement Interceptor and Authenticator.
Interceptor & Authenticator
Interceptor is very simple,
class AuthInterceptor @Inject constructor(
    private val tokenManager: TokenManager,
): Interceptor {
    override fun intercept(chain: Interceptor.Chain): Response {
        val token = runBlocking {
            tokenManager.getToken().first()
        }
        val request = chain.request().newBuilder()
        request.addHeader("Authorization", "Bearer $token")
        return chain.proceed(request.build())
    }
}
We are getting the token from tokenManager by blocking the current thread until completion with runBlocking. After that, we add Authorization header to the ongoing request.
Interceptors — OkHttp (square.github.io)
There is a small problem, what if token is empty or outdated? The solution is simple, Authenticator.
Performs either preemptive authentication before connecting to a proxy server, or reactive authentication after receiving a challenge from either an origin web server or proxy server.
When reactive authentication is requested by an origin web server, the response code is 401 and the implementation should respond with a new request that sets the “Authorization” header.
For more info, you can click the link.
class AuthAuthenticator @Inject constructor(
    private val tokenManager: TokenManager,
): Authenticator {

    override fun authenticate(route: Route?, response: Response): Request? {
        val token = runBlocking {
            tokenManager.getToken().first()
        }
        return runBlocking {
            val newToken = getNewToken(token)

            if (!newToken.isSuccessful || newToken.body() == null) { //Couldn't refresh the token, so restart the login process
                tokenManager.deleteToken()
            }

            newToken.body()?.let {
                tokenManager.saveToken(it.token)
                response.request.newBuilder()
                    .header("Authorization", "Bearer ${it.token}")
                    .build()
            }
        }
    }

    private suspend fun getNewToken(refreshToken: String?): retrofit2.Response<LoginResponse> {
        val loggingInterceptor = HttpLoggingInterceptor()
        loggingInterceptor.level = HttpLoggingInterceptor.Level.BODY
        val okHttpClient = OkHttpClient.Builder().addInterceptor(loggingInterceptor).build()

        val retrofit = Retrofit.Builder()
            .baseUrl("https://jwt-test-api.onrender.com/api/")
            .addConverterFactory(GsonConverterFactory.create())
            .client(okHttpClient)
            .build()
        val service = retrofit.create(AuthApiService::class.java)
        return service.refreshToken("Bearer $refreshToken")
    }
}
Authenticator will not intercept every time, it’s going to be reactive to response and react accordingly. So, if token is valid, authenticator won’t interfere but if token is not valid, it’ll intercept and refresh the token.
Again, before we do anything we get the token with runBlocking. After it, we use getNewToken function to request new token with the old token then we are checking if we’ve retrieved the new token successfully.
If we couldn’t get new token, we use deleteToken function which will trigger TokenViewModel token live data and on UI part we’ll force user to logout.
If we’ve retrieved the new refresh token successfully, we’ll update the old token value with new token and make the request.
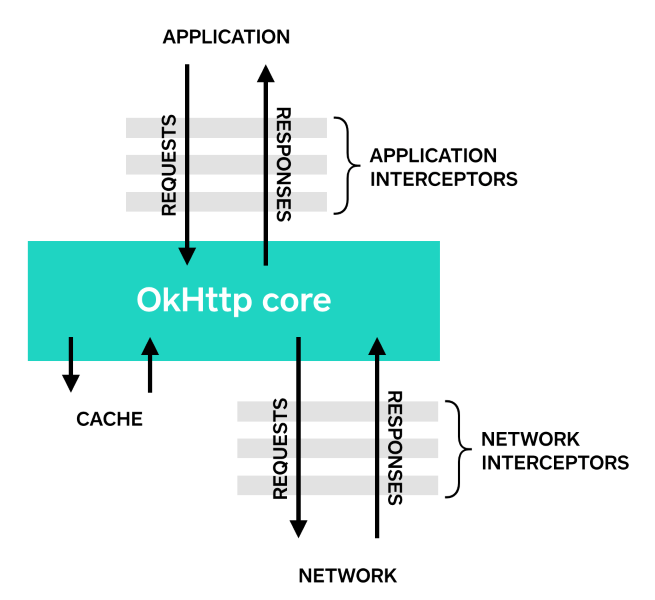
 Authenticator Flow
As you can see from the image, we make the request (1) but token is expired, so we make another request to auth/refresh for a new token and successfully retrieve it (2). After that we make the request to user/info and successfully fetch the data (3).
Hilt Module
| val Context.dataStore: DataStore<Preferences> by preferencesDataStore(name = "data_store") | |
| @Module | |
| @InstallIn(SingletonComponent::class) | |
| class SingletonModule { | |
| @Singleton | |
| @Provides | |
| fun provideTokenManager(@ApplicationContext context: Context): TokenManager = TokenManager(context) | |
| @Singleton | |
| @Provides | |
| fun provideOkHttpClient( | |
| authInterceptor: AuthInterceptor, | |
| authAuthenticator: AuthAuthenticator, | |
| ): OkHttpClient { | |
| val loggingInterceptor = HttpLoggingInterceptor() | |
| loggingInterceptor.level = HttpLoggingInterceptor.Level.BODY | |
| return OkHttpClient.Builder() | |
| .addInterceptor(authInterceptor) | |
| .addInterceptor(loggingInterceptor) | |
| .authenticator(authAuthenticator) | |
| .build() | |
| } | |
| @Singleton | |
| @Provides | |
| fun provideAuthInterceptor(tokenManager: TokenManager): AuthInterceptor = | |
| AuthInterceptor(tokenManager) | |
| @Singleton | |
| @Provides | |
| fun provideAuthAuthenticator(tokenManager: TokenManager): AuthAuthenticator = | |
| AuthAuthenticator(tokenManager) | |
| @Singleton | |
| @Provides | |
| fun provideRetrofitBuilder(): Retrofit.Builder = | |
| Retrofit.Builder() | |
| .baseUrl("https://jwt-test-api.onrender.com/api/") | |
| .addConverterFactory(GsonConverterFactory.create()) | |
| @Singleton | |
| @Provides | |
| fun provideAuthAPIService(retrofit: Retrofit.Builder): AuthApiService = | |
| retrofit | |
| .build() | |
| .create(AuthApiService::class.java) | |
| @Singleton | |
| @Provides | |
| fun provideMainAPIService(okHttpClient: OkHttpClient, retrofit: Retrofit.Builder): MainApiService = | |
| retrofit | |
| .client(okHttpClient) | |
| .build() | |
| .create(MainApiService::class.java) | |
| } |
This class doesn’t need much of an explanation but some small notes,
- Like I’ve mentioned earlier, we set the
Context.dataStoreextension at the top of this class. HttpLogginInterceptorwhich logs request and response information.- Instead of providing Retrofit instance, I’ve provided
Retrofit.BuilderbecauseAuthApiServicewon’t useOkHttpClientbutMainApiServicewill. To make the separation I am passing only theRetrofit.Builderinstance.
That’s it. Now we can implement UI.
UI
We’ll have Login and Main fragments.
| @AndroidEntryPoint | |
| class LoginFragment : Fragment() { | |
| private val viewModel: AuthViewModel by viewModels() | |
| private val tokenViewModel: TokenViewModel by activityViewModels() | |
| private lateinit var navController: NavController | |
| override fun onCreateView( | |
| inflater: LayoutInflater, container: ViewGroup?, | |
| savedInstanceState: Bundle? | |
| ): View? { | |
| return inflater.inflate(R.layout.fragment_login, container, false) | |
| } | |
| override fun onViewCreated(view: View, savedInstanceState: Bundle?) { | |
| super.onViewCreated(view, savedInstanceState) | |
| navController = Navigation.findNavController(view) | |
| val loginTV = view.findViewById<TextView>(R.id.loginTV) | |
| tokenViewModel.token.observe(viewLifecycleOwner) { token -> | |
| if (token != null) | |
| navController.navigate(R.id.action_loginFragment_to_main_nav_graph) | |
| } | |
| viewModel.loginResponse.observe(viewLifecycleOwner) { | |
| when(it) { | |
| is ApiResponse.Failure -> loginTV.text = it.errorMessage | |
| ApiResponse.Loading -> loginTV.text = "Loading" | |
| is ApiResponse.Success -> { | |
| tokenViewModel.saveToken(it.data.token) | |
| } | |
| } | |
| } | |
| view.findViewById<Button>(R.id.loginButton).setOnClickListener { | |
| viewModel.login( | |
| Auth("test@gmail.com", "123Test"), | |
| object: CoroutinesErrorHandler { | |
| override fun onError(message: String) { | |
| loginTV.text = "Error! $message" | |
| } | |
| } | |
| ) | |
| } | |
| } | |
| } |
Views are poorly set, please ignore them.
In LoginFragment, we have two view models, AuthViewModel and TokenViewModel. We’ve used activityViewModels because TokenViewModel should be scoped to Activity, not fragment.
activityViewModels()is pretty self-explanatory. It is used to scoped to its activity and when its activity get destroy,activityViewModels()will be destroyed as well. Source Link.
We are observing two live data objects, token and loginResponse. When user clicks the loginButton and makes the viewModel.login request, we’ll retrieve the data.token from loginResponse and save it. When saved, token will observe and when it’s set and not null we’ll navigate to MainFragment.
| @AndroidEntryPoint | |
| class MainFragment : Fragment() { | |
| private val viewModel: MainViewModel by viewModels() | |
| private val tokenViewModel: TokenViewModel by activityViewModels() | |
| private lateinit var navController: NavController | |
| private var token: String? = null | |
| override fun onCreateView( | |
| inflater: LayoutInflater, container: ViewGroup?, | |
| savedInstanceState: Bundle?): View { | |
| return inflater.inflate(R.layout.fragment_main, container, false) | |
| } | |
| override fun onViewCreated(view: View, savedInstanceState: Bundle?) { | |
| super.onViewCreated(view, savedInstanceState) | |
| navController = Navigation.findNavController(view) | |
| tokenViewModel.token.observe(viewLifecycleOwner) { token -> | |
| this.token = token | |
| if (token == null) | |
| navController.navigate(R.id.action_global_loginFragment) | |
| } | |
| val mainTV = view.findViewById<TextView>(R.id.infoTV) | |
| viewModel.userInfoResponse.observe(viewLifecycleOwner) { | |
| mainTV.text = when(it) { | |
| is ApiResponse.Failure -> "Code: ${it.code}, ${it.errorMessage}" | |
| ApiResponse.Loading -> "Loading" | |
| is ApiResponse.Success -> "ID: ${it.data.userInfo._id}\nMail: ${it.data.userInfo.email_address}\n\nToken: $token" | |
| } | |
| } | |
| view.findViewById<Button>(R.id.infoButton).setOnClickListener { | |
| viewModel.getUserInfo(object: CoroutinesErrorHandler { | |
| override fun onError(message: String) { | |
| mainTV.text = "Error! $message" | |
| } | |
| }) | |
| } | |
| view.findViewById<Button>(R.id.logoutButton).setOnClickListener { | |
| tokenViewModel.deleteToken() | |
| } | |
| } | |
| } |
MainFragment is very similar to LoginFragment. On infoButton click, we make the request and observe it. When we receive the userInfoResponse we present it to infoTV text view.
Also, we are observing the tokenViewModel token live data, when token is set to null, that means we should log out and move back to login screen.
Let’s see the results:
That’s it! I hope it was useful. 👋👋
Full Code
MrNtlu/Token-Authentication (github.com)
Sources:
- kotlin — add access token to retrofit request header and refresh it through refresh token — Stack Overflow
- https://github.com/Giga99/MediumRepos/tree/main/interceptors
- android — Fragment not being restored from backstack, also Hilt recreating ViewModel with Fragment’s lifecycle — Stack Overflow
- App Architecture: Data Layer — DataStore — Android Developers
- https://youtu.be/SJePkypZCzo
- Navigation Component — Comparison between viewModels(), activityViewModels() and navGraphViewModels() | by Teo | Medium
This article was originally published on proandroiddev.com on December 28, 2022


