

Screenshot testing is a great tool which sits between unit tests and Espresso tests. You can test the UI and catch many more real-world regressions compared to unit tests, but without the negatives of Espresso tests: high maintenance and flakiness.
Jetpack Compose has a native screenshot testing support, but it assumes the tests are separated from the code. I prefer test-driven development — use it as a tool for easier development and get tests “for free”. Android Studio already renders composables with @Preview annotations. What if all of them are automatically turned into screenshot tests?
Showkase
Meet Showkase library from AirBnB. Primary purpose of this library is to create a “showcase” UI of all your @Preview-annotated composables in a developer version of your app. It’s a great visual tool for communication with designers, QAs, PMs and others. It can even show your composables in various states (dark mode, bigger font, RTL etc.). And they recently added hooks for screenshot testing.
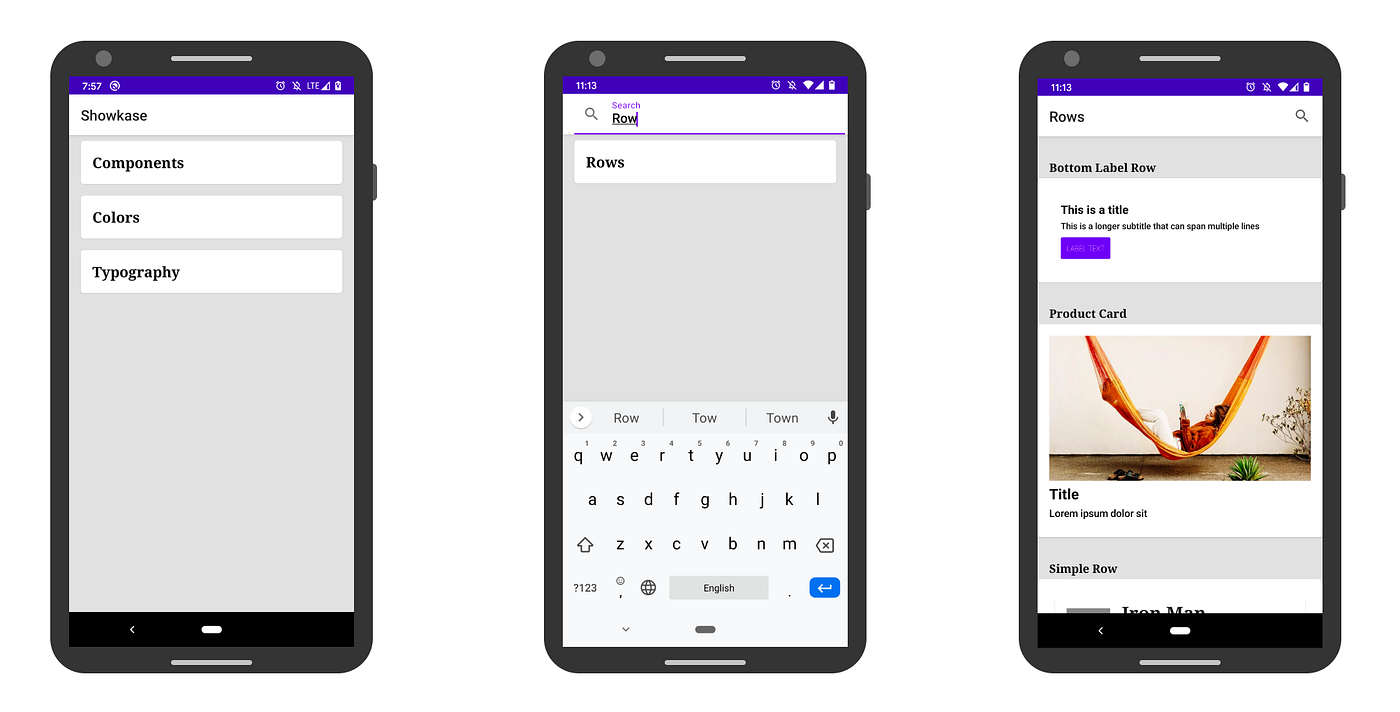 Showkase browser UI
For example you can create the following composable:
| @Composable | |
| fun AppGreeting() { | |
| Text(text = "Hello from app module!") | |
| } | |
| @Preview(name = "App module greeting", group = "Greetings") | |
| @Composable | |
| fun DefaultPreview() { | |
| ShowkaseTheme { | |
| AppGreeting() | |
| } | |
| } |
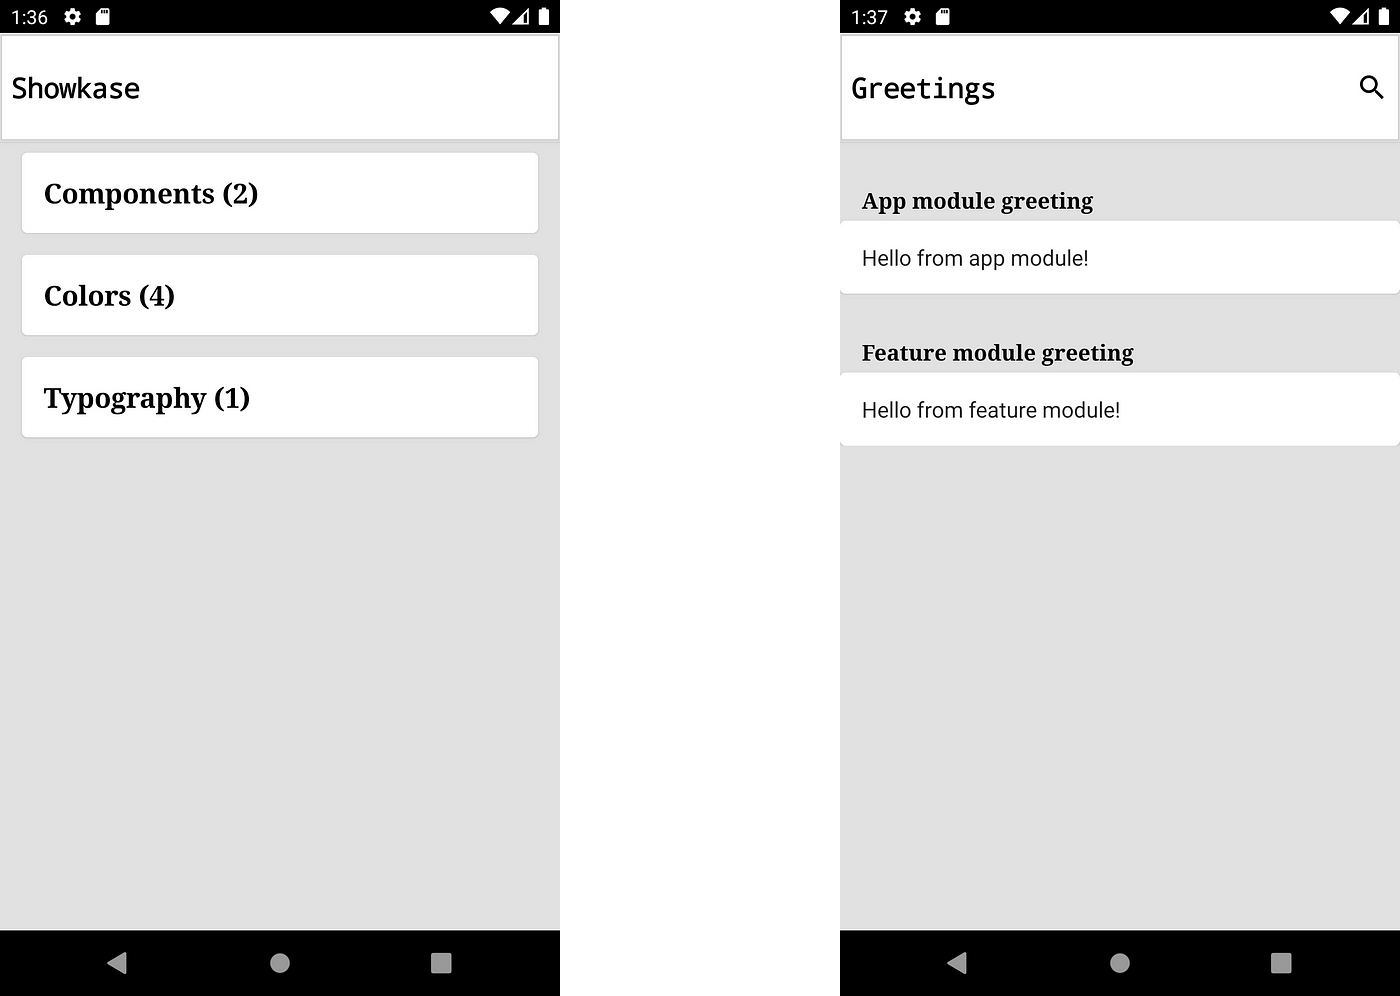
And it renders like this in Showkase browser inside your app:
Facebook’s screenshot testing library
I was one of the first developers to integrate Showkase and the library’s author was really helpful with some initial issues. The library is not a screenshot testing framework itself, but it provides a method where you get a bitmap of the composable and you can compare the image with a “golden” screenshot. Or you can use an existing screenshot testing framework there. I have integrated it with Facebook’s library. Shot library is also a good alternative.
OUR VIDEO RECOMMENDATION


Jobs
How to integrate it
I first integrated it into our JLL Jet app. It’s a large app with over 100 @Preview annotated composables. But it’s closed-source, so here is a sample project showing just the bare minimum: https://github.com/davidvavra/showkase-screenshot-tests
You can start by integrating the Showkase library itself. Read their setup or see my commit. Now you should see all your @Preview annotated composables in a nice UI. I recommend adding name and group parameters everywhere. It makes the showcase UI much more digestible for your non-developer colleagues. UX colleagues can quickly see what components are in the code and create similar components in the design. QA engineers can quickly see what’s covered by screenshot tests. iOS devs can see Android components and get inspired for theirs.
Then, start integrating the screenshot testing library. Here is a guide from Facebook. Now it’s time to connect the Showkase and screenshot testing library. Here is my approach:
| @ShowkaseScreenshot(rootShowkaseClass = ShowkaseRoot::class) | |
| abstract class ComposeTests : ShowkaseScreenshotTest { | |
| override fun onScreenshot( | |
| id: String, | |
| name: String, | |
| group: String, | |
| styleName: String?, | |
| screenshotType: ShowkaseScreenshotType, | |
| screenshotBitmap: Bitmap | |
| ) { | |
| val view = ImageView(InstrumentationRegistry.getInstrumentation().context) | |
| view.setImageBitmap(screenshotBitmap) | |
| ViewHelpers.setupView(view).setExactWidthPx(screenshotBitmap.width).setExactHeightPx(screenshotBitmap.height).layout() | |
| Screenshot.snap(view).setName("$group - $name").record() | |
| } | |
| } |
This code basically wraps composables into Views and applies dimensions required by Facebook’s library. The library is View-based, which is an advantage if you still have some Views in your codebase and want to screenshot test them as well. The image comparison is done by Gradle commands in the next section.
How to use it
Now you can use these Gradle commands:
./gradle runDebugAndroidTestScreenshotTestcreates a nice HTML report with all your composable screenshots. This is useful mainly when you are developing or maintaining tests — you can see them at one place../gradle recordDebugAndroidTestScreenshotTestsaves all screenshot image files to a folder. You can push these images into git and create (or update) your “golden” screenshots../gradle verifyDebugAndroidTestScreenshotTestcompares your “golden” screenshots created by previous command with the latest ones. If fails the build if there are some differences in the images.
For example, if you run ./gradle runDebugAndroidTestScreenshotTest with composable from the beginning, it will create the following screenshot in a HTML report:
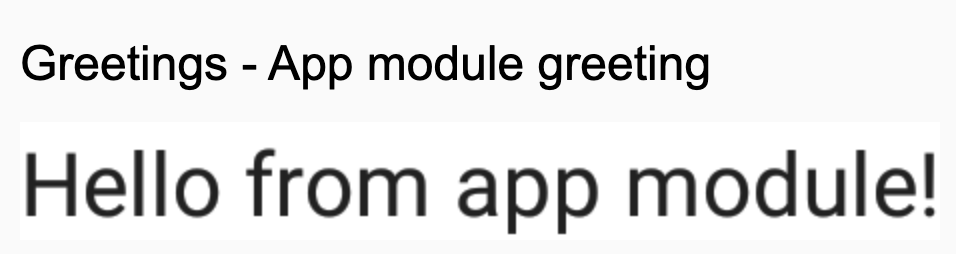 Example screenshot in HTML report
Summary
You saw an easy way how to take screenshots of all your @Previewannotated composables. It uses the Showkase library which has an added benefit of showing all of it in the nice UI right in the app.
The next step is probably to automate it on CI. We have a nice setup with GitHub Actions and screenshot differences in a different branch — GitHub can nicely visualize what’s different in each image and merge it if the change is intended. I can share it in another article, if there is an interest.
Thanks to Mario Sanoguera de Lorenzo.


