

Hi, everyone! We are launching a big series of tutorial articles about Kaspresso and Android UI-tests. The complexity level of these articles will vary: at first, there will be materials for those who have little or no experience in coding and test automation, while in the later articles you will find some advanced implementation details for complex mechanisms and infrastructure.
Thus, the tutorials will be useful both for those just beginning their step-by-step dive into test automation with Kaspresso, as well as for experienced developers who can discover various practical implementation details or learn about interesting practices. We know you’ve been waiting for such tutorials for a long time. At last, we found the time and energy to make it happen. Should you have any suggestions or wish to assist us, please leave a note in the comments below or in our Telegram group.
For those of you who have encountered Kaspresso for the first time, in case you’re intending to write Android UI-tests, feel free to use this awesome tool. Why Kaspresso? Here are some materials where you can find the answer to this question: an article in English, a video in English, an article comparing current UI-test frameworks for Android (part 1 and part 2). Also, to get a better general understanding of Android automated tests, you can read this article. If something in the above-mentioned materials isn’t completely clear, that’s fine, don’t panic. Once you are done with this tutorial, everything will finally fall into place.
For a start, here are a couple of words from this article’s author, Ivan Fedyanin:
Hello there! My name is Ivan Fedyanin, and I work as a software tester at wowworks.ru. I am responsible for manual testing of the company’s website and mobile app. In the last six months, I’ve become interested in the automated testing of mobile applications. After some research and plenty of thought, I finally decided to learn to write automated tests with Kaspresso. In order to delve deeper, I’m helping the Kaspresso team by writing this tutorial.
So, in this first article, we will be taking a rather close look at how to prepare a working environment for using Kaspresso, how to download and run the first tests on emulators and physical devices and view the results of such runs. This article is great for those who have little or no experience in software development.
Contents:
1. Downloading the project
2. Setting up and launching an emulator
3. Running tests on an emulator
4. Running tests on a physical device
5. Options for running single / multiple tests
6. Analyzing test run results. Reading logs
Downloading the project
First of all, it is necessary to install Git on your computer. Follow this link to learn more about how Git works and how to install it.
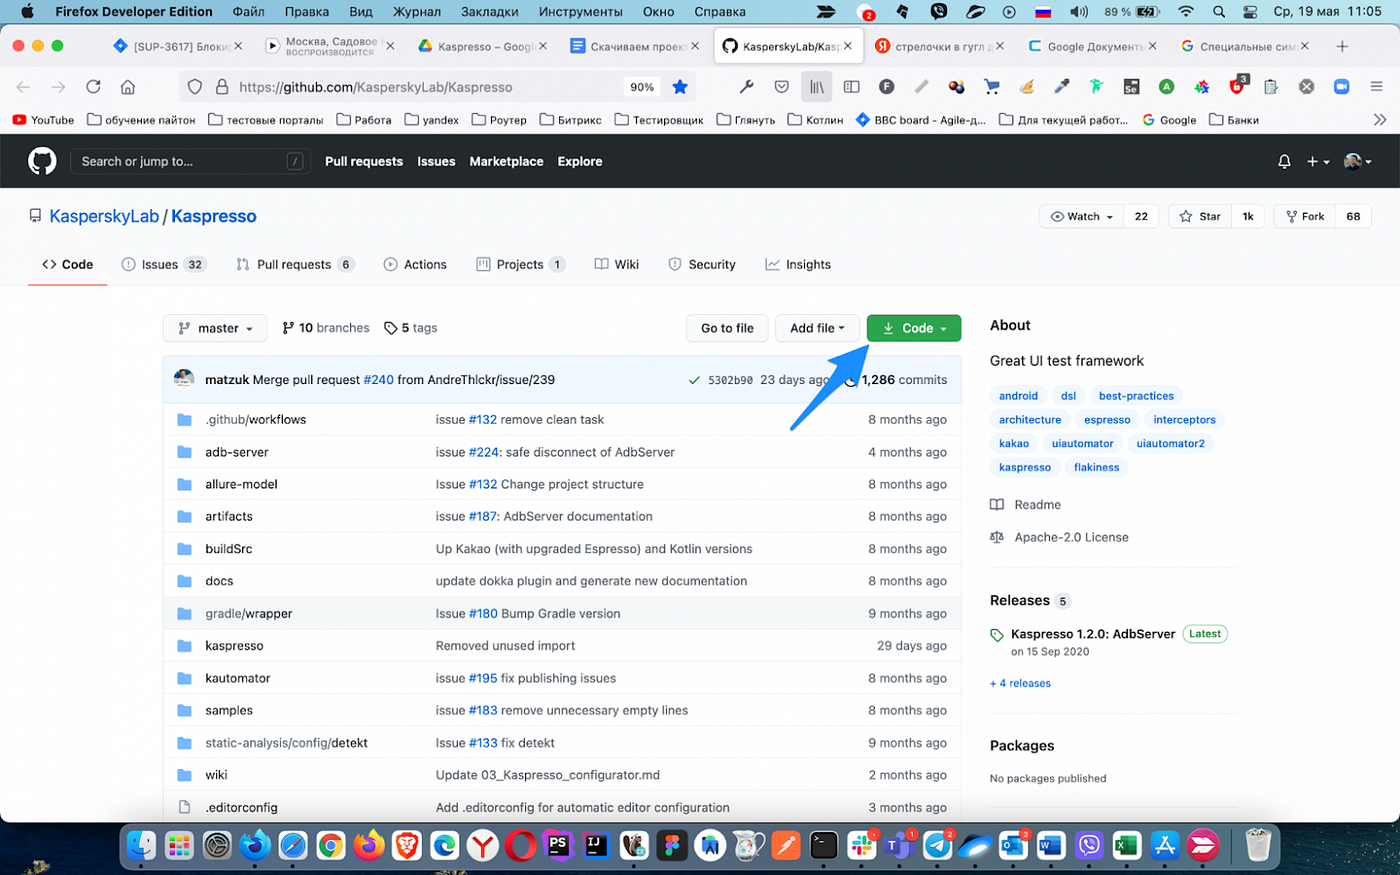
Once you’ve installed Git, go to https://github.com/KasperskyLab/Kaspresso and press the button (1):

You need to copy the link (2). To do that, press (3).
Now let’s open the terminal (for macOS and Linux) or the console (for Windows). Go to the directory where you want to place the project with this command:
cd <path to your project>
For Linux and macOS, the path may look like this:
/Users/UserName/Desktop/MyProject
An example for Windows:
С://MyProject.
On a Mac computer it looks this way:

(1) the command
(2) this indicates that we are in the right directory
The next step is cloning the repository by executing the following command:
git clone https://github.com/KasperskyLab/Kaspresso.git

As a result, a local copy of the remote repository has been created on your computer. In the next section, you will learn how to open the project.
Downloading the project without using Git
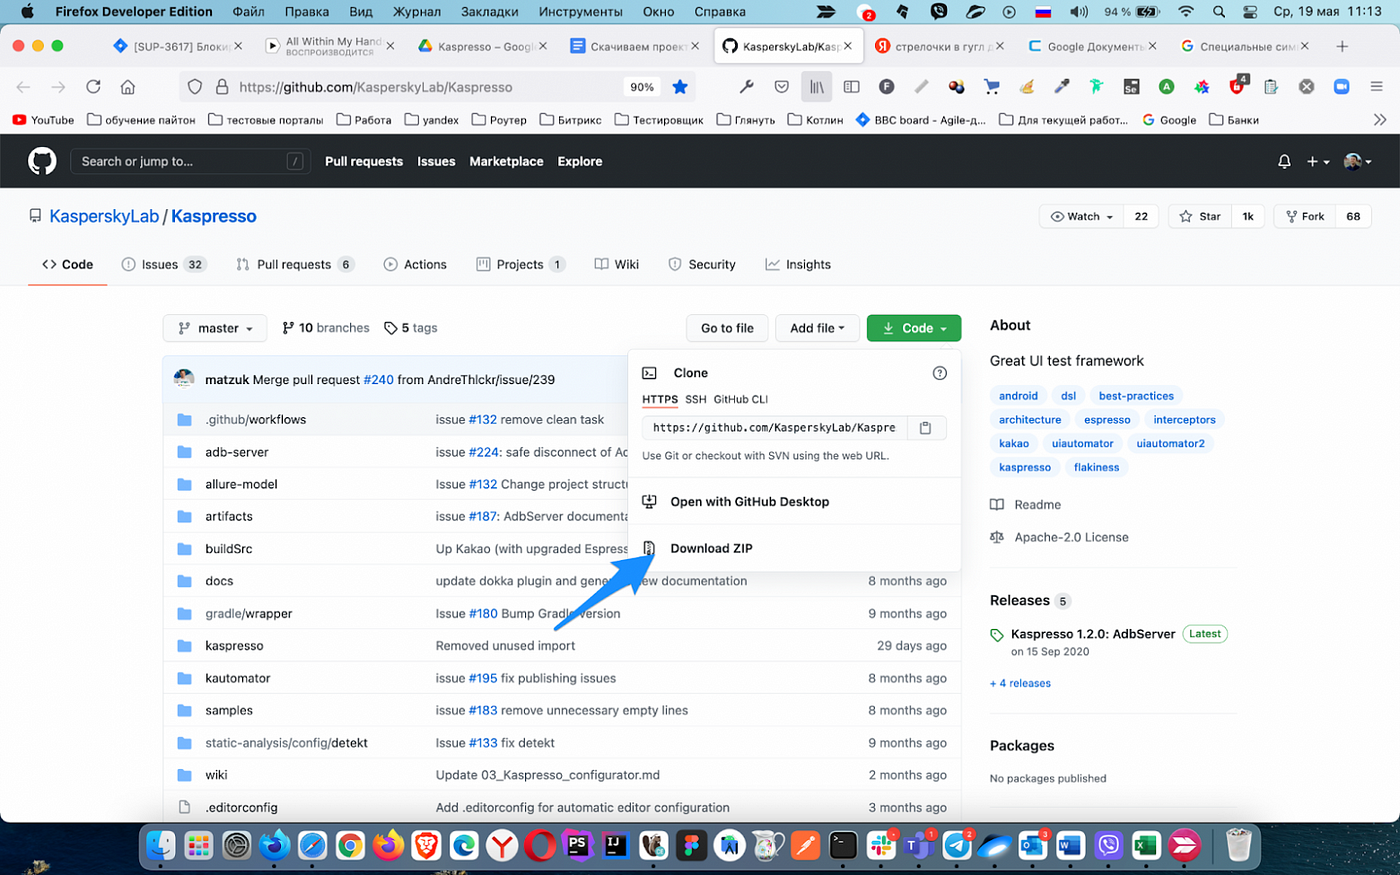
Open the link https://github.com/KasperskyLab/Kaspresso, press the green button Code:
In the drop-down menu, select Download ZIP:
Download and unzip the archive. Keep in mind that the folder’s name is Kaspresso-master, because the name of the default branch is added as a postfix; you can always rename it if you so desire. Move the project folder to a convenient place, it’s better not to keep it in the “Downloads’’ directory:

Launching the project in Android Studio
If you haven’t installed Android Studio yet, follow this link and find out how to install it and configure a device emulator.
Next, launch Android Studio, and on the welcome screen select the option Import Project (Gradle, Eclipse ADT, etc.):


Once you’ve opened the project, you will need to wait until Android Studio finishes indexing the project files.
Setting up and launching an emulator
Getting started, we need to create a device emulator in Android Studio, which we will later be running our tests on.
Below you will find a step-by-step guide.
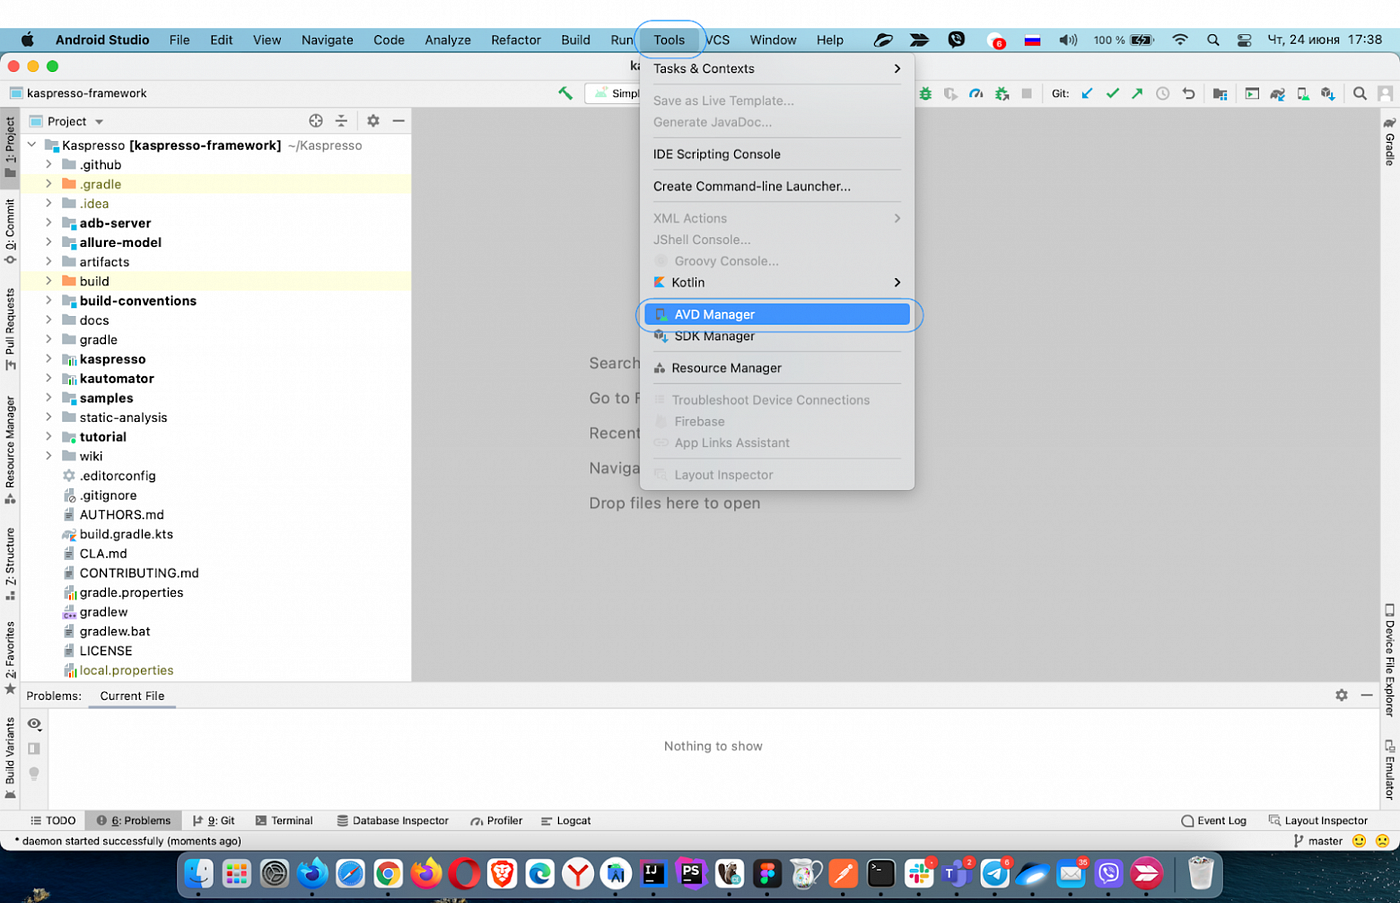
In the top menu, select Tools > AVD Manager:
You will see the interface for managing virtual devices. If this is the first time you’ve opened it, there won’t be any emulators. As you can see in the screenshot, I already have three device emulators:
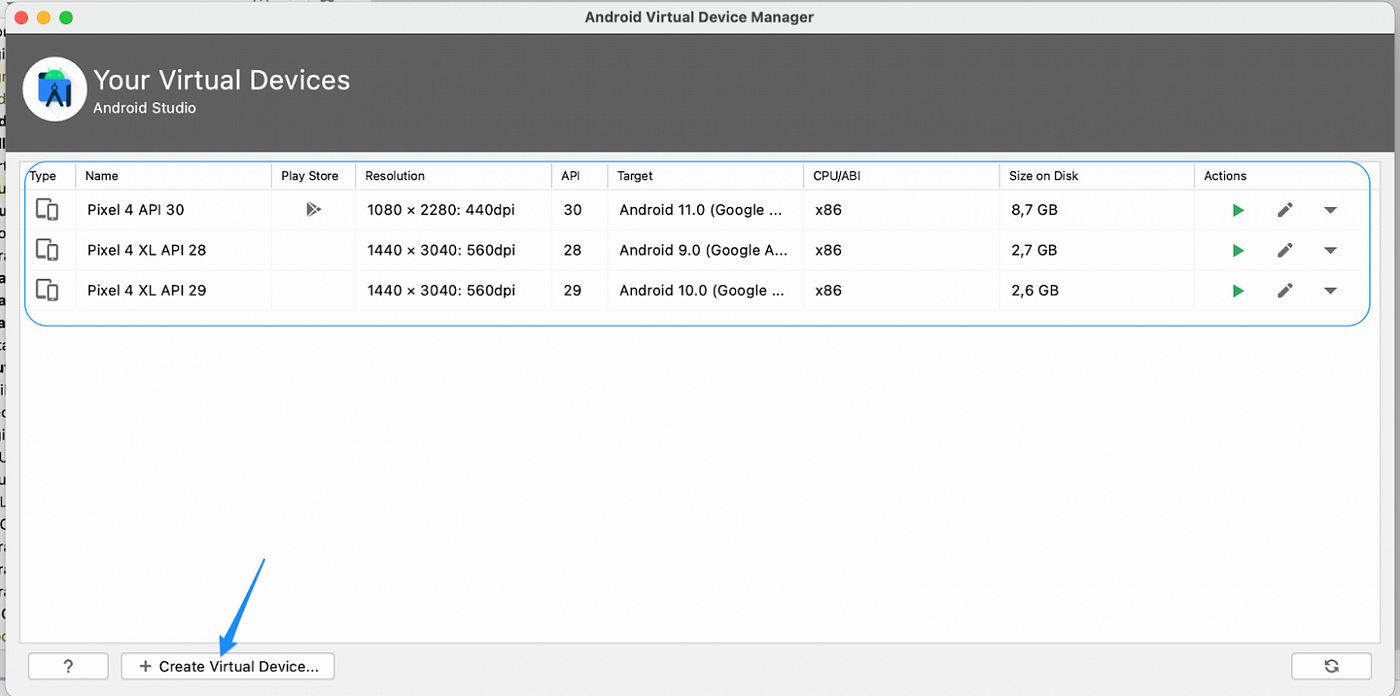
Click the button Create Virtual Device… .
Select the type of device that you want to emulate. There are several options: TV, Phone, Wear OS, and so on. We want to emulate a smartphone, so we’ll need to select Phone:
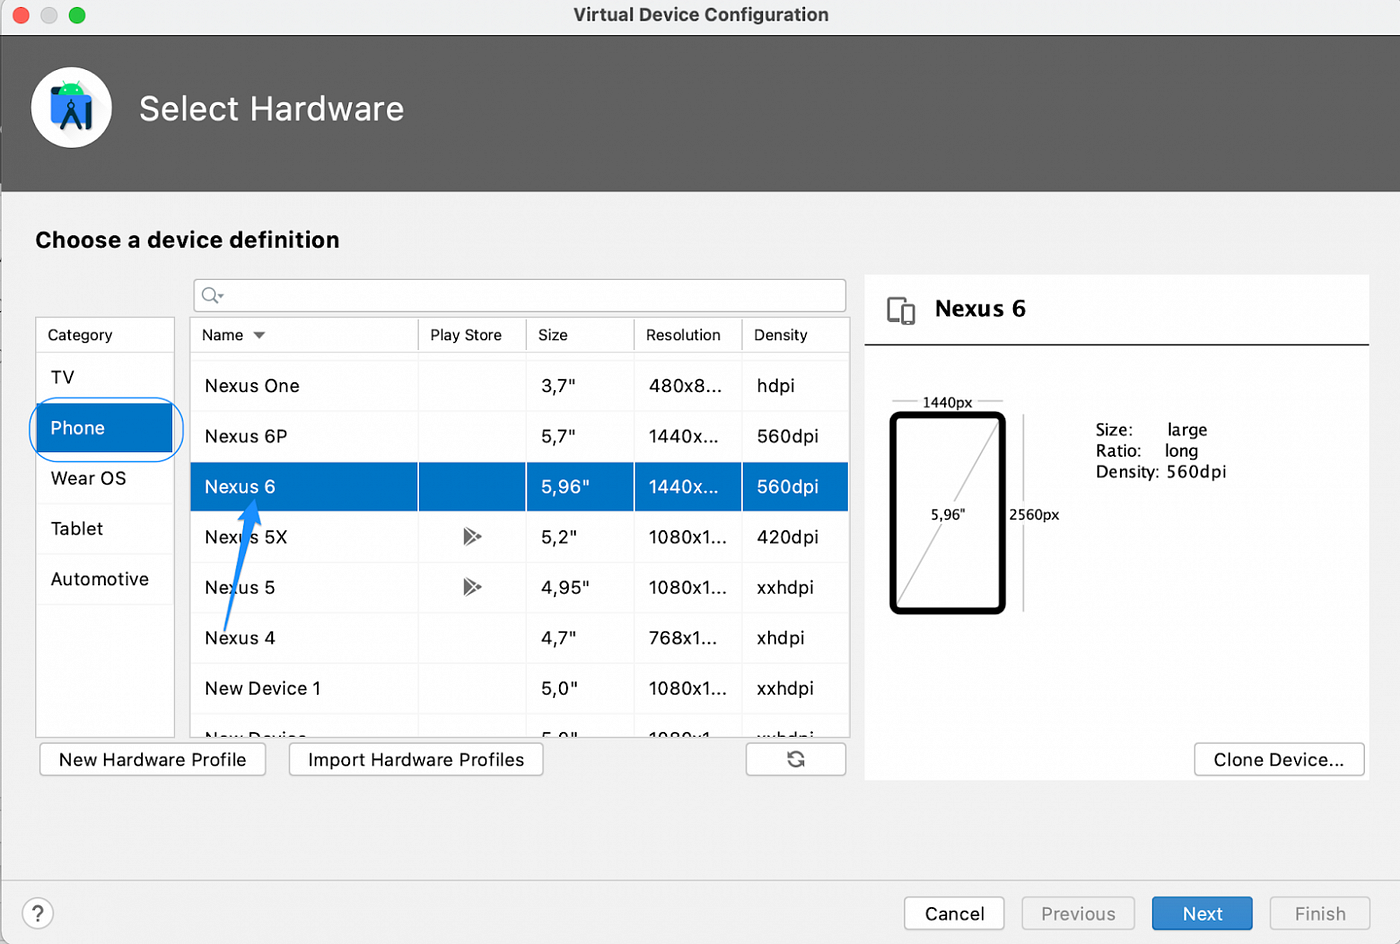
After that, select the smartphone model, e.g. Nexus 6. Then click Next, and you will arrive at the next step — selection of the operating system image:

In case you see a Download link, that means you need to download the image. We will create our emulator using Android 8.1, so let’s click Download, then wait until the image has been downloaded and installed on the computer:

Once it’s over, click Finish:

Then select the necessary image and click Next:

You don’t need to change any settings on the next screen, just click Finish:

A new virtual device has been created, and can be seen in AVD Manager:

You can launch it by clicking Action. It’s better to do it before you run your tests, as the first launch of a virtual device is usually pretty time-consuming.
You may also notice that the virtual device is now available in the drop-down menu, where it can be selected for building and running tests; more on that in the next part of our tutorial:

Running tests on an emulator
Let’s talk a little about where everything is in our project.
There are two directories where you can find examples of tests:
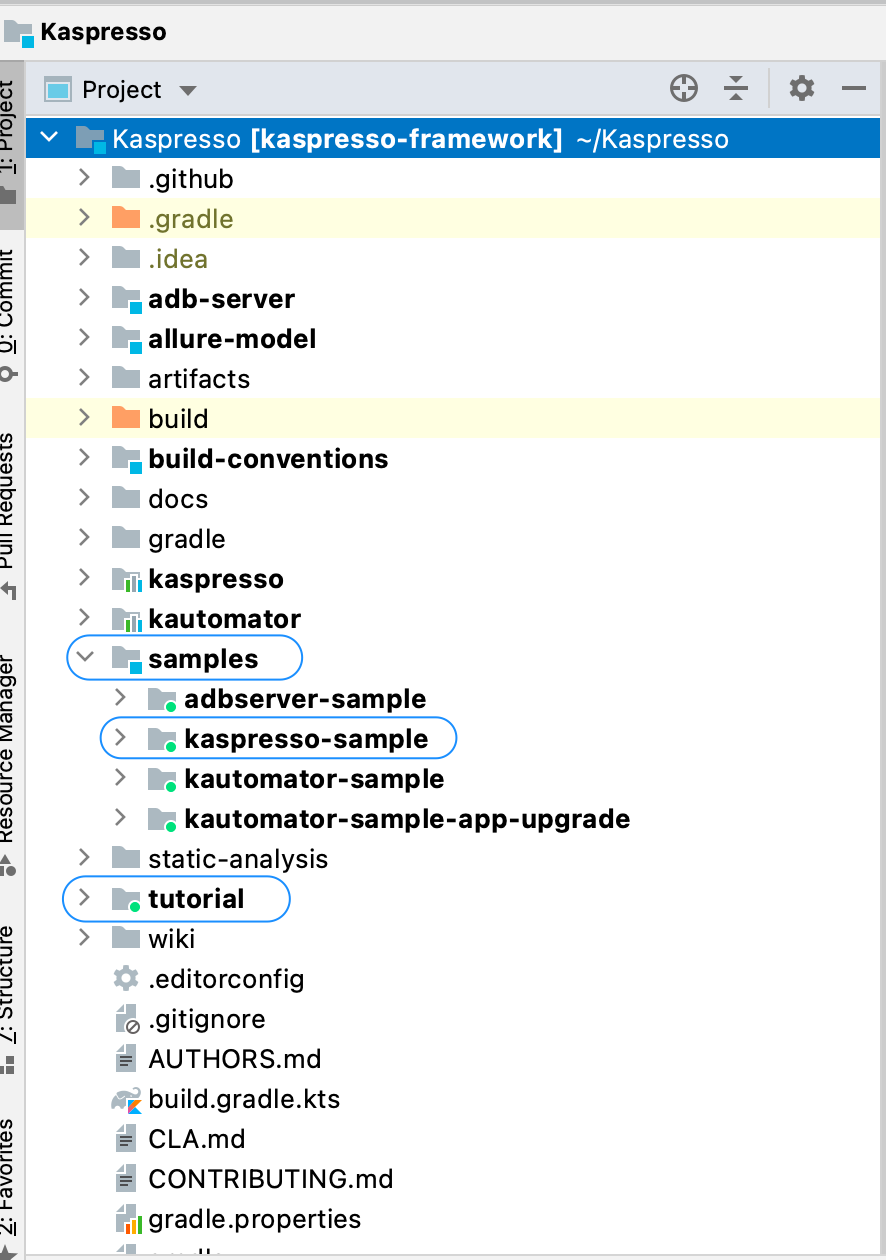
The first one is Kaspresso/samples, containing several modules, each of which is a separate example application. At the very beginning, we will focus on the most basic tests, which are situated in the Kaspresso/samples/kaspresso-sample module .
The second directory is Kaspresso/tutorial, where you will find some of the more complex examples created with best practices in mind. We will get to those a bit later.
Let’s figure out how to run the tests from Kaspresso/samples directory; you will later use this knowledge to run any other kinds of tests.
Select the display mode for project files as Project.
Then, go to samples > kaspresso-sample > src > androidTest:

The examples of UI-tests are placed in directories according to their purpose, which is evident from their names. Once you’re through with the example, try running all of them to get a better understanding of the project’s capabilities.
Before running the tests, let’s take a look at how the application itself works. To do this, we’ll need to install the application on our emulator. The procedure is as follows:
In the drop-down menu, select samples.kaspresso-sample:
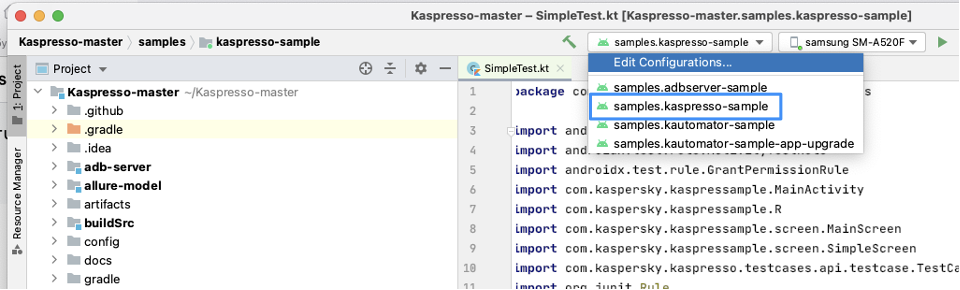
Choose the emulator on which the application should be installed:

Then click the Run button:

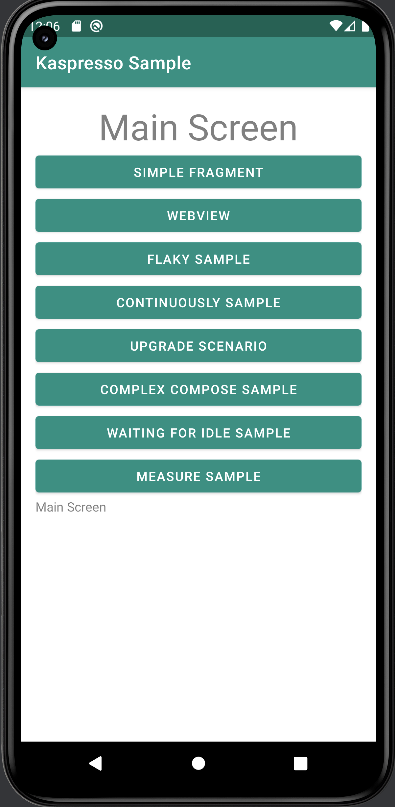
If the application has been installed without errors, it will start immediately; it should look somewhat like this:
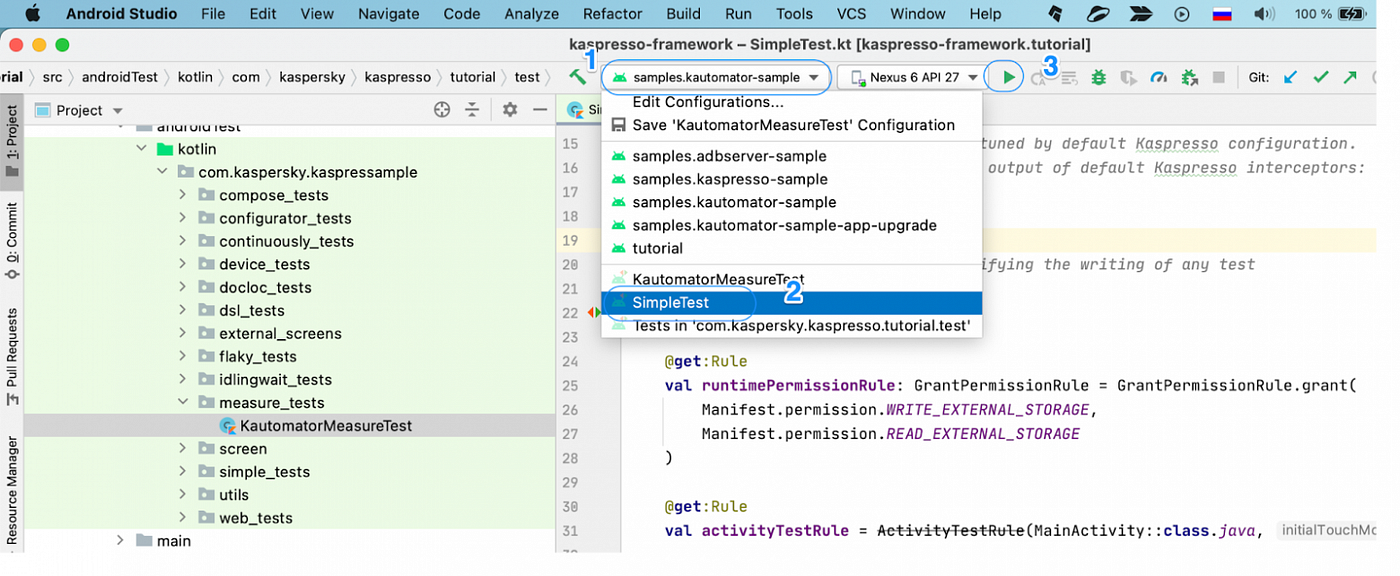
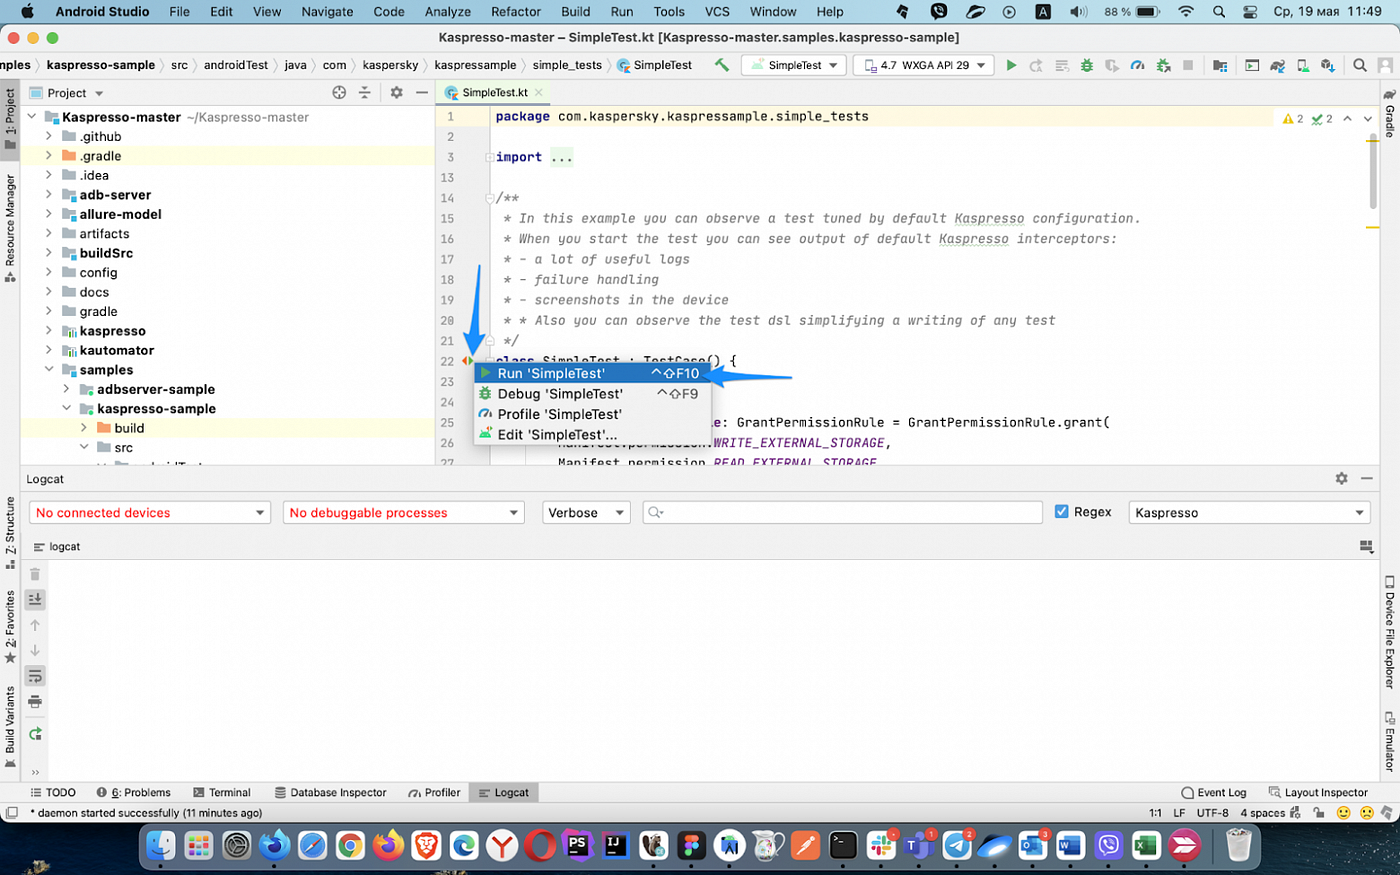
Now that you’ve got acquainted with how the application works, let’s proceed to run the tests. We will begin with SimpleTest.
Select the file SimpleTest.kt and open it:
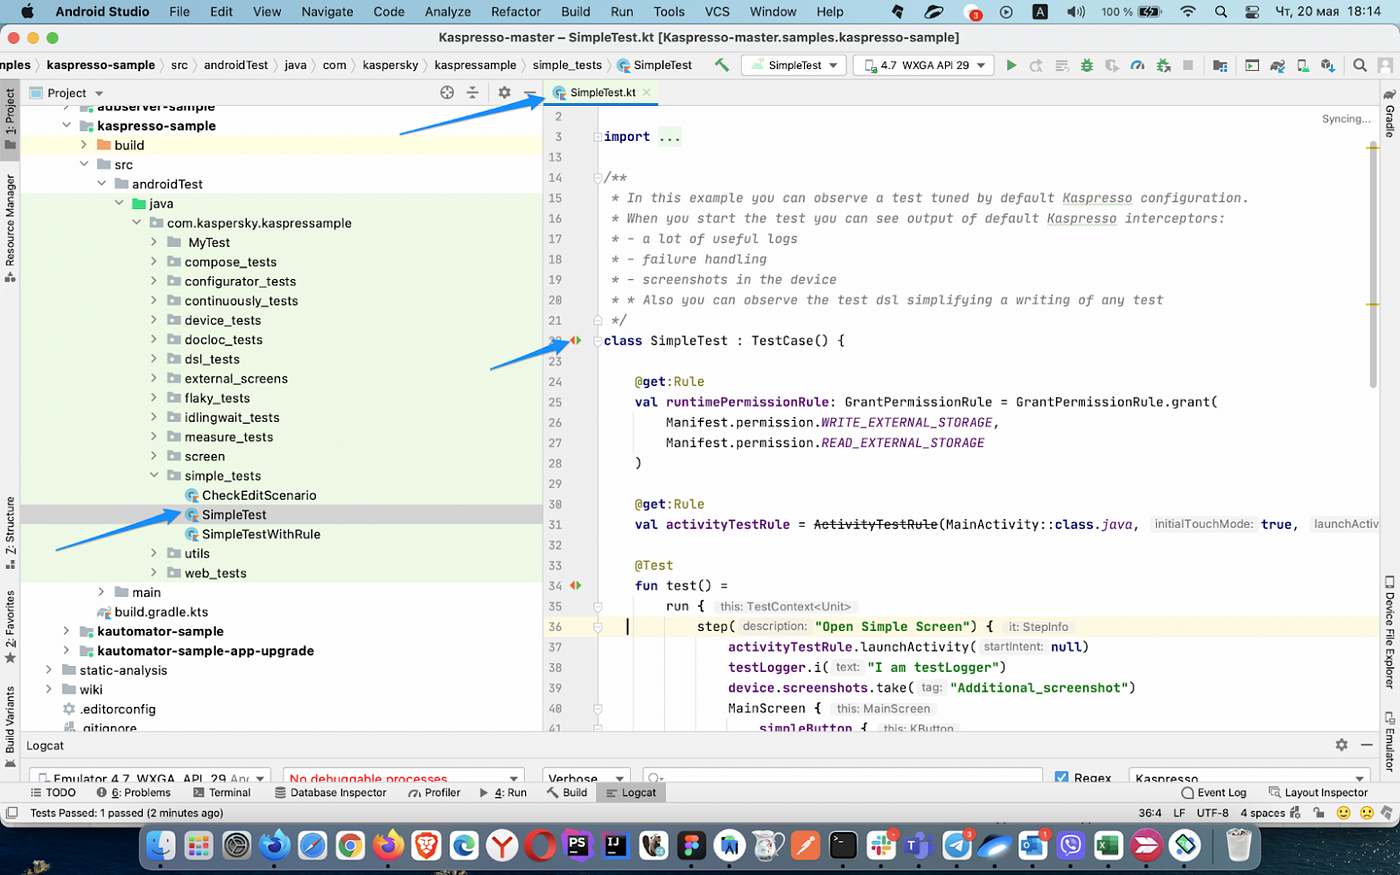
There are several ways to run a test, this article includes a separate section on it. We will launch our first test run the following way.
Find a button that looks like two arrows (red and green) left to the code line:
class SimpleTest : TestCase()

After clicking it, you’ll see a drop-down menu. Select the option Run “SimpleTest”:

OUR VIDEO RECOMMENDATION


Jobs
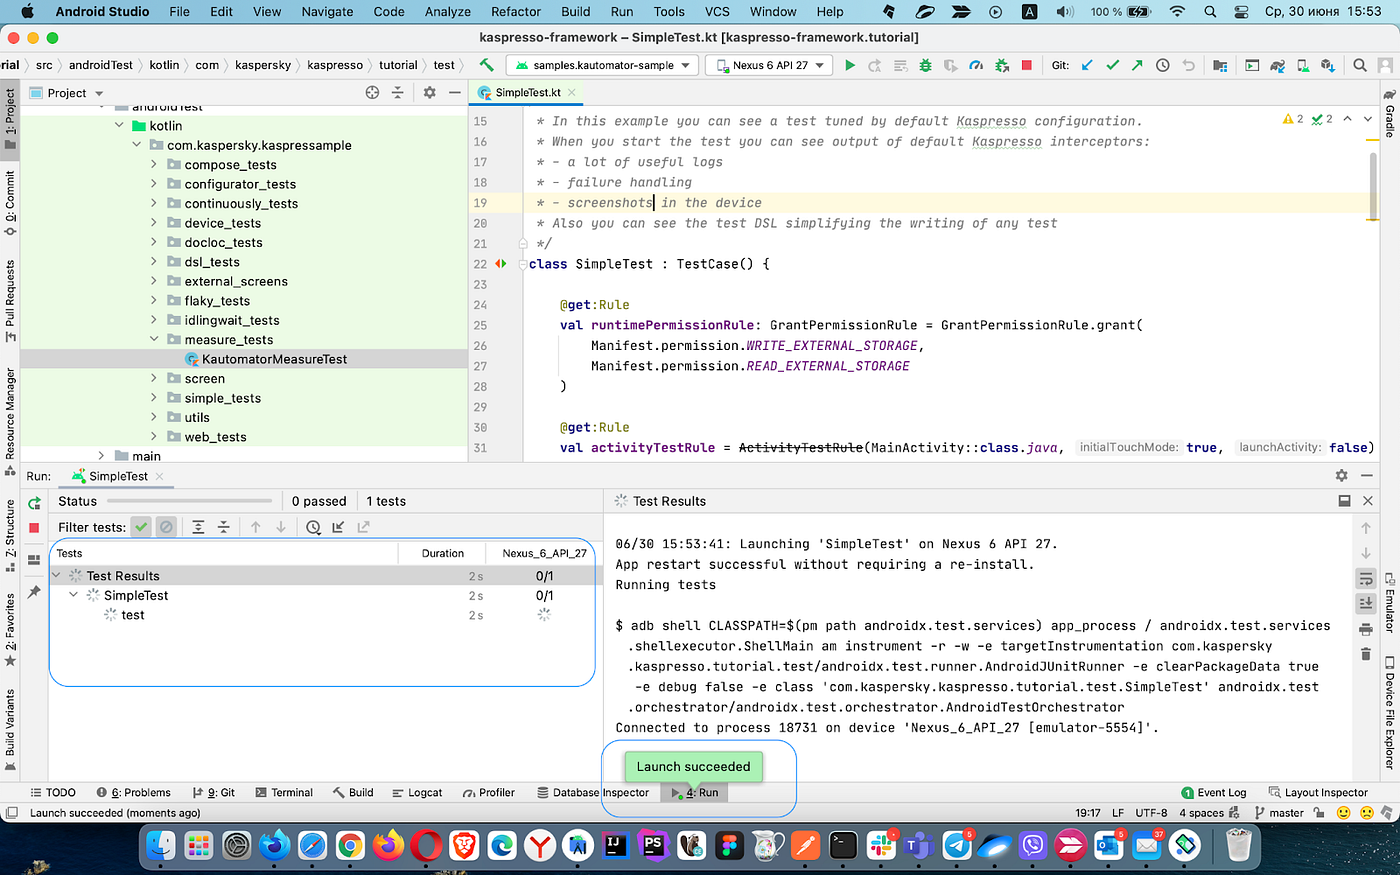
The test won’t be launched right away, you’ll need to wait for some time. If everything goes well, congratulations on running your first Kaspresso test!
Running tests on a physical device
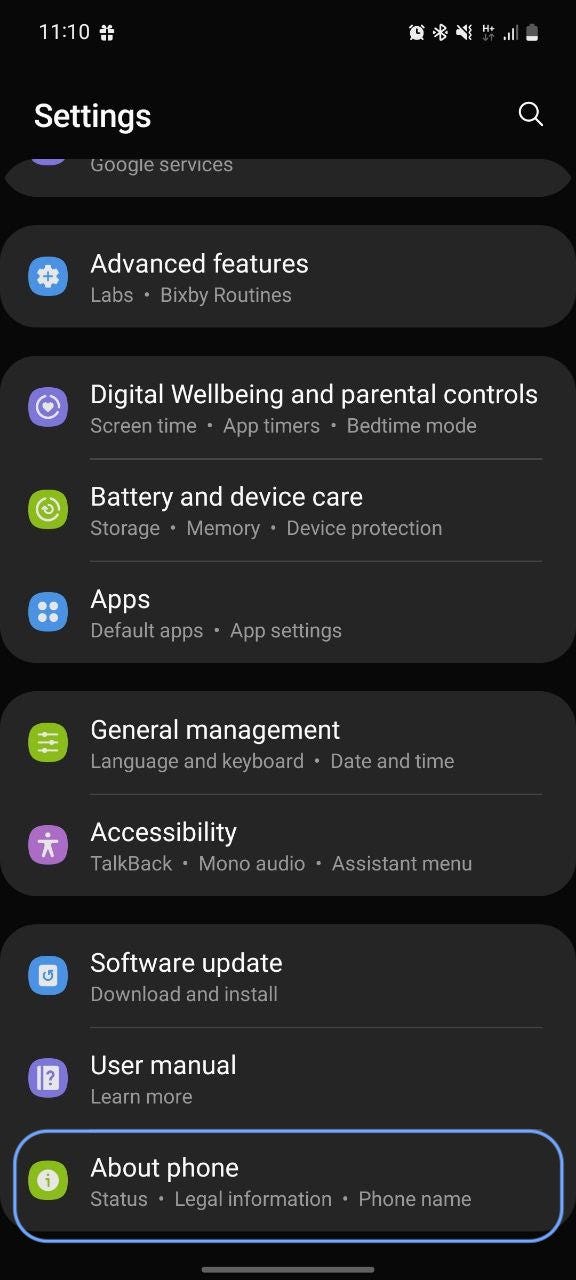
In order to run tests on a physical device, you must connect it to your computer via a cable; it is also necessary to turn on the Developer options menu and enable USB debugging.
Let’s take a look at some general instructions for turning on the Developer options menu; they are more or less the same for all Android-based devices.
We will be using a Samsung smartphone as an example.
First, go to Settings > About phone:
Then select Software information:
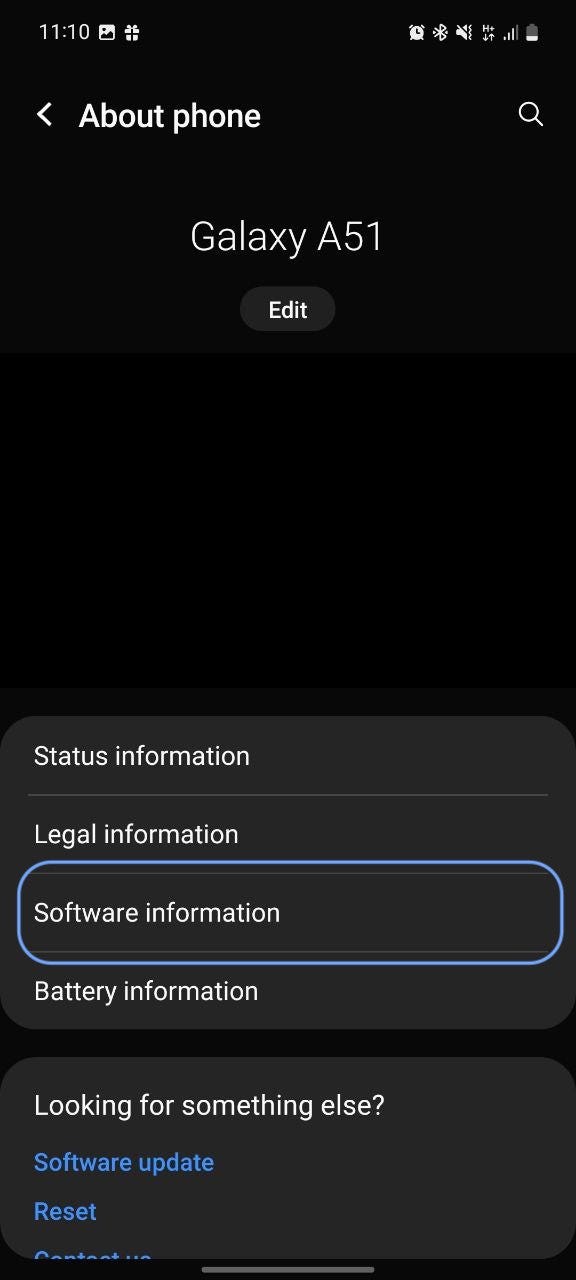
Tap on Build number several times:
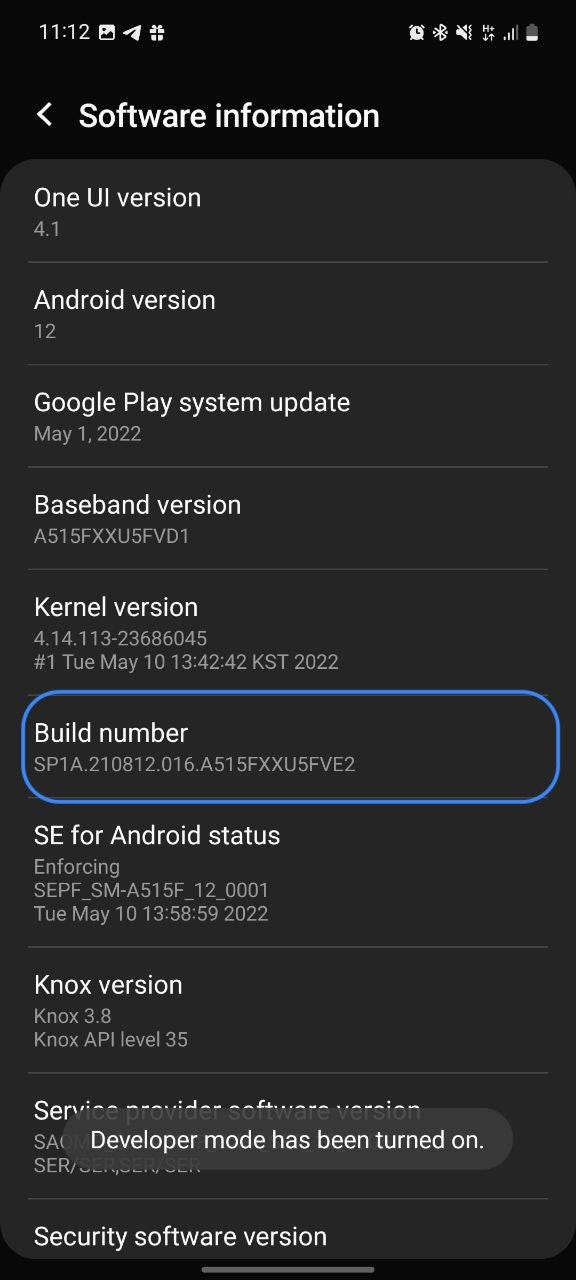
Once you’ve tapped enough times, there will be a message stating that developer mode is now on. In the main menu you will see a new item — Developer options:

Now you may turn on USB debugging:

When connecting to a computer for the first time, your device will display a dialog. Press OK, and USB debugging will be enabled on your smartphone.
Now let’s go back to Android Studio. Your physical device should be available for building a project:
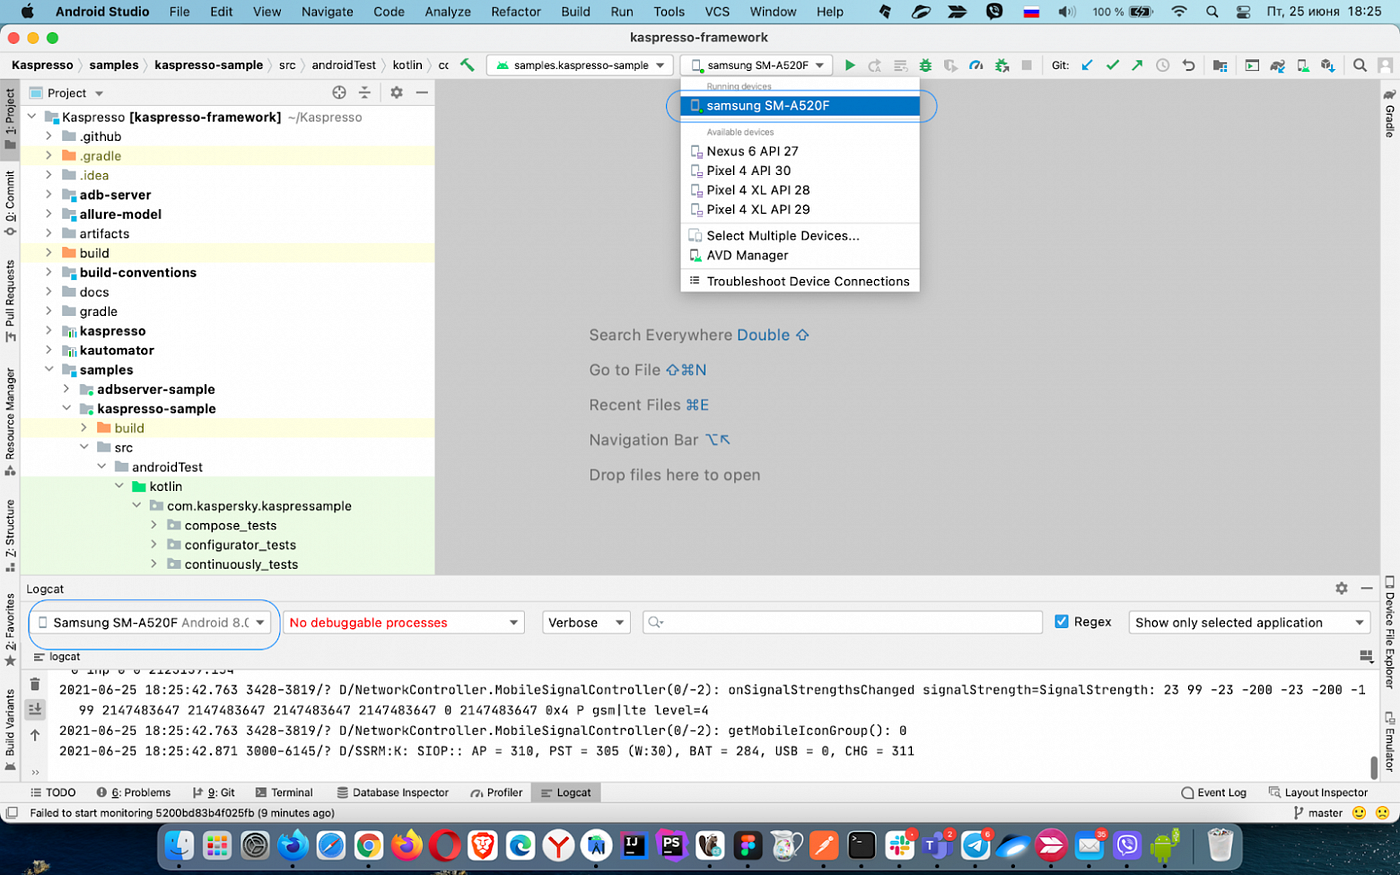
So, the device has appeared both in the drop-down menu and in Logcat (we will talk about this tab in more detail later in the article).
Our next steps are just the same as when running tests on the emulator — we’ll build the project on our physical device, and then run the test.
Options for running single / multiple tests
Tests can be run in a variety of ways, let’s take a look at a few of them. The first way was described in the example above. Here’s another way to run a test.
If a test has already been run on the device, it appears in the drop-down menu, and you can run it again. For instance, let’s run SimpleTest:
Open the drop-down menu (1), select SimpleTest (2), and click the green button (3).
After the test has been run, you can launch it again from the Run tab (1). To do that, click the button (2):

As you can see, the test has been launched:
And it has passed successfully:

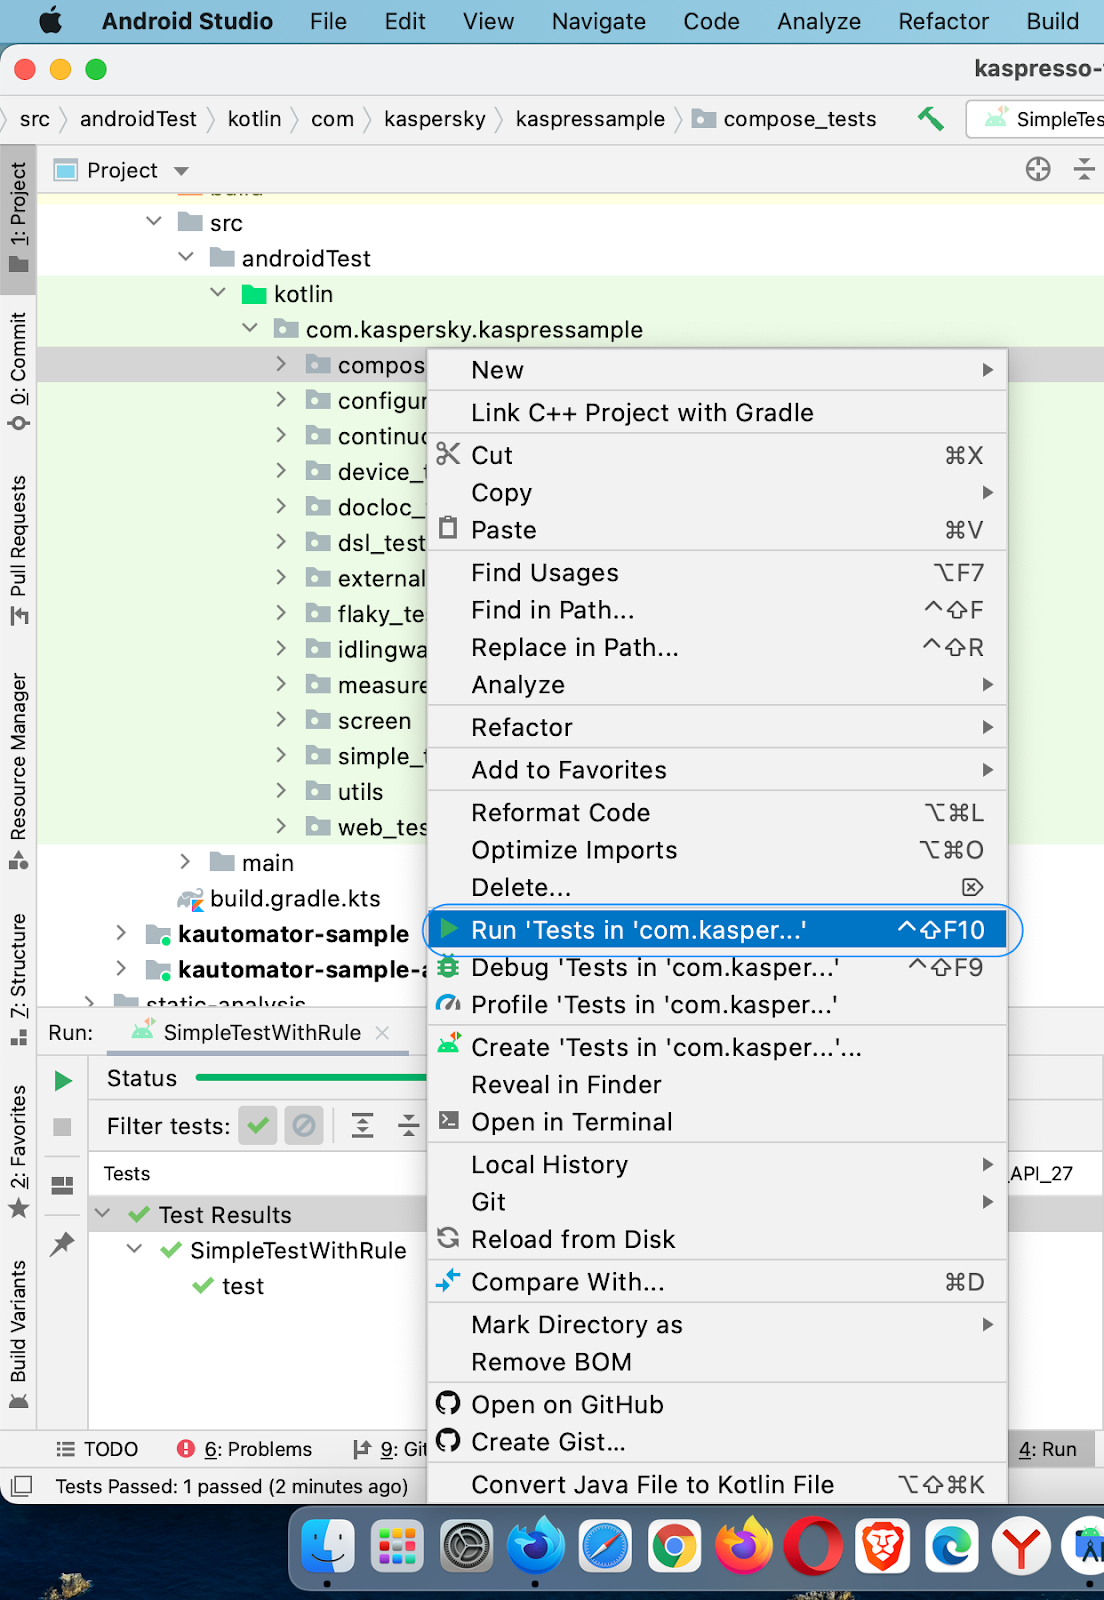
You can also run a test through the context menu. Just select the test that you want to run, right-click and select Run “Test Name”:
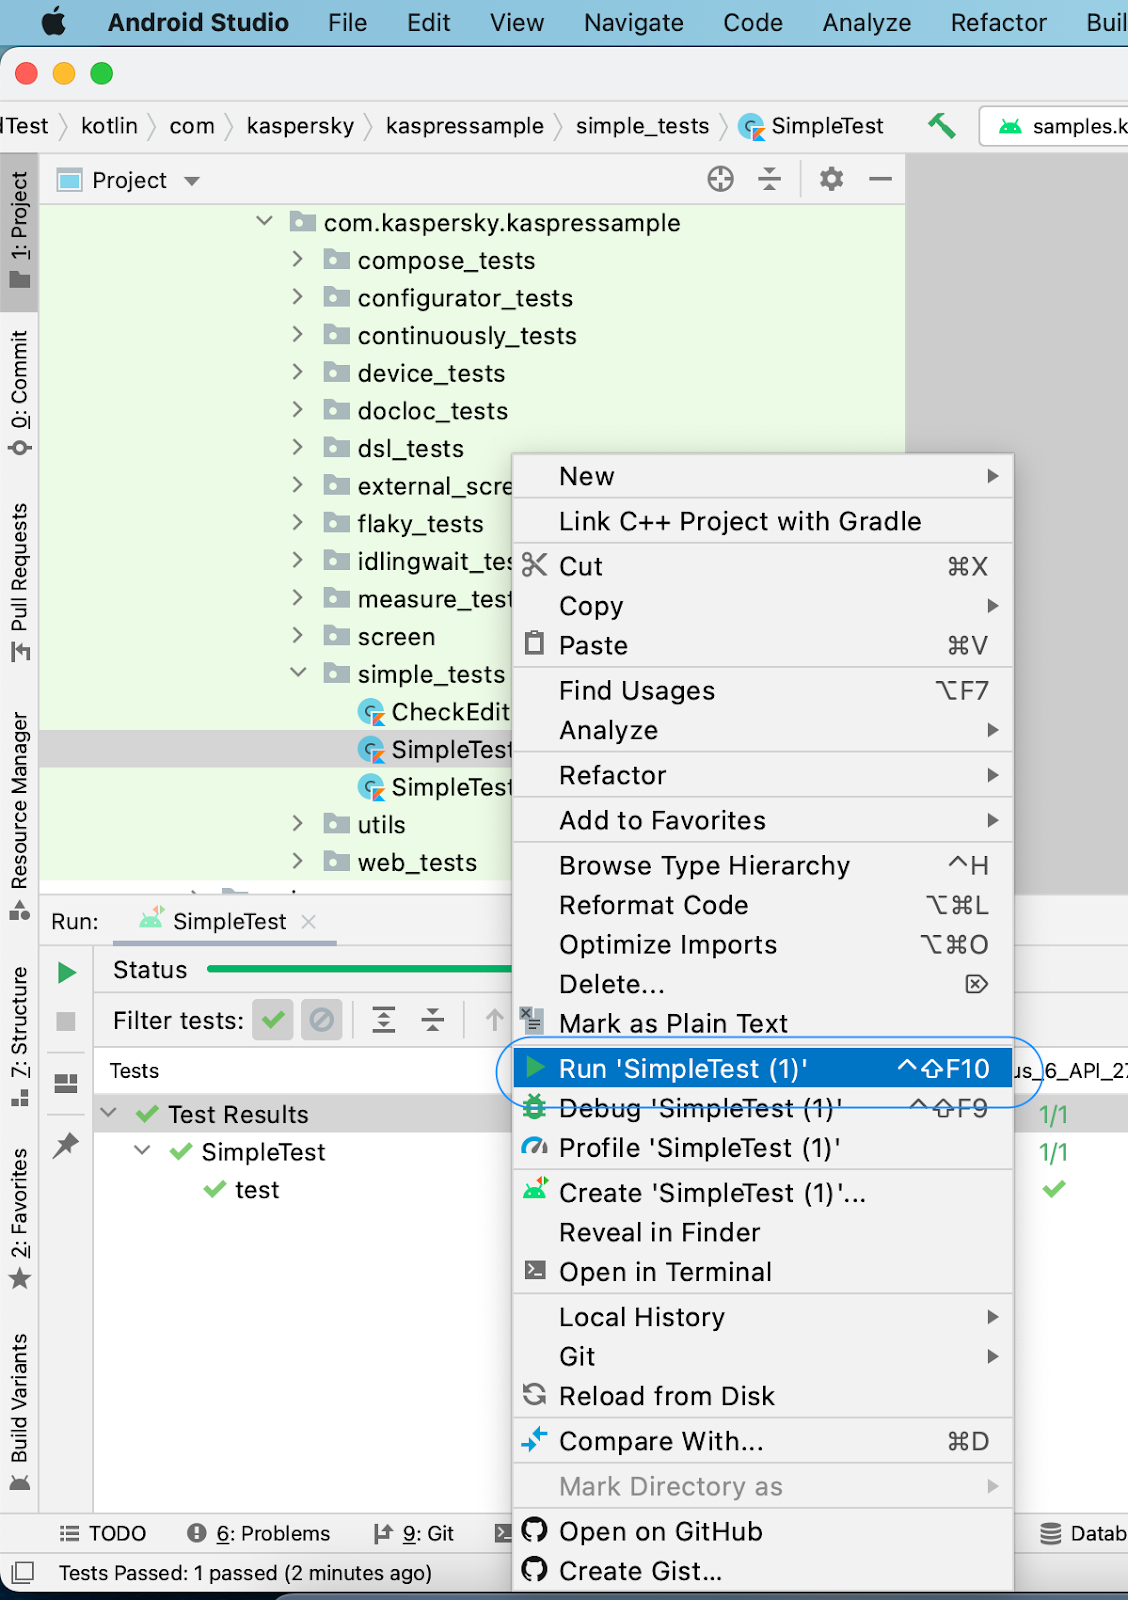
In the same way, it’s possible to launch all the tests in the directory at once: select the directory, right-click and select Run “Tests in “Directory Name”. All tests in the directory will be run:
Test results can be seen in the Run tab:

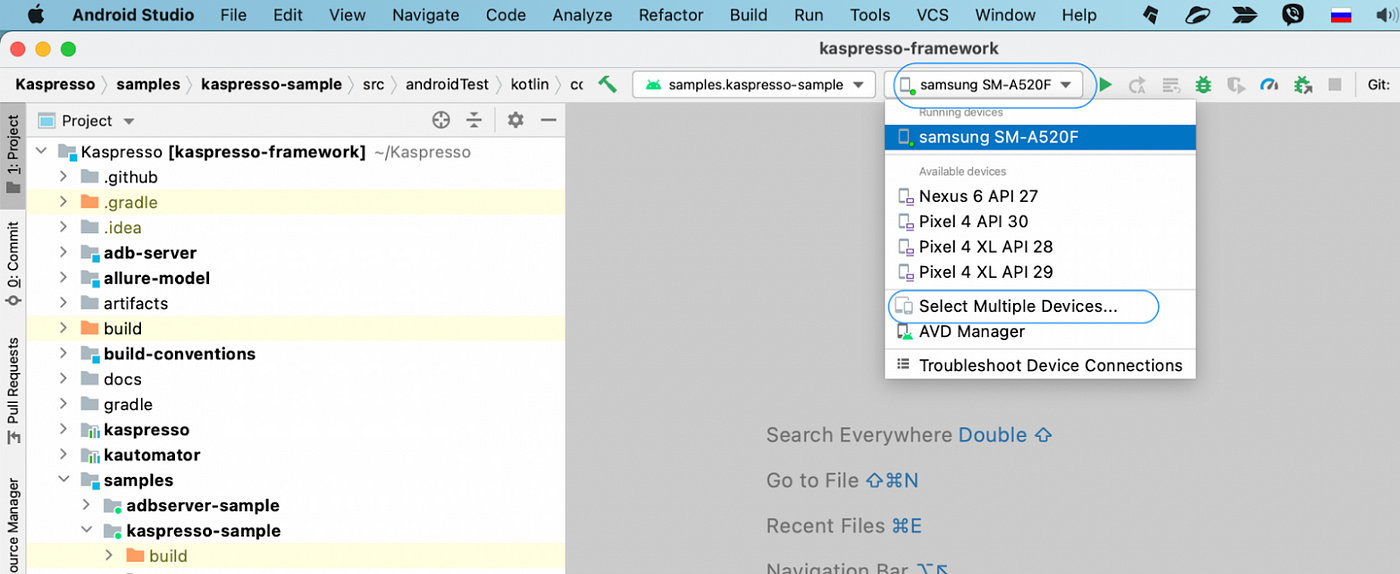
Running tests in Android Studio on several devices
In Android Studio 4.2.1, it became possible to build a project on several devices at once. Thus, you can run tests on various devices or emulators simultaneously.
Let’s see how we can select an emulator and a physical device at once. Open the drop-down menu and click Select Multiple Devices… :
Then activate the check-boxes next to the devices that you wish to use:

As a result, several devices will be selected:

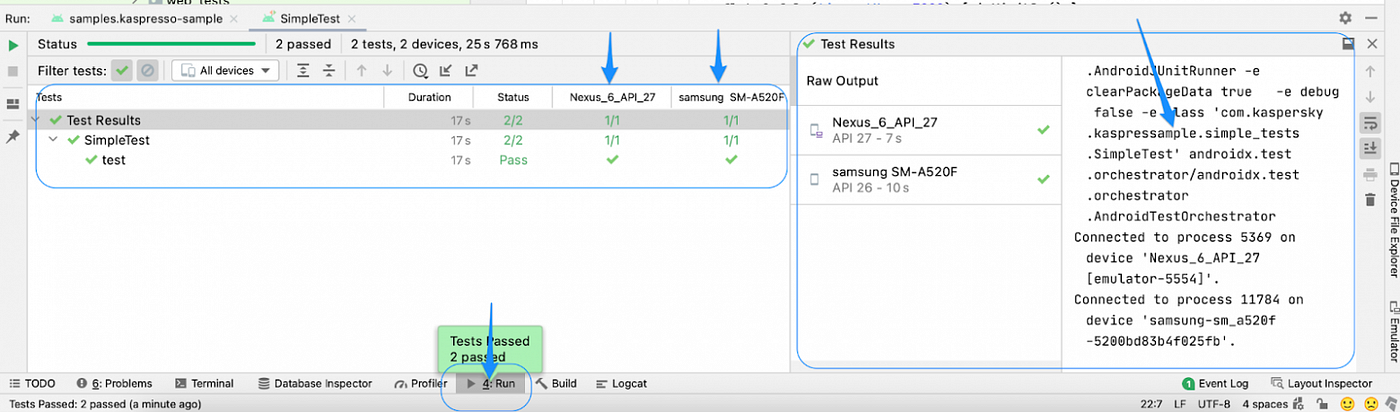
Test results are displayed for different devices, there is also technical information about the test run. In the next section, we will look at how to view the logs.
Analyzing test run results. Reading logs
Kaspresso has an awesome built-in feature: the modification and extension of test logs, which significantly improves their readability. In order to view the logs, you will need to make some preparations.
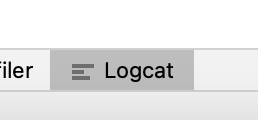
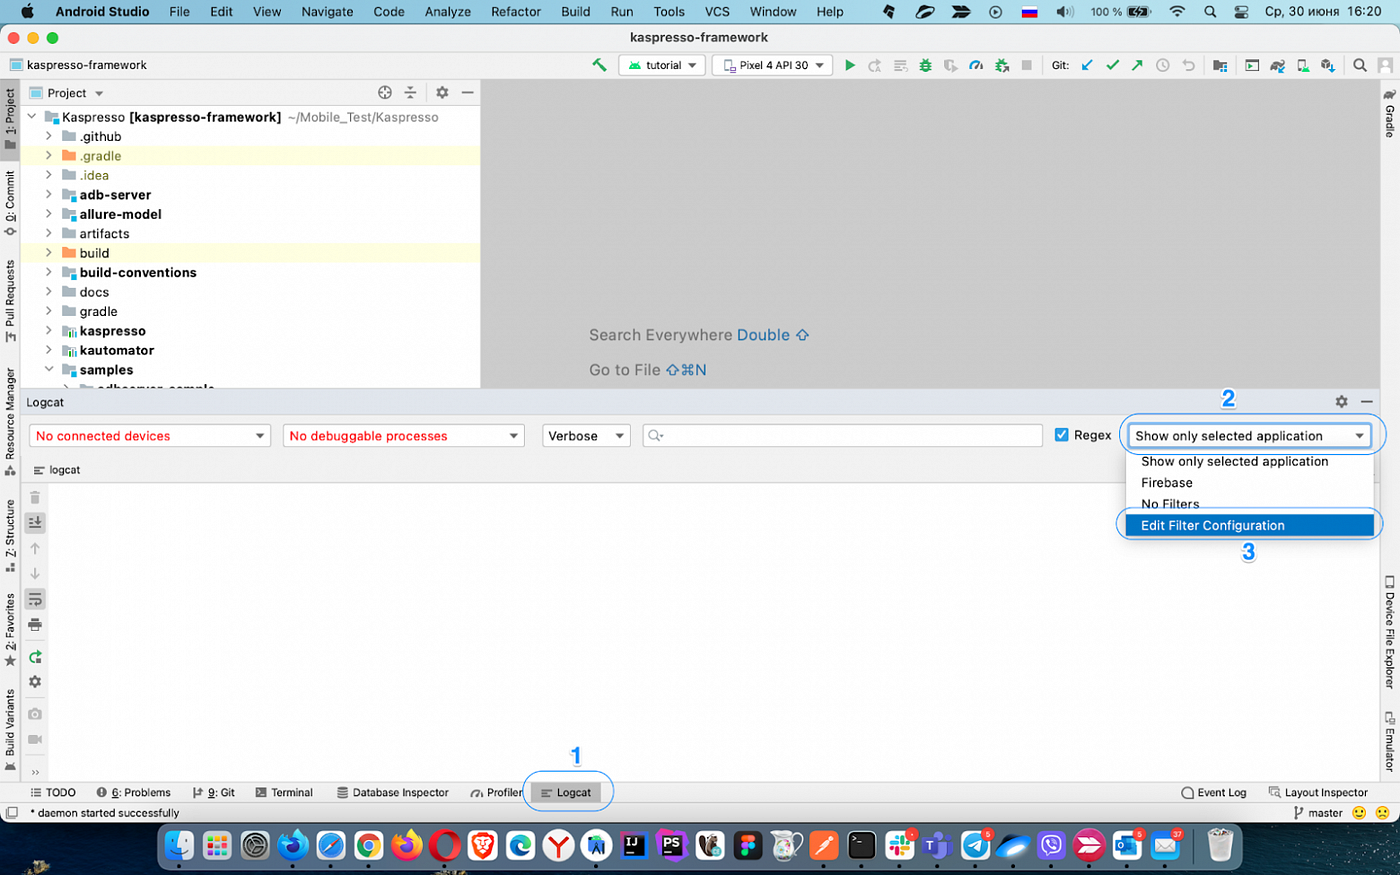
The logs can be found in the Logcat tab, which is situated at the bottom of the Android Studio window:
Click the Logcat tab (1), then in the upper right corner, click Show only selected application (2), and select Edit Filter Configuration (3):
You will see the following window:
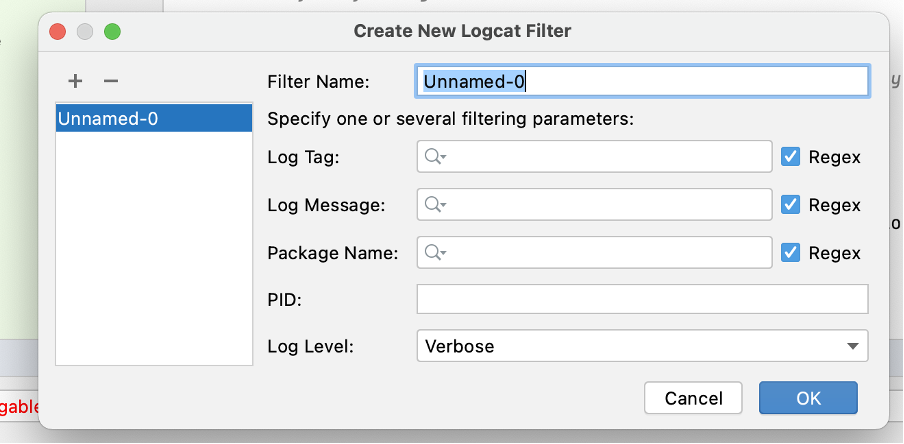
Fill in the following fields:
- Filter Name — it can be anything, e.g. Kaspresso logs.
- Log Tag — in this field, type \bKASPRESSO\b.
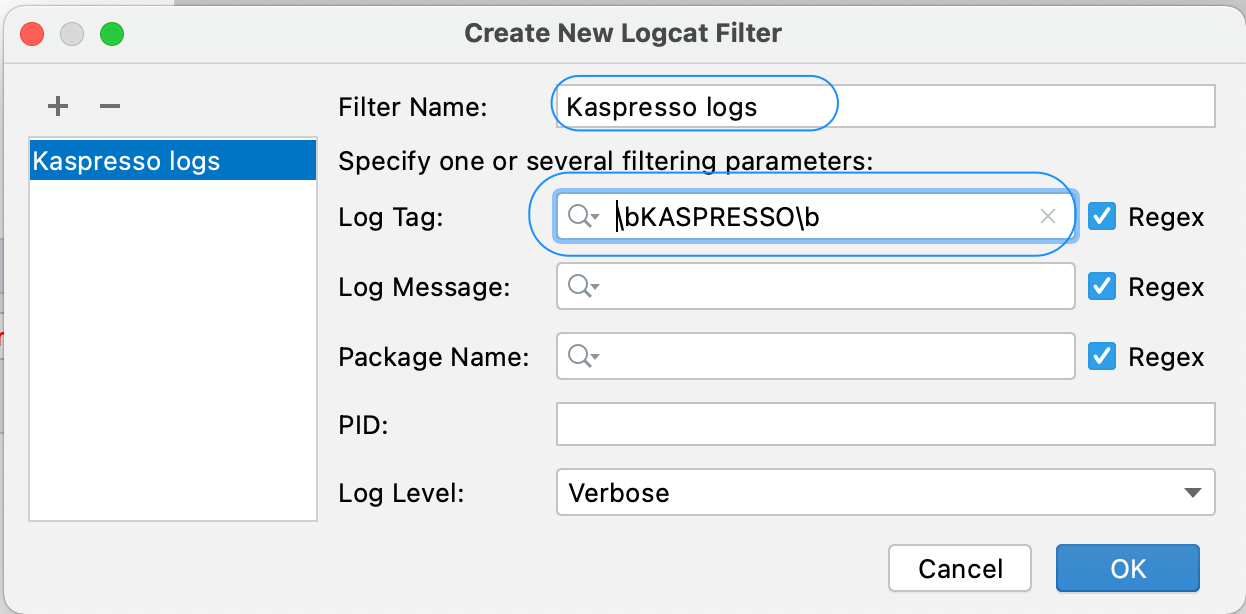
Now click OK, and the log filter is ready to go. It’s time to run a test:
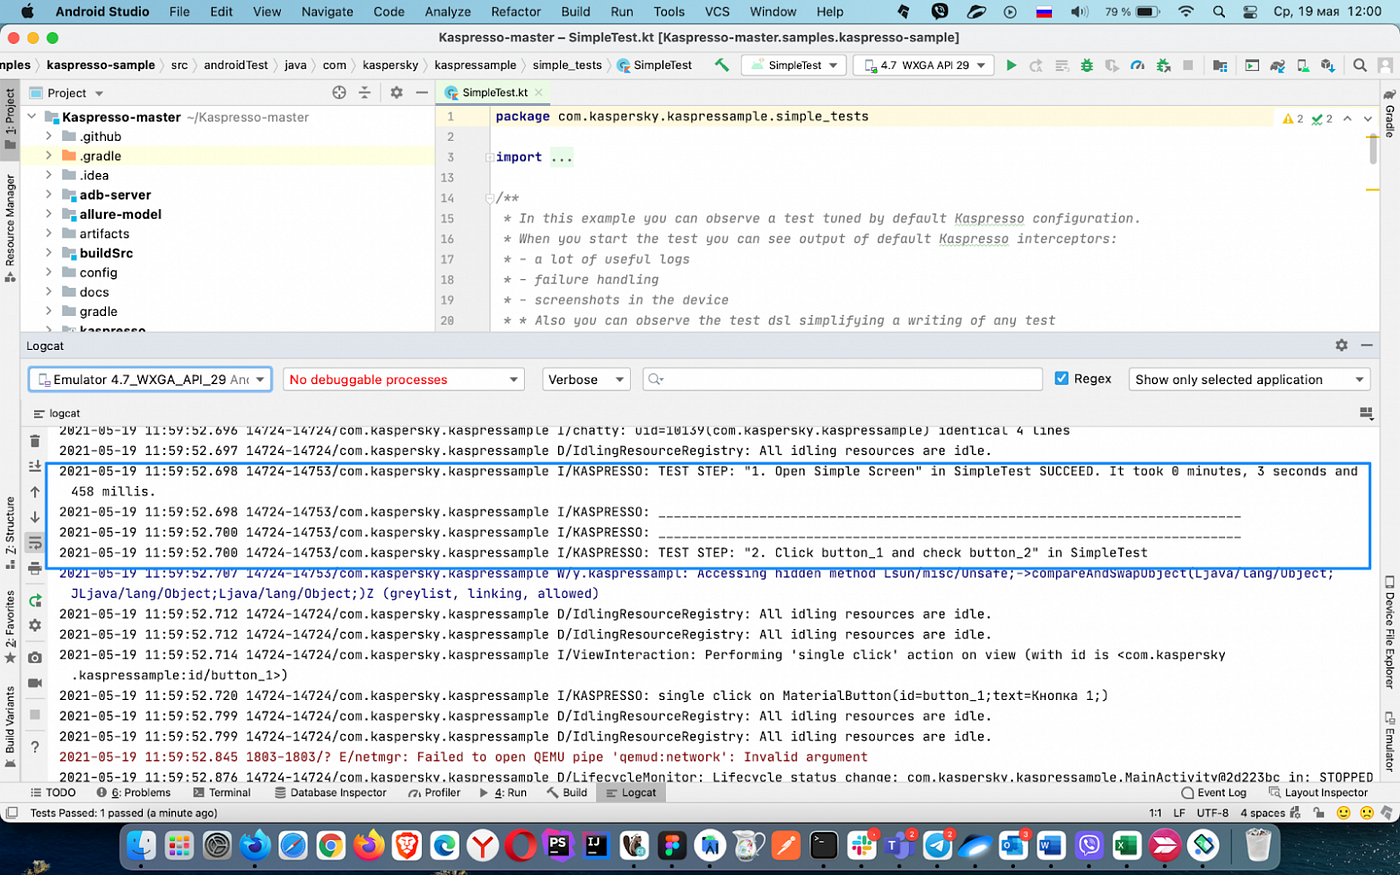
Once you’ve launched the test, you will see the logs appearing in Logcat.

In case you don’t want to create a filter, simply type the tag I/KASPRESSO in the search line:

Here is an example of logs with no filters applied. Kaspresso logs can be easily lost among the system ones:
Summing up
In this first article, you’ve learned how to run example Kaspresso tests. The next article will discuss in detail how to write your first test, what entities are needed for it, and how to use them properly.
See you in the next one!
Thanks to Eugene Matsyuk
This article was originally published on proandroiddev.com on June 29, 2022


