

Let’s fill our stores with Data!
In Android apps, we generally store simple data sets using local preferences. These preferences are simple, fast and easy to access. We either do it with SharedPreferences or DataStore Preferences. In a use case where we’re using SharedPreferences and we want to migrate to DataStore Preferences then it might affect many parts of our code.
So in this article we will:
- Create a separate module for our preferences and we’ll keep rest of the modules independent of which type of preferences we’re using
- Use Hilt for dependency injection from our preference module to our main app module
Use case for article
We’ll consider that:
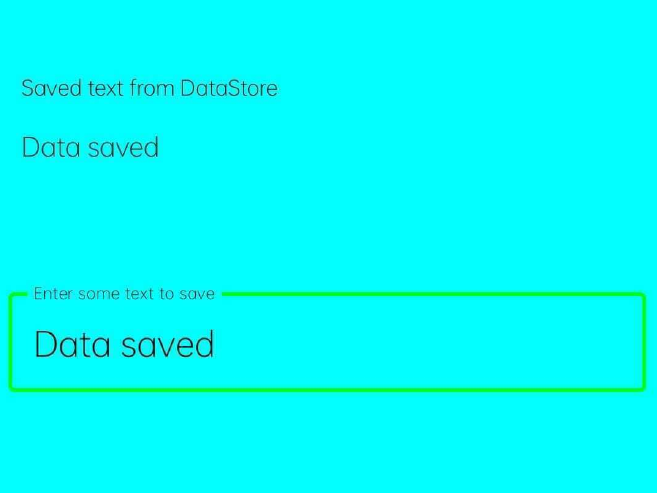
- Our app simply accepts a user name
- As the user types the name, it is saved and updated immediately and displayed over a text view on the same screen.
Local Preference Module Set up
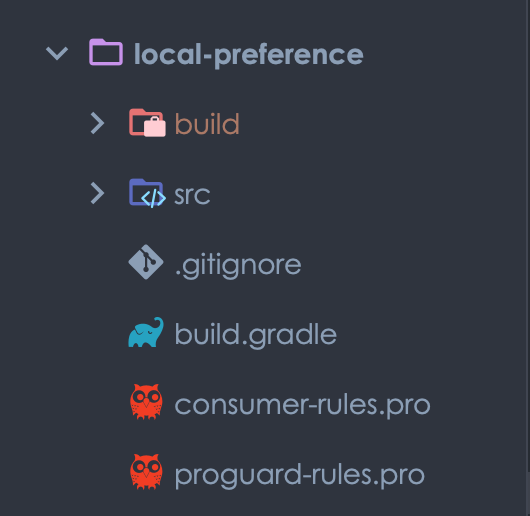
We’ll create a new module as an Android Library module and name it as local-preference. To create a new module right click on your project name -> New -> Module

Then select Android Library and fill the details as expected.

Click finish and we get our local-preference module created.
Local Preference Module Architecture
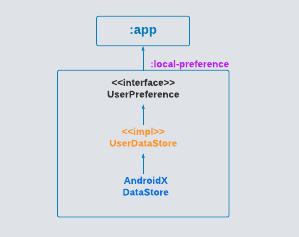
Though this looks very simple but in a similar fashion we can have different types of preferences e.g UserDevicePreference, LoginPreference, AppPreference, etc.
In this architecture we’ve exposed only required end points to our main :app module related to a user’s preferences via UserPreference interface. Now the :app module don’t bother about how and where the data is stored.
DataStore Preference Set up
To add data store preferences, we need to add the dependency in local-preference build.gradle
// inside local-preference build.gradle
implementation "androidx.datastore:datastore-preferences:1.0.0"
We define our UserPreference interface as follows
interface UserPreference {

    /**
     * returns user name flow
     * */
    fun userName(): Flow<String>

    /**
     * saves user name in data store
     * */
    suspend fun saveUserName(name: String)
}
OUR VIDEO RECOMMENDATION


Jobs
The functions are self explanatory. We provide its implementation UserDataStore as:
class UserDataStore @Inject constructor(
    private val dataStore: DataStore<Preferences>
): UserPreference {

    override fun userName(): Flow<String> {
        return dataStore.data
            .catch {
                emit(emptyPreferences())
            }
            .map { preference ->
                preference[KEY_USER_NAME] ?: ""
            }
    }

    override suspend fun saveUserName(name: String) {
        dataStore.edit { preference ->
            preference[KEY_USER_NAME] = name
        }
    }
}
Getting a data from data store returns a flow which is a great deal. Here we simply returns our saved user name as a flow. This is beneficial because any change in the user name will update our flow instantly and we can work on the latest changes.
Saving user name is also quite straightforward but to note that it is a suspend function and should be called within a coroutine scope.
Hilt Setup
We inject the data store object into the UserDataStore using Hilt. To add Hilt we need to add a plugin and dependency in local-preference build.gradle as shown below (same for :app module)
plugins {
    ...
    id 'kotlin-kapt'
}
...
dependencies {
    ...
    // hilt
    implementation "com.google.dagger:hilt-android:2.44"
    kapt "com.google.dagger:hilt-compiler:2.44"
}
And because this is a different module than :app module and both of our modules will use Hilt so we define the Hilt plugin commonly inside project level build.gradle file as follows:
plugins {
    ...
    id 'com.google.dagger.hilt.android' version '2.44' apply false
}
Coming back to our local-preference module, we provide our data store object as a singleton as follows:
@InstallIn(SingletonComponent::class)
@Module
object DataStoreModule {

    @Provides
    fun provideDataStore(@ApplicationContext context: Context) : DataStore<Preferences> {
        return PreferenceDataStoreFactory.create(
            corruptionHandler = ReplaceFileCorruptionHandler(
                produceNewData = { emptyPreferences() }
            ),
            produceFile = { context.preferencesDataStoreFile("user_data") }
        )
    }
}
And we provide the UserPreference object implementation as follows:
@InstallIn(ViewModelComponent::class)
@Module
abstract class UserPreferenceModule {

    @Binds
    abstract fun bindUserPreferences(impl: UserDataStore): UserPreference
}
To note that, we provided UserPreference within ViewModelComponent, this is because this preference object will be valid until our view model lives.
Main App Set up
As we’ve our preferences set up ready, we can now use it in our main application. We first add the local-preference module to our :app module by adding the dependency as follows:
// Local preferences
implementation project(path: ':local-preference')
Then we add hilt in our main :app module in same fashion we did for local-preference. We mark our main application as HiltApplication.
@HiltAndroidApp
class DataStoreApplication: Application()
Then we create our view model MainViewModel and inject UserPreference in it. We also mark it as HiltViewModel and it looks like as below:
@HiltViewModel
class MainViewModel @Inject constructor(
    private val userPreference: UserPreference
) : ViewModel() {}
Then we define our methods in view models to read and write user name as shown:
/**
 * username flow to observe changes in user name
 * */
val userName: StateFlow<String> = userPreference.userName().filter {
    it.isNotEmpty()
}
    .stateIn(
        viewModelScope,
        SharingStarted.WhileSubscribed(),
        "No saved data"
    )

/**
 * save user name
 * */
fun saveUserName(name: String) {
    viewModelScope.launch {
        userPreference.saveUserName(name)
    }
}
userName is a flow which is converted into a hot flow using stateIn and collected in UI with lifecycle state as shown below.
val userName: String by viewModel.userName.collectAsStateWithLifecycle()
We could have used normal flow but then we would need to make different provision to observe it with UI lifecycle.
userName is saved simply in a coroutine scope using the userPreference object.
Note: To use collectAsStateWithLifecycle() function, we need to add a dependency as follows:
implementation "androidx.activity:activity-ktx:1.6.1"
Then we finally use the whole set up in our UI composable and shows the data as it gets saved and updated.
Bam! We created a separate layer for our preferences. This also helps in speeding up build time in a large scale project. You can try doing more with it and play around with different scenarios.
You can find the complete code on GitHub.
GitHub – aqua30/PreferenceModuleDemo: Project to demonstrate how can we create a local-preference…
That is all for now! Stay tuned!
Connect with me (if the content is helpful to you ) on
Until next time…
Cheers!
This article was originally published on proandroiddev.com on November 11, 2022


