Posted By: Shivam Dhuria
This is the Part 2 of the Series on Material Theme. To know how to add material components to your app, Part 1 here.
Use this as starting point for this guide.
Naming Convention
Since there is no way to differentiate between a style or a theme as both a wrapped around in <Style> tag. I’ll follow this naming convention.
StyleType . AppName . SubGroupName* . Variant* (* = optional)
For a name of a toolbar style, use something like
Widget.Zimgur.Toolbar
and for a theme use
Theme.Zimgur.DayNight
If you’d like to learn by implanting this in code, here’s a starting point you can use.
Split Files on basis of Purpose ?
Instead of wring all the styles in styles.xml , we will split the file on the basis of purpose. type.xml will contain on typography styles, shape.xml will contain all shape styling and style.xml will contain all widget styling.
Typography ⌨️
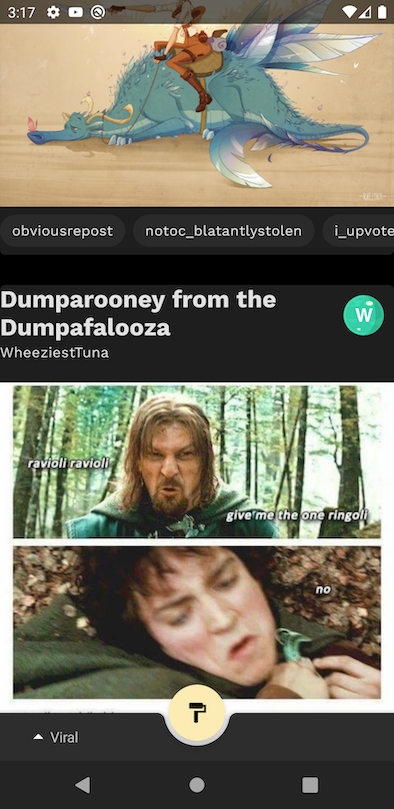
Material Design Guidelines recommend that you only use specific styles of text in your application. You can find more about the type system here. By Default, Material theme uses Roboto Font, I’ll inherit from TextAppearance.Zimgur.Headline3 and then override the font and other properties for some.
| <style name="TextAppearance.Zimgur.Headline3" parent="TextAppearance.MaterialComponents.Headline3"> | |
| <item name="fontFamily">@font/work_sans_bold</item> | |
| </style> |
Under values package, create a new Resource File called type.xml
Define these values
| <resources> | |
| <!--Typography--> | |
| <style name="TextAppearance.Zimgur.Headline2" parent="TextAppearance.MaterialComponents.Headline2"> | |
| <item name="fontFamily">@font/work_sans_semibold</item> | |
| </style> | |
| <style name="TextAppearance.Zimgur.Headline3" parent="TextAppearance.MaterialComponents.Headline3"> | |
| <item name="fontFamily">@font/work_sans_bold</item> | |
| </style> | |
| <style name="TextAppearance.Zimgur.Headline4" parent="TextAppearance.MaterialComponents.Headline4"> | |
| <item name="fontFamily">@font/work_sans_bold</item> | |
| </style> | |
| <style name="TextAppearance.Zimgur.Headline5" parent="TextAppearance.MaterialComponents.Headline5"> | |
| <item name="fontFamily">@font/work_sans_bold</item> | |
| </style> | |
| <style name="TextAppearance.Zimgur.Headline6" parent="TextAppearance.MaterialComponents.Headline6"> | |
| <item name="fontFamily">@font/work_sans_medium</item> | |
| </style> | |
| <style name="TextAppearance.Zimgur.Body1" parent="TextAppearance.MaterialComponents.Body1"> | |
| <item name="fontFamily">@font/work_sans</item> | |
| <item name="android:textSize">16sp</item> | |
| <item name="lineHeight">24sp</item> | |
| </style> | |
| <style name="TextAppearance.Zimgur.Body2" parent="TextAppearance.MaterialComponents.Body2"> | |
| <item name="fontFamily">@font/work_sans</item> | |
| <item name="android:textSize">14sp</item> | |
| </style> | |
| <style name="TextAppearance.Zimgur.Subtitle1" parent="TextAppearance.MaterialComponents.Subtitle1"> | |
| <item name="fontFamily">@font/work_sans</item> | |
| </style> | |
| <style name="TextAppearance.Zimgur.Subtitle2" parent="TextAppearance.MaterialComponents.Subtitle2"> | |
| <item name="fontFamily">@font/work_sans_medium</item> | |
| </style> | |
| <style name="TextAppearance.Zimgur.Button" parent="TextAppearance.MaterialComponents.Button"> | |
| <item name="fontFamily">@font/work_sans_medium</item> | |
| <item name="android:textAllCaps">false</item> | |
| </style> | |
| <style name="TextAppearance.Zimgur.Caption" parent="TextAppearance.MaterialComponents.Caption"> | |
| <item name="fontFamily">@font/work_sans</item> | |
| </style> | |
| <style name="TextAppearance.Zimgur.Overline" parent="TextAppearance.MaterialComponents.Overline"> | |
| <item name="fontFamily">@font/work_sans_semibold</item> | |
| <item name="android:textSize">12sp</item> | |
| <item name="android:textAllCaps">true</item> | |
| </style> | |
| </resources> |
Now implement these as theme attributes in themes.xml file.
| <?xml version="1.0" encoding="utf-8"?> | |
| <resources> | |
| <style name="Theme.Zimgur.DayNight" parent="Theme.Zimgur" /> | |
| <style name="Theme.Zimgur" parent="Theme.MaterialComponents.DayNight.NoActionBar"> | |
| <!--Typography--> | |
| <item name="textAppearanceHeadline2">@style/TextAppearance.Zimgur.Headline2</item> | |
| <item name="textAppearanceHeadline3">@style/TextAppearance.Zimgur.Headline3</item> | |
| <item name="textAppearanceHeadline4">@style/TextAppearance.Zimgur.Headline4</item> | |
| <item name="textAppearanceHeadline5">@style/TextAppearance.Zimgur.Headline5</item> | |
| <item name="textAppearanceHeadline6">@style/TextAppearance.Zimgur.Headline6</item> | |
| <item name="textAppearanceSubtitle1">@style/TextAppearance.Zimgur.Subtitle1</item> | |
| <item name="textAppearanceSubtitle2">@style/TextAppearance.Zimgur.Subtitle2</item> | |
| <item name="textAppearanceBody1">@style/TextAppearance.Zimgur.Body1</item> | |
| <item name="textAppearanceBody2">@style/TextAppearance.Zimgur.Body2</item> | |
| <item name="textAppearanceButton">@style/TextAppearance.Zimgur.Button</item> | |
| <item name="textAppearanceCaption">@style/TextAppearance.Zimgur.Caption</item> | |
| <item name="textAppearanceOverline">@style/TextAppearance.Zimgur.Overline</item> | |
| </style> | |
| </resources> |
If you don’t override these, the default attributes remain these.
Now in item_galley_album.xml
| <TextView | |
| android:id="@+id/titleTextView" | |
| android:textAppearance="?attr/textAppearanceHeadline5" | |
| ... /> | |
| <TextView | |
| android:id="@+id/descriptionTextView" | |
| android:textAppearance="?attr/textAppearanceBody1" | |
| ... /> | |
| <TextView | |
| android:id="@+id/userName" | |
| android:textAppearance="?attr/textAppearanceBody2" | |
| ... /> |
Shapes ? ?
Create a new resource file called Shape.xml in values.
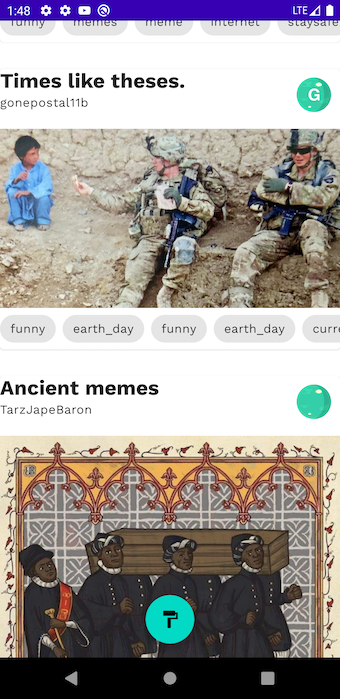
Components are organised into three categories, based on their relative size. Components linked to their category will inherit the shape values assigned to the category.
Small Components includes Button, Chip, FAB, TextField . All these will inherit from shapeAppearanceSmallComponent attribute in theme which you will later point to these styles.
Similarly , Medium Component include Dialog Boxes and Material Cards while Large Components include Nav Drawer(side and bottom)
| <?xml version="1.0" encoding="utf-8"?> | |
| <resources> | |
| <!--Shape--> | |
| <style name="ShapeAppearance.Zimgur.SmallComponent" parent="ShapeAppearance.MaterialComponents.SmallComponent"> | |
| <item name="cornerFamily">rounded</item> | |
| <item name="cornerSize">@dimen/Zimgur_small_component_corner_radius</item> | |
| </style> | |
| <style name="ShapeAppearance.Zimgur.MediumComponent" parent="ShapeAppearance.MaterialComponents.MediumComponent"> | |
| <item name="cornerFamily">rounded</item> | |
| <item name="cornerSize">@dimen/Zimgur_medium_component_corner_radius</item> | |
| </style> | |
| <style name="ShapeAppearance.Zimgur.LargeComponent" parent="ShapeAppearance.MaterialComponents.LargeComponent"> | |
| <item name="cornerFamily">rounded</item> | |
| <item name="cornerSize">@dimen/Zimgur_large_component_corner_radius</item> | |
| </style> | |
| <dimen name="Zimgur_small_component_corner_radius">24dp</dimen> | |
| <dimen name="Zimgur_medium_component_corner_radius">5dp</dimen> | |
| <dimen name="Zimgur_large_component_corner_radius">12dp</dimen> | |
| </resources> |
Now point the theme attributes to the above set styles
| <style name="Theme.Zimgur" parent="Theme.MaterialComponents.DayNight.NoActionBar"> | |
| <item name="shapeAppearanceSmallComponent">@style/ShapeAppearance.Zimgur.SmallComponent</item> | |
| <item name="shapeAppearanceMediumComponent">@style/ShapeAppearance.Zimgur.MediumComponent</item> | |
| <item name="shapeAppearanceLargeComponent">@style/ShapeAppearance.Zimgur.LargeComponent</item> | |
| <!--Typography--> | |
| ... | |
| </style> |
And you’re done. All the components will automatically inherit the shape values assigned to their category.
But, If you noticed, The modal Bottom sheet that comes up when you long press a post, doesn’t have rounded edges. Ideally it should inherit from shapeAppearanceLargeComponent but since we have put a Navigation View inside it, it covers up the otherwise rounded corners.
To fix this , go to styles.xml
| <style name="Widget.Zimgur.NavigationView" parent="Widget.MaterialComponents.NavigationView"> | |
| <!--Remove any scrim insets applied by NavigationView for system bars--> | |
| <item name="insetForeground">@android:color/transparent</item> | |
| <!--Set the background color of NavigationView--> | |
| <item name="android:background">@android:color/transparent</item> | |
| <item name="elevation">0dp</item> | |
| <item name="itemTextAppearance">?attr/textAppearanceBody2</item> | |
| </style> |
Now, set theme attribute navigationViewStyle to the above style.
| <item name="navigationViewStyle">@style/Widget.Zimgur.NavigationView</item> |
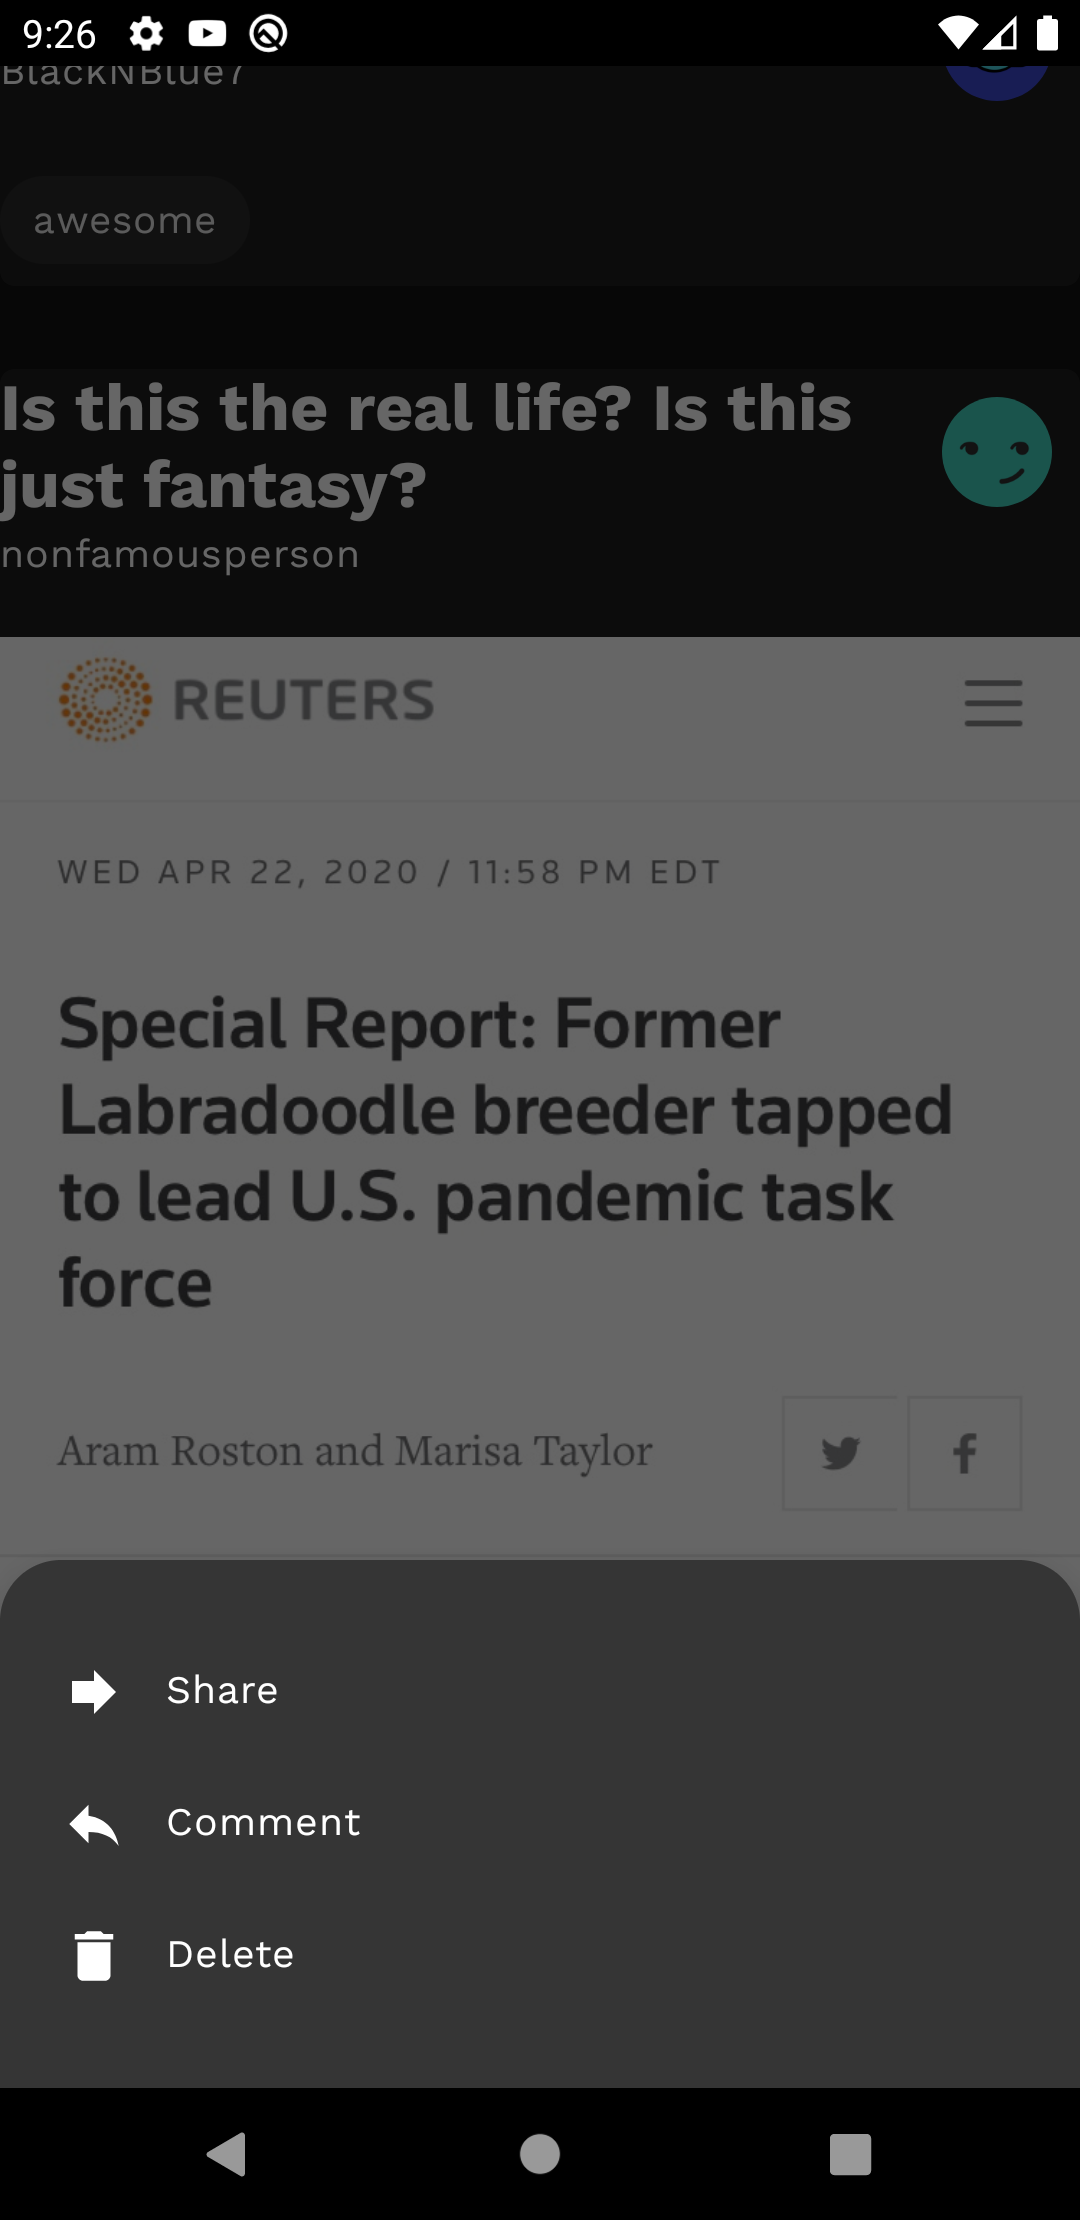
Note: Bottom Modal Sheet applies a Shape Overlay which has its bottom left and right corners set to 0 dp as can be seen in the image.
Color ?
Use the Material Design Palette to generate a color palette. My palette looks something like this.
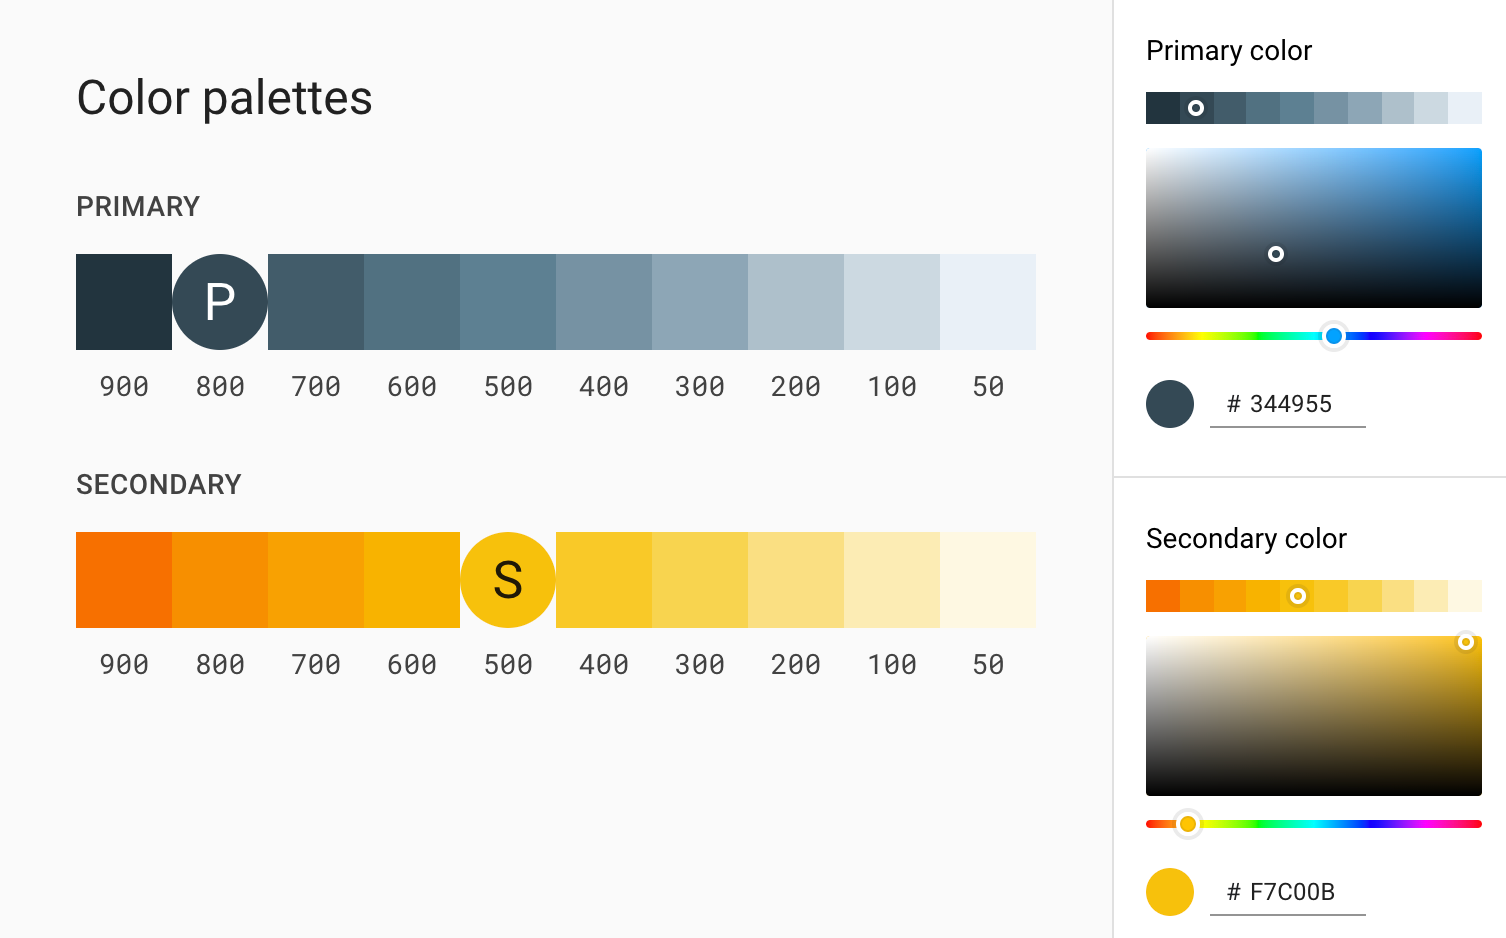
In the Colors.xml file, list all the colors you will be using throughout the app(Both for light and dark mode).
| <resources> | |
| .... | |
| <color name="zimgur_blue_50">#eef0f2</color> | |
| <color name="zimgur_blue_200">#adc0cb</color> | |
| <color name="zimgur_blue_300">#8da6b5</color> | |
| <color name="zimgur_blue_800">#344955</color> | |
| <color name="zimgur_blue_900">#23343e</color> | |
| <color name="zimgur_yellow_100">#fcecb3</color> | |
| <color name="zimgur_yellow_200">#fadf82</color> | |
| <color name="zimgur_yellow_500">#f7c00b</color> | |
| <color name="zimgur_yellow_600">#f7b201</color> | |
| <color name="zimgur_red_200">#cf7779</color> | |
| <color name="zimgur_red_400">#ff4c5d</color> | |
| ... | |
| <color name="nav_bar">@color/zimgur_black_900_alpha_020</color> | |
| </resources> |
Now set theme attributes to these values.
| <!--Color--> | |
| <item name="colorPrimary">@color/zimgur_blue_800</item> | |
| <item name="colorPrimaryVariant">@color/zimgur_blue_800</item> | |
| <item name="colorSecondary">@color/zimgur_yellow_500</item> | |
| <item name="colorSecondaryVariant">@color/zimgur_yellow_600</item> | |
| <item name="android:colorBackground">@color/zimgur_blue_50</item> | |
| <item name="colorSurface">@color/zimgur_white_50</item> | |
| <item name="colorPrimarySurface">?attr/colorPrimary</item> | |
| <item name="colorError">@color/zimgur_red_400</item> | |
| <item name="colorOnPrimary">@color/zimgur_white_50</item> | |
| <item name="colorOnSecondary">@color/zimgur_black_900</item> | |
| <item name="colorOnBackground">@color/zimgur_black_900</item> | |
| <item name="colorOnSurface">@color/zimgur_black_900</item> | |
| <item name="colorOnError">@color/zimgur_white_50</item> | |
| <item name="scrimBackground">@color/zimgur_white_50_alpha_060</item> | |
| <item name="android:statusBarColor">@color/zimgur_blue_50_alpha_060</item> | |
| <item name="android:navigationBarColor">@color/nav_bar</item> |
Job Offers
I’ll only discuss the attributes that might be a little hard to understand.
Surface colors affect surfaces of components, such as cards, sheets, and menus .
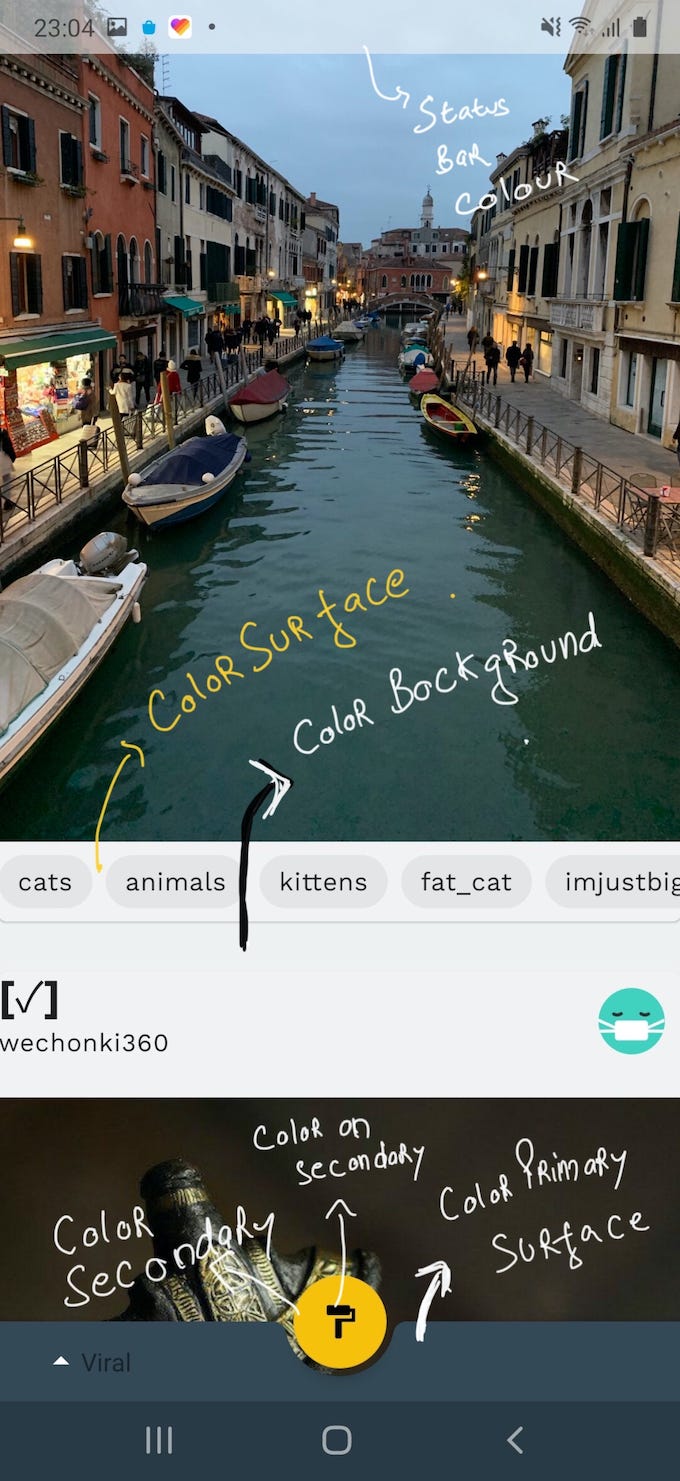
Attributes like “colorOn….” are pretty self explanatory. For example, if you set icon tint color to ColorOnPrimary which is on a surface with Primary Color background, you can be sure the icon will always contrast with the Primary Color in both Light and Dark Mode.
ColorPrimarySurface, now Google came out with this attribute which is composed of ColorPrimary and ColorSurface. The value of this is ColorPrimary in LIGHT mode and ColorSurface is DARK mode. This is important as in dark mode, you should avoid having bright colors (eg ColorPrimary) for large surfaces(Think Modal Sheet etc) but use ColorSurface which should be dark.A lot of widgets have styles buily in which will inherit this style automatically.
I point this style to the Bottom App Bar Style in themes.
| <item name="bottomAppBarStyle">@style/Widget.MaterialComponents.BottomAppBar.PrimarySurface</item> |
Theme ?
Right click values>New Resource File. Set File name as themes and add qualifier Night Mode. You should have two themes.xml files now, One for day mode and one for night mode.
I want to add a transition when user switched from Light to Dark mode and vice verse.
Add this to styles.xml
| <style name="WindowAnimationTransition"> | |
| <item name="android:windowEnterAnimation">@android:anim/fade_in</item> | |
| <item name="android:windowExitAnimation">@android:anim/fade_out</item> | |
| </style> |
and then set this style to windowAnimationStyle attribute in themes.xml.
| <item name="android:windowAnimationStyle">@style/WindowAnimationTransition</item> |
Now time to configure the themes.xml(night) file.
| <resources xmlns:tools="http://schemas.android.com/tools"> | |
| <style name="Theme.Zimgur.DayNight" parent="Theme.Zimgur.Dark" /> | |
| <style name="Theme.Zimgur.Dark" parent="Theme.Zimgur"> | |
| <!--Color--> | |
| <item name="colorPrimary">@color/zimgur_blue_200</item> | |
| <item name="colorPrimaryVariant">@color/zimgur_blue_300</item> | |
| <item name="colorSecondary">@color/zimgur_yellow_100</item> | |
| <item name="colorSecondaryVariant">@color/zimgur_yellow_200</item> | |
| <item name="android:colorBackground">@color/zimgur_black_900</item> | |
| <item name="colorSurface">@color/reply_black_800</item> | |
| <item name="colorPrimarySurfaceVariant">?attr/colorSurface</item> | |
| <item name="colorError">@color/zimgur_red_200</item> | |
| <item name="colorOnPrimary">@color/zimgur_black_900</item> | |
| <item name="colorOnSecondary">@color/zimgur_black_900</item> | |
| <item name="colorOnBackground">@color/zimgur_white_50</item> | |
| <item name="colorOnSurface">@color/zimgur_white_50</item> | |
| <item name="colorOnError">@color/zimgur_white_50</item> | |
| <item name="scrimBackground">@color/zimgur_black_900_alpha_087</item> | |
| <item name="android:statusBarColor">@color/zimgur_black_900_alpha_060</item> | |
| <item name="elevationOverlayEnabled">true</item> | |
| <item name="android:windowLightStatusBar" tools:ignore="NewApi">false</item> | |
| <item name="android:windowAnimationStyle">@style/WindowAnimationTransition</item> | |
| </style> | |
| </resources> |
Now, Dark mode is successfully set up in your app.Also call recreate() method after you programatically change theme in your app.
Full Screen ?
To provide a more immersive experience, sometimes you’d want to make your App fullscreen.
| var flags = SYSTEM_UI_FLAG_LAYOUT_STABLE or | |
| SYSTEM_UI_FLAG_LAYOUT_FULLSCREEN or | |
| SYSTEM_UI_FLAG_LAYOUT_HIDE_NAVIGATION | |
| //Changing status bar icons color should be easily be done by setting "android:windowLightStatusBar" item to true in Day Theme and false | |
| // in night Theme but it seems to be broken for now if above flags are set. 🙁 | |
| if (!isDarkTheme(this)) { | |
| flags = flags or SYSTEM_UI_FLAG_LIGHT_STATUS_BAR | |
| } | |
| window.decorView.systemUiVisibility = flags |
Make sure you add some top padding to the recycler, so that the first item in recycler doesn’t get covered by status bar.
| private fun setInsets() { | |
| // https://proandroiddev.com/draw-under-status-bar-like-a-pro-db38cfff2870 | |
| ViewCompat.setOnApplyWindowInsetsListener(recyclerView) { view, insets -> | |
| recyclerView.updatePadding(top = insets.systemWindowInsetTop - 1) | |
| insets | |
| } | |
| } |


