

Mobile apps are growing tremendously these days. Most companies are focusing on their apps as they drive most of the revenue. With increasing daily active users of the apps, their complexities are increasing as well.
Keeping these complexities and the increasing number of concurrent users in mind, as a developer, it is very crucial to build scalable apps.
In Android app development, scalability depends on some key aspects like
1. Architecture
2. Modularization
3. Tests
4. Flexible UI Design
5. Code Style
Note: Most of these topics are recommended by Google itself!
App Architecture
App architecture defines the blueprint of the application. It may vary depending on the app’s use cases. There cannot be a perfect architecture which works with every kind of application.
Though it is recommended to use MVVM (Model View ViewModel) architecture as it works pretty well and helps in scaling as well.
Generally, we broadly define two layers called UI Layer and Data Layer.

UI and Data Layer
The Data layer fetches and exposes app data to the UI layer as a stream along with performing some business logic.
The UI layer collects data as a stream to display it on the UI and reacts to any changes in the stream of data.
By setting up a stream of data between the two layers we are creating a Reactive UI. We just need to handle various states of data that could arrive here.
There should not be any pulling or requesting of data from the UI, it should only collect data. The UI layer should communicate with the data layer only in the form of Events. The data layer handles these events to update data and reflects the changes to the UI. This way, our data layer will be considered a Single Source of Truth. This also ensures that we have a Unidirectional data flow. This will maintain consistency throughout our app.
Further, our Data layer can be divided into two layers, Repository and Data Source.

Data layer
We should put all of our business logic like fetching the data, mapping them or exposing them as streams (like flows) in the Repository itself.
Further, our Data source can be of two types Local (Room) or Remote (Network).
It would be the repository’s responsibility to decide where to fetch the data and in what form to expose it.
Now let’s see how we can show these data on the UI.

UI layer
OUR VIDEO RECOMMENDATION


Jobs
The UI layer will consist of two components called Screen (activity/fragment/composable) and a ViewModel. The ViewModel will expose data to Screen in the form of a UI State. The screen will be observing these UI states and will react according to the current state.
The ViewModel will get the data from the repository and convert it into a UI state,i.e; Loading, Success and Error. Based on these states, the screen will render it using the UI elements on the screen. Initially, ViewModel will create a Loading State, then we can obtain data from the repository and convert it into one of either state, i.e; Success or Error.
Modularization
If we talk about scalability, our codebase is going to grow as well with it. Therefore, it is recommended to divide the code into various modules based on a feature or a responsibility instead of keeping everything in the app module.
Creating separate modules for various features also reduces build time pretty well.
There are broadly three ways to create a module:
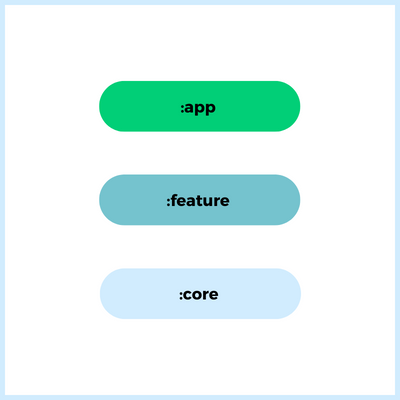
Types of modules
- :app module acts as the entry point of the application and brings all the other modules together (like :feature or :core).
- :feature modules are responsible for a single area of the user-facing functionalities, i.e; only a particular part of the app’s code will be written in this module. For example, we can have an :onboarding module which only consists of code related to the onboarding of users.
This will depend on the :core module. - :core module is the common library module which contains common components/classes/functions which are going to be used throughout the application.
We should also restrict the scope of this module to a single area of responsibility as we can have
:core:model for common model classes
:core:local for all the local database-related stuff
:core:network for all the network or API-related stuff
Now with a multi-modular codebase, we will be having a lot of gradle files as well. This generally creates two common problems:
1. Duplicate dependencies and configurations in gradle files for each module
2. Maintaining consistent versioning of libraries throughout the modules.
We can solve the duplicate dependencies problem by using a Convention Plugin. We can put all the common dependencies and configuration blocks inside a plugin and include that plugin in all the modules that require those options.
The convention plugins will be in a separate :build-logic module which will be built before any other module. This will ensure all the configuration changes will be reflected in every other module before they are built.
The second common problem is tracking library versions throughout all the modules. We can solve this by creating a separate file called Version Catalog and adding all the libraries’ versions there. So, whenever we need to update any library version we can do that in the Version Catalog and it will remain consistent at all places.
Tests
Tests make sure that our functions are working as intended. It helps to verify the working of our classes or our app as a whole. They will tell you if have broken something before you ship it to production. Though writing tests increases the development timeline it is worth building a bug-free app.
It is a good practice to write the test first before actual implementation but it is just a choice!
Generally, we write Unit Tests and UI Tests to verify the behaviour of our feature.
Test Driven Development mainly consists of 5 steps:
1. Add a test
2. Run it and watch it fail
3. Write the code to make the test pass
4. Run the tests and see them pass
5. Do any refactoring
Flexible UI Design
To create a flexible UI design for our we need to first our theme.
1. To define the Theme, first, we need to define a set of colors in our app
2. Then we need to define a color scheme for Light and Dark Mode.
3. We can also define a set of typography to define our text styles.
After setting up the theme, we can set up a good image-loading library to load images in our app smoothly.
We can also create a custom view specific to our app like custom TextViews, custom Loaders, etc.
The next crucial thing for creating a flexible UI is to support all screen-sizes.
Support for different screen sizes increases the target devices along with users for your app.
To support as many screen sizes as possible, we should design our app layouts to be responsive and adaptive. Responsive/adaptive layouts provide an optimized user experience regardless of screen size, enabling our app to accommodate phones, tablets, foldable and Chrome OS devices, portrait and landscape orientations, and resizable configurations such as multi-window mode.
Code Style
We often ignore this one but it this one of the most important while writing code for bigger projects.
We should have a set of rules that needs to be enforced while writing code. This will make the code base consistent and easily understandable for all the Team members.
In Android, we use lint checks to improve our code.
Conclusion
Here we looked at some basic aspects of building scalable apps that are recommended by Google.
You can also check google’s Now in Androidrepository for actual implementations of these concepts.
This article was originally published on proandroiddev.com on October 27, 2022


