 Koined from original banner — https://github.com/android/nowinandroid
Now In Android is an open-source Android application that covers Modern Android Development best practices. The project is maintained by the Google Android team.
I propose to continue our tour with the version built with the Koin dependency injection framework. This is a good time to refresh practices, from standard components structure to more advanced cases.
Let’s make a walkthrough into the common core components, giving us the essential building blocks to let us write our features.
This article series covers several parts:
Part 1 — Koin setup, application verification, and a first module tour
Part 2 — Common Modules components and feature modules
Part 3 — Now in Android with Koin Annotations
… perhaps more 🙂
You can find all the related sources at this location: https://github.com/InsertKoinIO/nowinandroid

Features picture from https://github.com/android/nowinandroid
Building the common blocks with Koin
The screens of the NowInAndroid app are developed with Jetpack Compose and use repository & usecase components:
- Repository to access data (network, database …)
- Usecase to handle business logic
Let’s open the DataKoinModule.kt to see our Repository components definitions:
 Common Data Components
All the repository components are declared using the singleOf keyword plus a bind() section to specify the bound type. This will create each one as a singleton instance.
It’s a good practice to use the includes() function to list explicitly any Koin module that would be needed for any definition of the current module. This also expresses a strong link, that can be used by the verify() API to verify our Koin configuration.
Components from the Data layer can be declared as singleton instances. The Data layer is independent of the UI layer: there is no need to associate them to a lifecycle.
For Usecase domain components, we will see about them in detail in the section later.
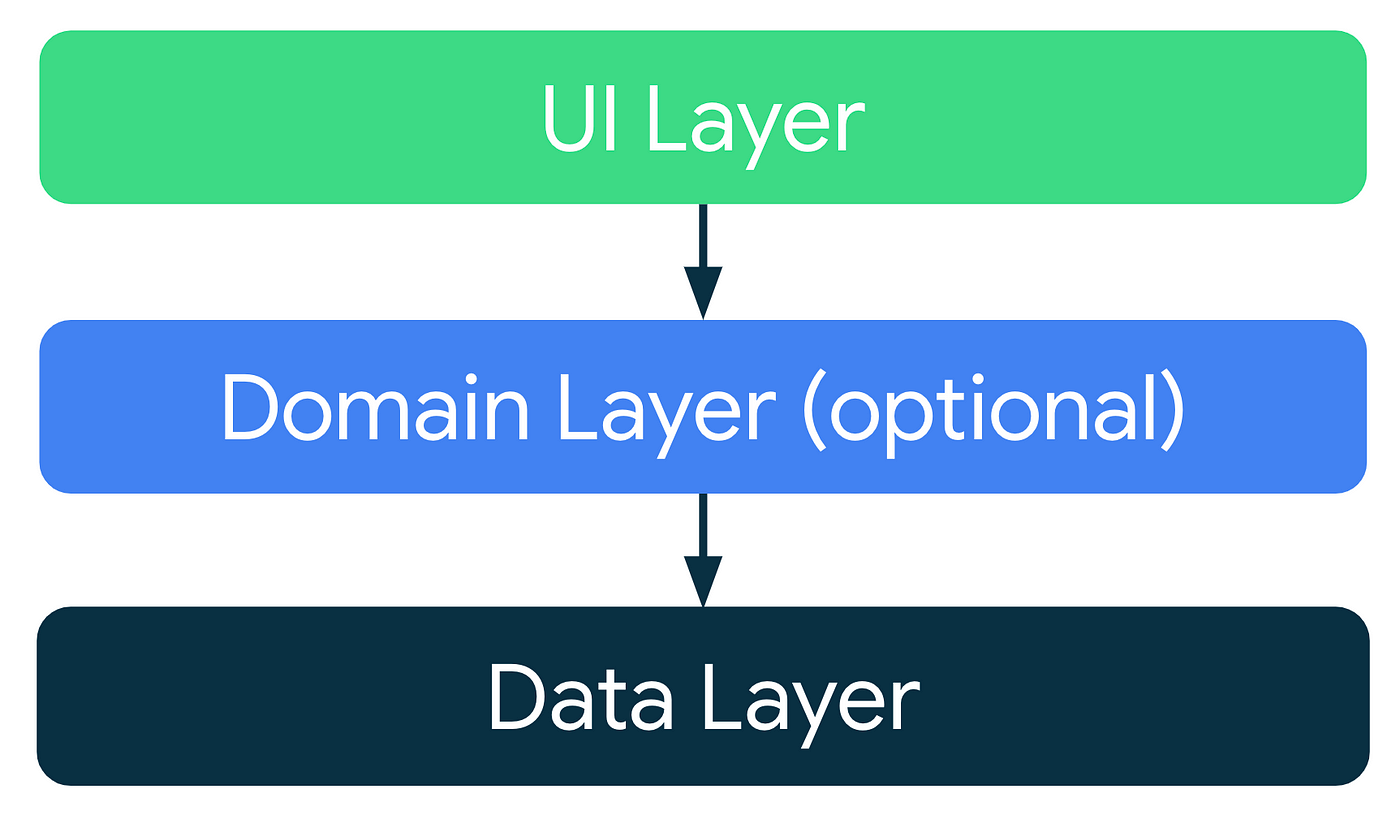
Architecture layers from https://developer.android.com/topic/architecture
The first data modules we will look at, are the database components indaosKoinModule.
DAO & Database Layer
The project is using Room. To declare a Room database instance, we need to create it with the Room.databaseBuilder() builder function. This instance will be registered as singleton and referred by DAO components.
Below, the databaseKoinModule declares the definition of the database instance:
 Declaring Room Database
We simply use a single definition, followed by a function to be executed. Note here that we use the androidContext() function to retrieve the Android context from Koin.
Next in daosKoinModule, is fairly straightforward to declare each DAO. Each of them is referenced from the NiaDatabase interface. We can reference each DAO as follow. We use the get<NiaDatabase>() expression to retrieve our database instance, and use it to call our DAO instance as follow:
 Declaring DAOs
Each of those DAO is defined with the single keyword (singleton instance). We include the database definition module.
In Dagger Hilt, the philosophy remains the same but it’s still verbose:
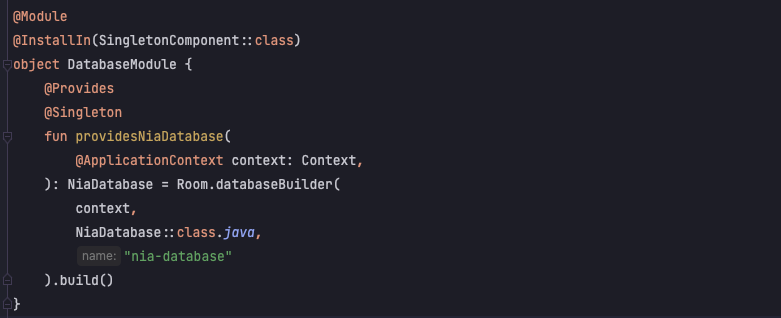 Hilt NiaDatabase Declaration
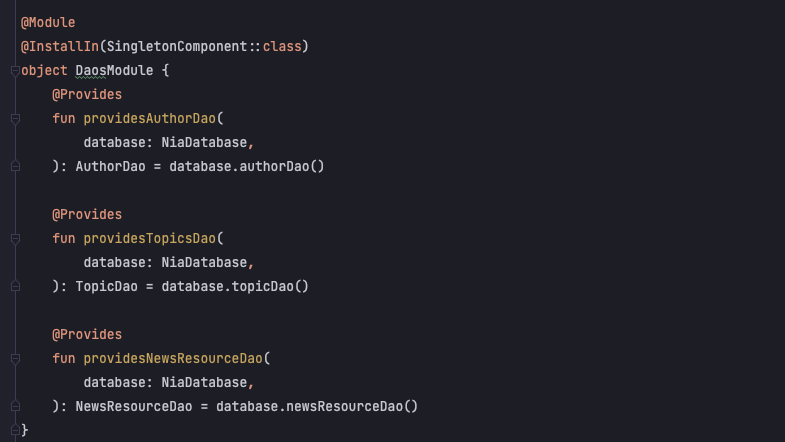 Hilt DAOs declaration
Job Offers
Let’s continue with the DataStore components in the following section.
Datastore Layer
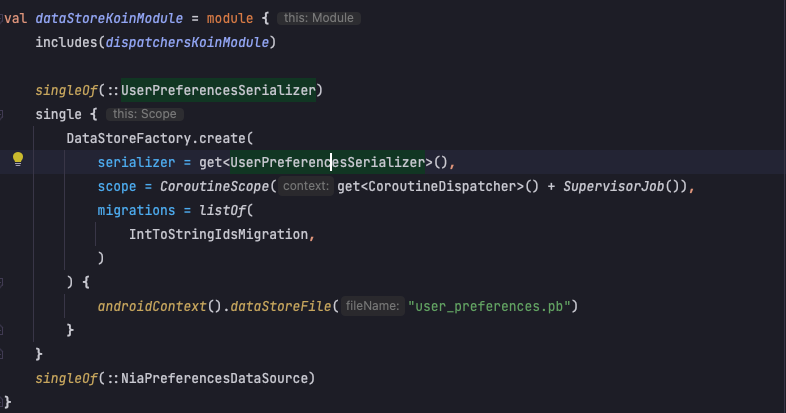
In this part, we need to prepare the creation of theDataStoreFactory instance to read offline data. Let’s open the dataStoreKoinModule to see those components:
 DataStore Module
We need several singletons here:
UserPreferencesSerializerto be passed to our DataStore, to serialize data from UserPreferencesDataStoreFactorythe DataStore instance itselfNiaPreferencesDataSourceDatasource component, which uses the DataStore to read local data
In this module, we need to inject the Kotlin coroutines “default dispatcher”. This one is included in our module, and can be written like this:
 Declaring Default Coroutines Dispatcher
Note that we can easily override such a definition in a test environment by providing a new definition that will override the default one. If you have several definitions of the same type, you can also add a qualifier.
Network Layer
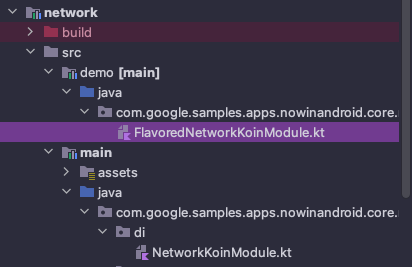
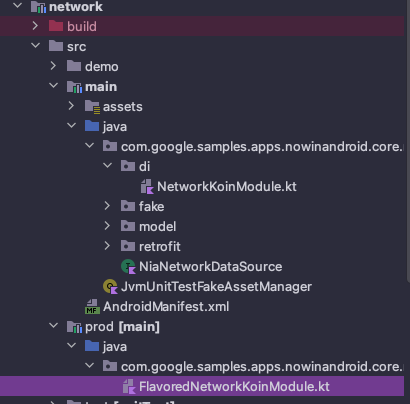
The network module is an interesting case: we need to load different definitions of implementation depending on the flavor of the module. We have 2 flavors: demo (static demo content) & prod (content requested over the network).
How to dynamically use the right flavor implementation?
Let’s first write the networkKoinModulefile first. This module will include child implementation:
 The network module
We can declare here, all common definitions used by the included modules (like the JSON serializer instance).
The call toincludes(networkFlavoredKoinModule) will load the suitable Koin module. From there, let’s write the networkFlavoredKoinModule module for each flavor. Naturally, the project will link and compile the right file.
The demo flavor folder:
Demo Flavor
The demo flavor networkFlavoredKoinModule file, declaring a fake implementation:
 Demo Network Module
The prod flavor folder:
Prod flavor
The prod flavor networkFlavoredKoinModule file, declaring a Retrofit implementation:
 Prod NiaNetworkDataSource implementation
Each implementation will provide a NiaNetworkDataSource component. We don’t need to declare nor include any Json definition, as Koin will find it from the parent module.
Usecase Domain Layer
Now that we have core components to help work with our data, we can have components dedicated to business logic and allow us to reuse them on the UI layer.
Let’s open the domainKoinModule file to see our Usecases definitions:
 Use-cases definitions
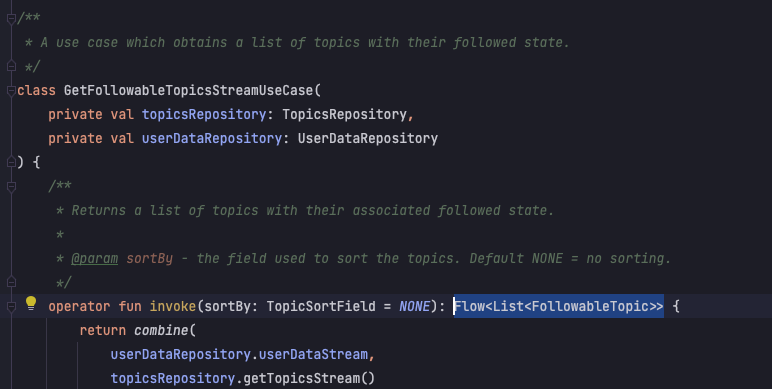
Each use-case component is defined as a “factory” here. Why? We want to ensure that we will have a “stateless” business logic unit, and avoid keeping in memory anything linked to the UI. Those use-case components are launching Coroutines Flows to listen to incoming data updates. We don’t want to keep Flow reference between screens.
 GetFollowableTopicsStream Usecase
The use of factoryOf ensure that we will recreate an instance, each time we will ask for it and garbage collect previously used instances (let the instance be destroyed).
Sync Worker — Offline data sync with WorkManager
Lastly, one special and important component of this project is the SyncWorker class, dedicated to resyncing data to repositories. This is helping get data for the “offline first” strategy: we look at data locally and remotely. We can display already-fetched data while asking for new data remotely, and avoid displaying empty content to the user.
As you see, this class is demanding almost all our common components:
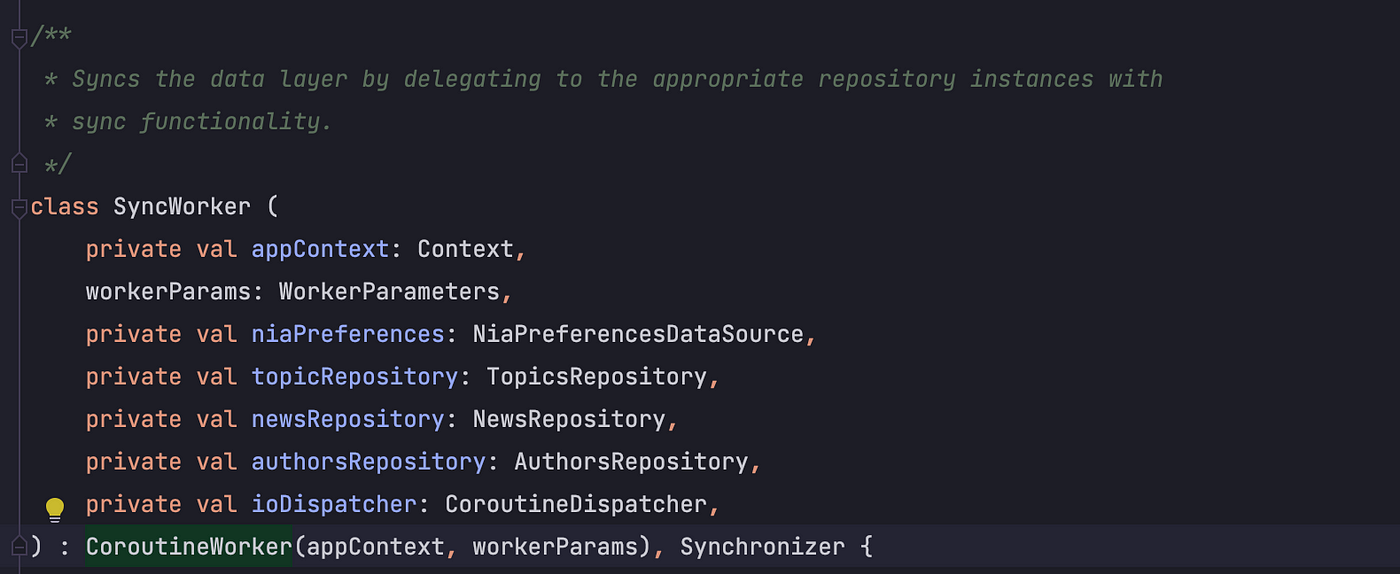 SyncWorker Class — To help sync data repositories
Let’s open the syncWorkerKoinModule file to declare our WorkManager. You may see that we simply need to declare our component with workerOf keyword, and that’s it:
 Declaring Sync Worker
Don’t forget to start WorkManager Koin factory at the Application start, with the workManagerFactory()function:
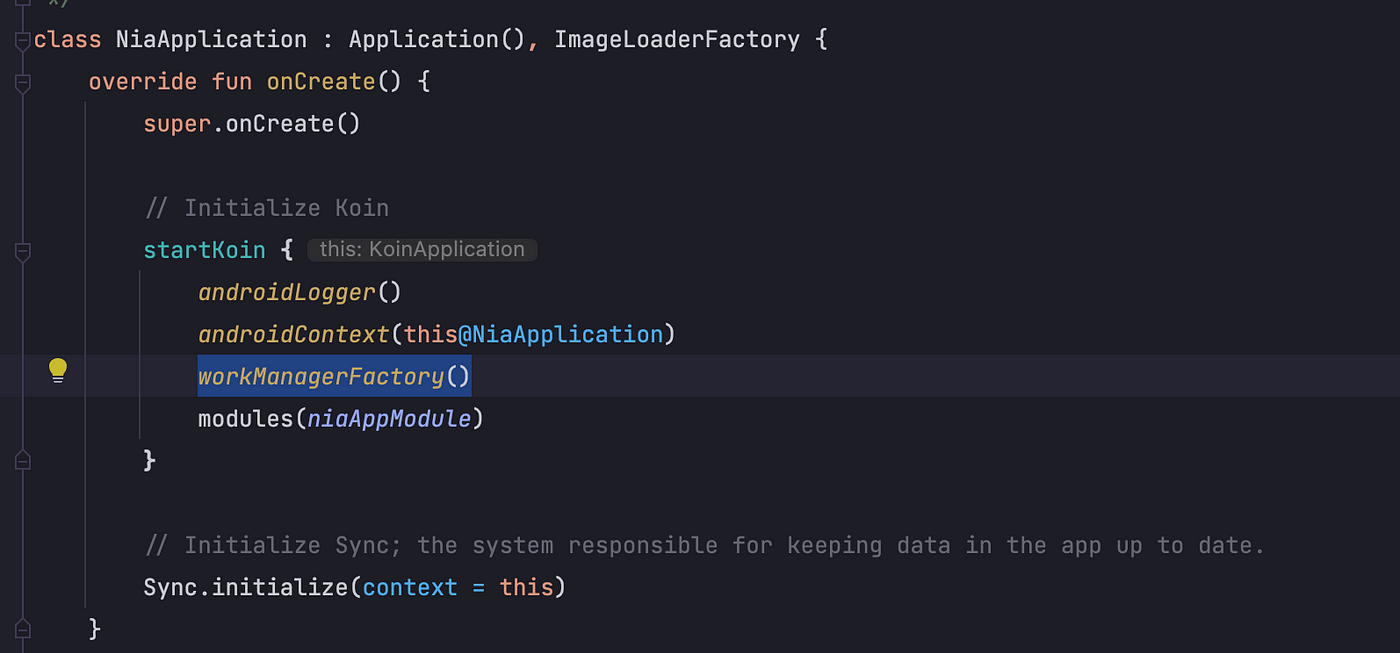 WorkManager setup with Koin
The call to Sync.initialize() asks to initialize the data sync for offline content.
Don’t hesitate to check the documentation for more details: https://insert-koin.io/docs/reference/koin-android/workmanager
Injecting ViewModels in Features
We are now ready to inject everything in one Jetpack Compose composable function. In our AuthorRoute screen composable, we use the koinViewModel() function to get the ViewModel.
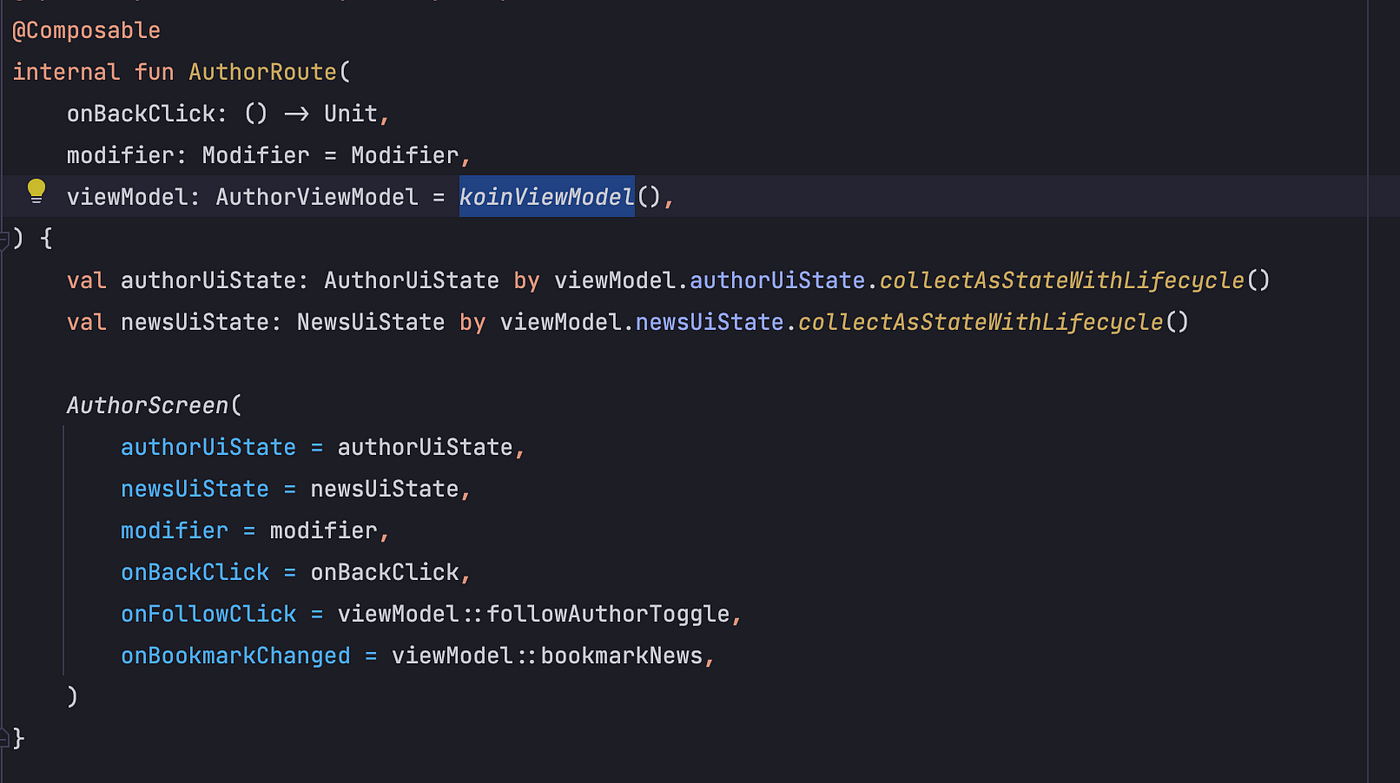 injecting ViewModel in Compose
To declare a ViewModel component, we simply need the viewModelOf keyword following by our class constructor:
 Declaring AuthorViewModel
With such a keyword, your ViewModel can be automatically injected with SavedStateHandle parameter if you need.
 AuthorViewModel class constructor
That’s it for this second part. Hope you enjoyed it. See you in the next part about the Koin Annotations setup.
Follow Koin and Kotzilla’s latest news at http://blog.kotzilla.io/
This article was originally published on proandroiddev.com on December 22, 2022


