

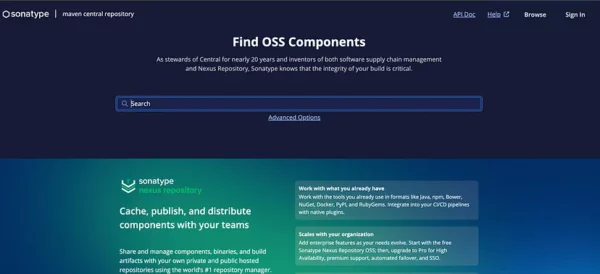
With JCenter sunsetted, distributing public Kotlin Multiplatform libraries now often relies on Maven Central via Sonatype. However, the transition from issues.sonatype.org to central.sonatype.com in March 2024 has left many developers grappling with outdated resources and scarce guidance.
This article serves as a practical step by step guide for individuals seeking to publish their Kotlin Multiplatform libraries on Maven Central using Sonatype Central, offering step-by-step instructions and insights to navigate the updated publishing process effectively.
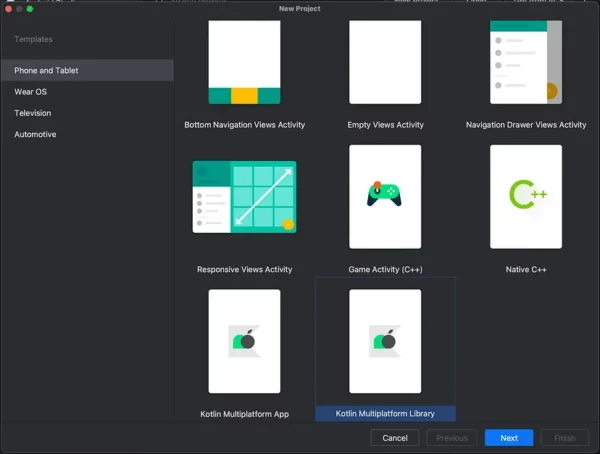
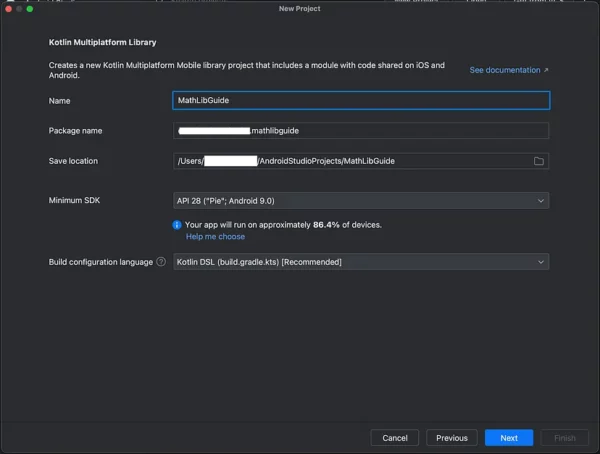
Before we dive into the steps for publishing to Maven Central, let’s set up a simple multiplatform library that we’ll use as an example throughout this guide. Create a new project in Android Studio using the Kotlin Multiplatform Library template and name the project MathLibGuide:
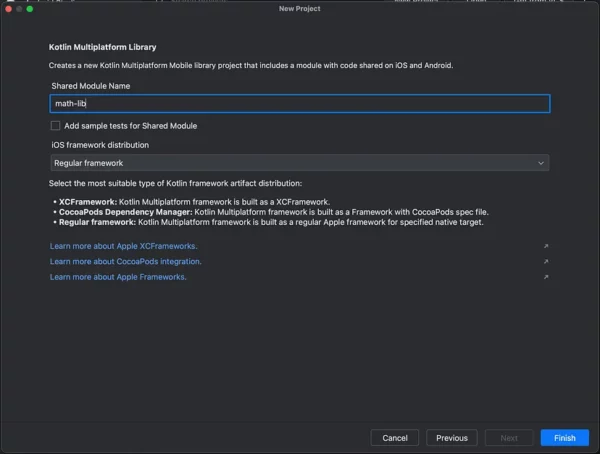
Name the shared module math-lib and click Finish:
In math-lib/src/commonMain, create a new Kotlin class named Math.kt and define a simple add function that takes two arguments, a and b, and returns their sum:
class Math {
    fun add(a: Int, b: Int): Int {
        return a + b
    }
}
Now that we have our math-lib library set up, we can proceed with the next step.
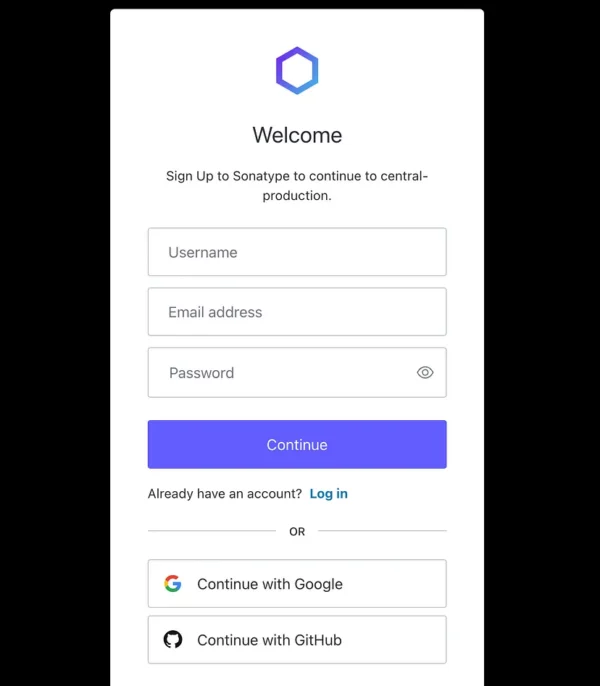
Sign up for an account on central.sonatype.com if you don’t already have one by clicking on the Sign In button and then selecting Sign up:
If you are new to Sonatype Central, you will have no verified namespaces and will see a prompt to view instructions for verifying namespaces. Tap on Close.
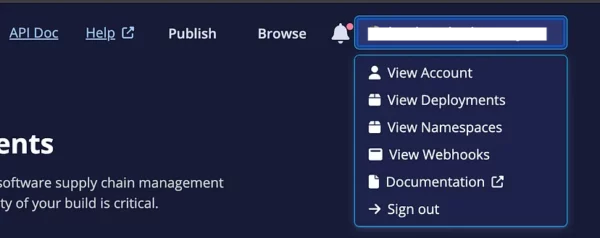
After creating an account and logging in, navigate to your account by clicking on your profile icon at the top right of the page. Then, select View Namespaces and click Add Namespace:
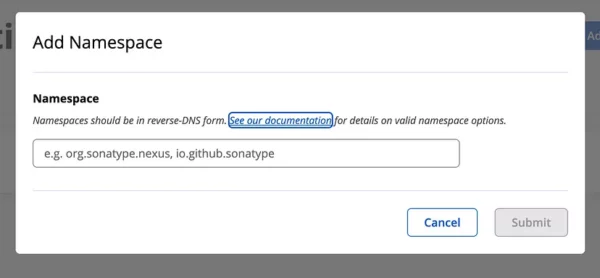
In line with the Java package naming convention, namespaces often adopt a reversed domain name system for organization and uniqueness. Sonatype Central streamlines the verification process for artifacts originating from code repositories hosted on platforms such as GitHub, GitLab, Gitee, and Bitbucket. Therefore, this guide will leverage this method, GitHub to be specific. Should you prefer to employ a custom domain, additional instructions can be found here.
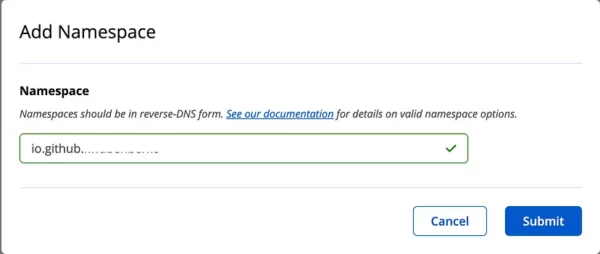
Enter io.github.<GITHUB_USER_NAME> in the designated text field, replacing <GITHUB_USER_NAME> with your GitHub username. Once entered, proceed by clicking Submit :
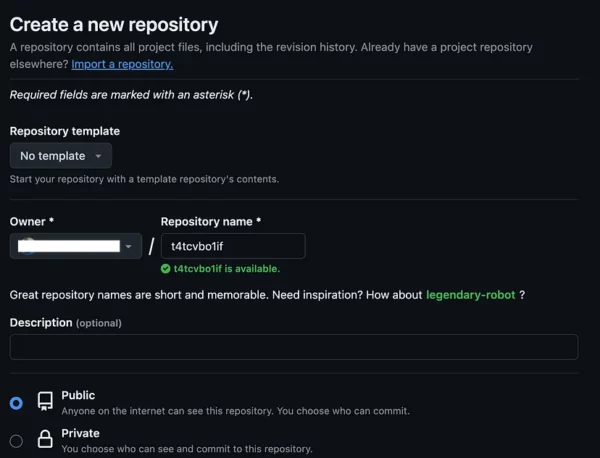
Afterward, copy the verification key provided and create a temporary, empty public GitHub project. Assign the verification key as the project name. This step is necessary for Sonatype Central to verify ownership of your account.
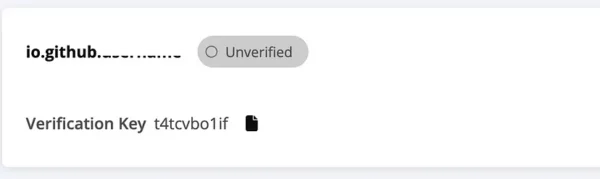
After creating the project, navigate to Sonatype Central and click on the Verify Namespace button to initiate the verification process. Typically, this process completes within a few minutes. Upon successful verification, you will notice a green Verified badge indicating completion:

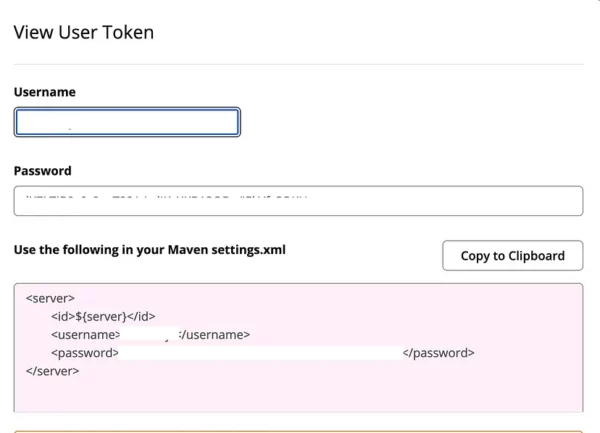
You can proceed to delete the temporary repository since it is no longer needed. Now that the namespace is verified, let’s generate a token for publishing. Begin by clicking on your profile icon located at the top-right corner of the page. Then, select View Account followed by Generate User Token. Copy the generated Username and Password token and securely store it. We’ll need it for later use.
Artifacts published on MavenCentral have to be signed by their publishers. The way to do this is by using a GPG key. If you’re using macOS, you can install GPG via Homebrew using the following command:
brew install gpg
Once installed, generate a new key with the following command:
gpg --full-gen-key
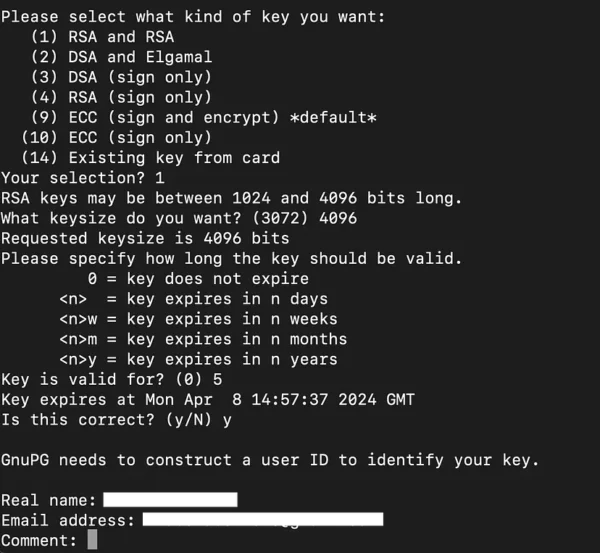
Follow the prompts to provide details for the key:
- Select option 1 for RSA and RSA when prompted.
- Choose keysize 4096 when asked.
- For the validity period, enter any value. For example, you can enter 5 to make the key valid for 5 days. Confirm by entering ‘y’ when prompted.
- Provide your Real name and Email address when prompted.
- When prompted for the Comment, you can press Enter to skip this step. Alternatively, if you wish to add a comment, feel free to enter it:
- Next, confirm your details by entering ‘O’ when prompted.
- Following this, you’ll be asked to set a passphrase for the key. This passphrase is used to encrypt your private key on your machine, providing an additional layer of security. Enter your desired passphrase and confirm it by typing it again.
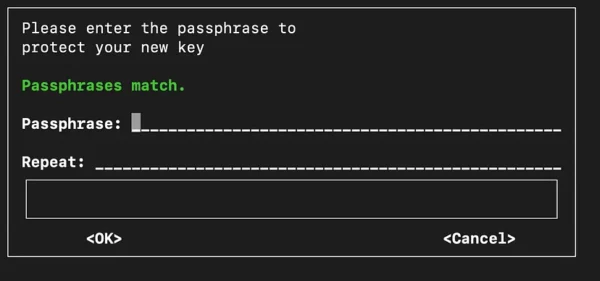
After entering and confirming your passphrase, the GPG key will be created, and you’ll see a few details for the key displayed in the terminal, similar to the example below:

OUR VIDEO RECOMMENDATION


Jobs
Take note of the last eight characters of your GPG Public Key ID, as they will be required later. For example, in my case, the last eight characters of my ID are 7875A727. You can always check the keys you have on your system by running the command below:
gpg --list-keys
To allow others to verify your files, you need to distribute your public key to a key server. Use the following command to send your public key to the key server. This command will make your public key available to others who wish to verify files signed with your key:
gpg --keyserver keyserver.ubuntu.com --send-keys <GPG_PUBLIC_KEY_ID>
To reference your private key for signing artifacts in your project, you can obtain an ASCII armored export of it using the following command, replacing <GPG_PUBLIC_KEY_ID> with your 8 digit public key id:
gpg --armor --export-secret-keys <GPG_PUBLIC_KEY_ID> | pbcopy
Enter your passphrase when prompted (the one you set earlier). This command will create and copy your private key in ASCII armored format to the clipboard. The text usually looks like this:
-----BEGIN PGP PRIVATE KEY BLOCK-----

.....some ASCII armored data...
-----END PGP PRIVATE KEY BLOCK-----
Next, paste the copied ASCII armored key text into the following command, replacing only<ASCII_FORMATTED_DATA> with the copied text:
echo "<ASCII_FORMATTED_DATA>" | gpg --dearmor > ~/secring.gpg
This command will create a GPG keyring file named secring.gpg in your home directory. You can verify the creation of this file by running the following command:
ls ~/secring.gpg
This step is necessary to convert the ASCII armored private key into a format that can be easily managed by GPG.
Next, add the amazing gradle-maven-publish-plugin plugin by Niklas Baudy to your build.gradle.kts file in the math-lib module and sync:
plugins {
  id("com.vanniktech.maven.publish") version "0.28.0"
}
This easy to use Gradle plugin creates a publish task to automatically upload all of your Kotlin multiplatform library artifacts to any Maven instance. Next, create a gradle.properties file in your root project if one doesn’t already exist and add the following properties:
mavenCentralUsername=<YOUR_CENTRAL_SONATYPE_TOKEN_USERNAME>
mavenCentralPassword=<YOUR_CENTRAL_SONATYPE_TOKEN_PASSWORD>
signing.keyId=<GPG_PUBLIC_KEY_ID>
signing.password=<GPG_PASSPHRASE>
signing.secretKeyRingFile=<HOME>/secring.gpg
mavenCentralUsernameandmavenCentralPassword: Your Username and Password token credentials generated on Sonatype Central.signing.keyId: The ID of your GPG Public Key(last 8 characters).signing.password: The passphrase used to unlock your GPG private key.signing.secretKeyRingFile: The file path to your GPG secret keyring, which contains your private key. Replace <HOME> with your actual home directory. To find your home directory, execute the following command:echo $HOME.
It’s worth noting that, similar to the local.properties file, the gradle.properties file should ideally never be committed to version control and should remain private to each developer’s environment.
The next step to enable publishing to Maven Central is to configure your POM by adding the following block to your math-lib/build.gradle.kts, replacing all the uppercase values in brackets with yours:
| mavenPublishing { | |
| // Define coordinates for the published artifact | |
| coordinates( | |
| groupId = "<YOUR_SONATYPE_CENTRAL_NAMESPACE>", | |
| artifactId = "math-lib", | |
| version = "1.0.0" | |
| ) | |
| // Configure POM metadata for the published artifact | |
| pom { | |
| name.set("Math KMP Library") | |
| description.set("Sample Kotlin MultiPlatform Library Test") | |
| inceptionYear.set("2024") | |
| url.set("https://github.com/<GITHUB_USER_NAME>/MathLibGuide") | |
| licenses { | |
| license { | |
| name.set("MIT") | |
| url.set("https://opensource.org/licenses/MIT") | |
| } | |
| } | |
| // Specify developers information | |
| developers { | |
| developer { | |
| id.set("<GITHUB_USER_NAME>") | |
| name.set("<GITHUB_ACTUAL_NAME>") | |
| email.set("<GITHUB_EMAIL_ADDRESS>") | |
| } | |
| } | |
| // Specify SCM information | |
| scm { | |
| url.set("https://github.com/<GITHUB_USER_NAME>/MathLibGuide") | |
| } | |
| } | |
| // Configure publishing to Maven Central | |
| publishToMavenCentral(SonatypeHost.CENTRAL_PORTAL) | |
| // Enable GPG signing for all publications | |
| signAllPublications() | |
| } |
Remember to include the import to SonatypeHost at the top of the build.gradle.ktsfile:
import com.vanniktech.maven.publish.SonatypeHost
Before we go ahead and publish, make sure your androidTarget block has a publishLibraryVariants if you’re publishing android artifacts and that your android block also uses the same namespace as your Sonatype Central namespace. Also make sure the name of the ios framework has the same name as the library module, in this case math-lib:
kotlin {
    androidTarget {
        compilations.all {
            kotlinOptions {
                jvmTarget = "1.8"
            }
        }
        publishLibraryVariants("release", "debug")
    }

    listOf(
        iosX64(),
        iosArm64(),
        iosSimulatorArm64()
    ).forEach {
        it.binaries.framework {
            baseName = "math-lib"
            isStatic = true
        }
    }

    sourceSets {
        commonMain.dependencies {
            //put your multiplatform dependencies here
        }
        commonTest.dependencies {
            implementation(libs.kotlin.test)
        }
    }
}

android {
    namespace = "io.github.<GITHUB_USER_NAME>"
    compileSdk = 34
    defaultConfig {
        minSdk = 28
    }
    compileOptions {
        sourceCompatibility = JavaVersion.VERSION_1_8
        targetCompatibility = JavaVersion.VERSION_1_8
    }
}
Now, it’s time to publish your Kotlin Multiplatform artifacts to Maven Central. Open your terminal in the Android Studio IDE, and enter the following command:
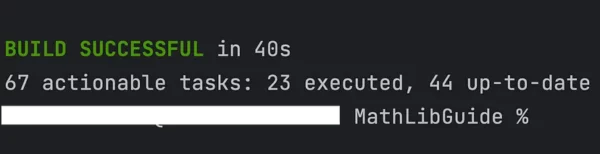
./gradlew publishAndReleaseToMavenCentral --no-configuration-cache
This command triggers the Gradle task to publish and release your artifacts to Maven Central. The --no-configuration-cache flag ensures that Gradle does not use any cached configurations, which can help prevent potential issues during the publishing process. Once the command is executed, Gradle will handle the necessary steps to upload your artifacts to Maven Central. Keep an eye on the terminal for any progress updates or error messages. Hopefully it succeeds!
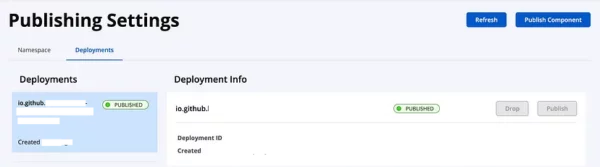
After the Gradle command completes successfully, you can verify the status of your deployment by following these steps:
- Click on your profile icon located at the top-right corner of the page on central.sonatype.com.
- Select View Deployments from the menu.
After publishing the library, you can easily access it in your project by adding the following dependency:
implementation("io.github.<GITHUB_USER_NAME>:math-lib:1.0.0")
If you’re wondering about CI/CD, fear not! Platforms like GitHub Actions allow us to automate the entire process outlined above using a workflow file. Let’s briefly look at how to set this up.
Begin by creating a new GitHub repository for your sample project. Then, navigate to the repository settings by clicking on Settings > Secrets and variables > Actions:
![]()
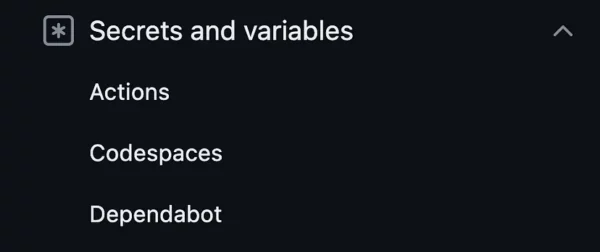
Next, create the following secrets. These variables are crucial for securely authenticating and signing your artifacts during the publishing process:
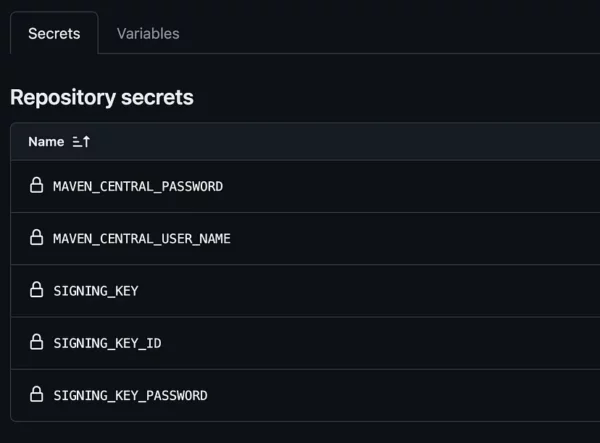
MAVEN_CENTRAL_USER_NAMEandMAVEN_CENTRAL_PASSWORD: Your Username and Password token credentials generated on Sonatype Central.SIGNING_KEY_ID: The ID of your GPG Public Key(last 8 characters).SIGNING_KEY_PASSWORD: The passphrase used to unlock your GPG private key.SIGNING_KEY: This value should be in the ASCII armored text format of the key obtained during the GPG setup process. You can generate this again by running:gpg --armor --export-secret-keys<PUBLIC_KEY_ID>| pbcopy.
Next, create a directory .github/workflows/ in the root of your project, then create a file in this directory namedpublish.yml with the following contents:
| name: Publish Artifacts | |
| on: | |
| workflow_dispatch: | |
| jobs: | |
| build: | |
| name: Build | |
| runs-on: macos-latest | |
| steps: | |
| - name: Checkout code | |
| uses: actions/checkout@v4 | |
| - name: Setup Java | |
| uses: actions/setup-java@v4 | |
| with: | |
| distribution: 'zulu' | |
| java-version: '17' | |
| - name: Install GPG | |
| env: | |
| SIGNING_KEY: ${{ secrets.SIGNING_KEY }} | |
| run: | | |
| brew install gpg | |
| echo "$SIGNING_KEY" | gpg --dearmor > ${HOME}/secring.gpg | |
| - name: Setup Gradle | |
| uses: gradle/actions/setup-gradle@v3 | |
| - name: Add Gradle Properties | |
| env: | |
| MAVEN_CENTRAL_USER_NAME: ${{ secrets.MAVEN_CENTRAL_USER_NAME }} | |
| MAVEN_CENTRAL_PASSWORD: ${{ secrets.MAVEN_CENTRAL_PASSWORD }} | |
| SIGNING_KEY_ID: ${{ secrets.SIGNING_KEY_ID }} | |
| SIGNING_KEY_PASSWORD: ${{ secrets.SIGNING_KEY_PASSWORD }} | |
| run: | | |
| echo "mavenCentralUsername=${MAVEN_CENTRAL_USER_NAME}" >> gradle.properties | |
| echo "mavenCentralPassword=${MAVEN_CENTRAL_PASSWORD}" >> gradle.properties | |
| echo "signing.keyId=${SIGNING_KEY_ID}" >> gradle.properties | |
| echo "signing.password=${SIGNING_KEY_PASSWORD}" >> gradle.properties | |
| echo "signing.secretKeyRingFile=${HOME}/secring.gpg" >> gradle.properties | |
| - name: Setup Xcode | |
| uses: maxim-lobanov/setup-xcode@v1 | |
| with: | |
| xcode-version: latest-stable | |
| - name: Publish To Maven Central | |
| run: | | |
| ./gradlew publishAndReleaseToMavenCentral --no-configuration-cache |
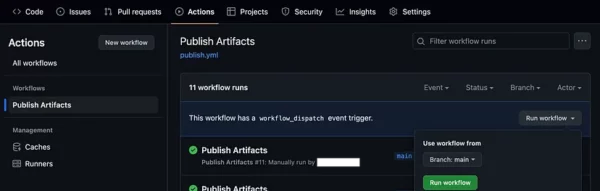
Once you’ve added the publish.yml file to the .github/workflows/ directory, commit and push the changes to your GitHub repository. After pushing your changes, navigate to the Actions tab in your GitHub repository. You should see the newly created workflow named Publish Artifacts. If the workflow hasn’t started automatically, you can manually trigger the workflow by clicking on Run workflow.
Congratulations, you’ve successfully learned how to publish your Kotlin Multiplatform artifacts to Maven Central via Sonatype Central, a crucial step in sharing your libraries with the wider community.
Looking to expand your knowledge further? Stay tuned for an upcoming article on publishing private artifacts via GitHubPackages, where we’ll explore the process of securely sharing your libraries within restricted environments.
Happy coding!
Special thanks to Niklas Baudy, Gabriel Ittner and Denis Brandi for taking the time to review this article.
This article is previously published on proandroiddev.com


