Any messaging app uses emojis abundantly. But how do you create an emoji keyboard on your own?
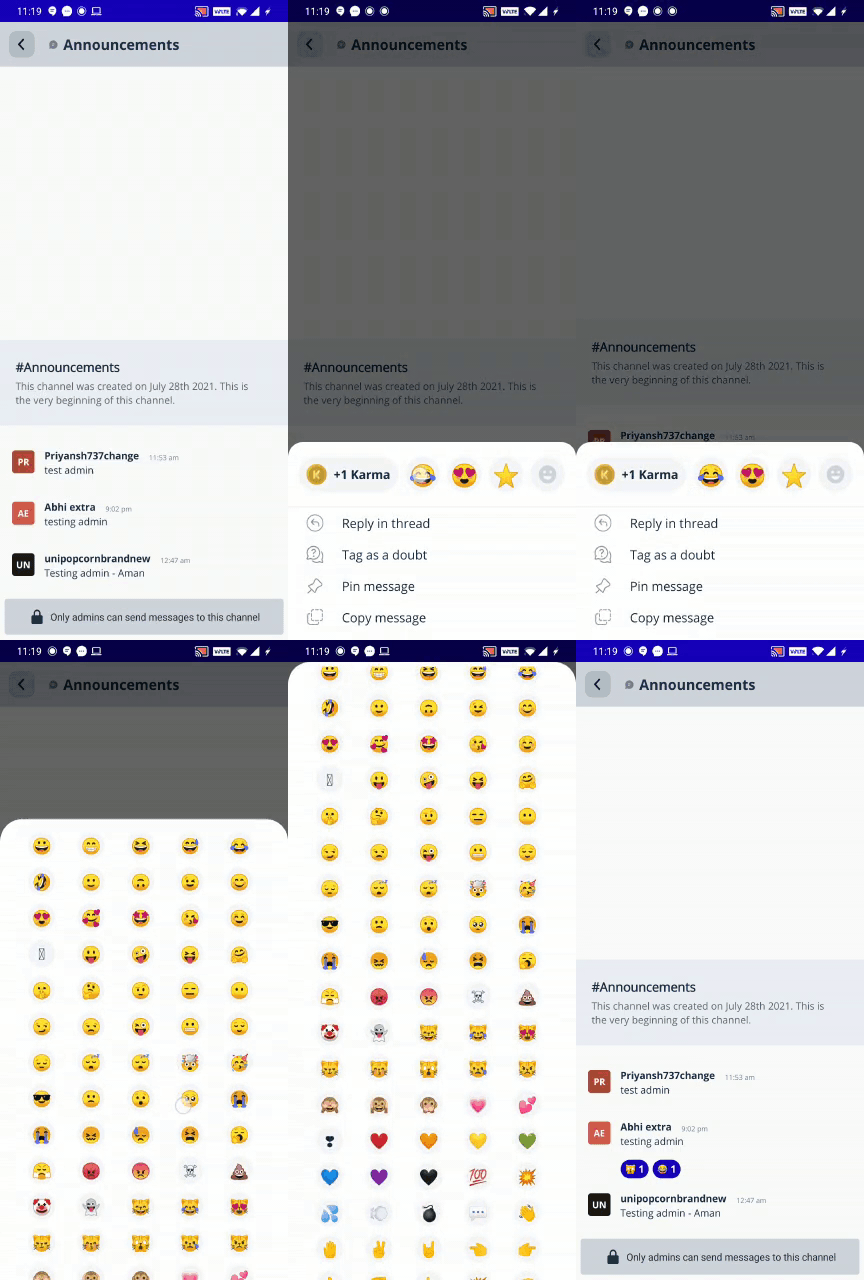
In this blog, we will learn how we can create our own basic emoji keyboard, and also render the reactions for a user just like Slack does.
Let’s start with the most basic question first. How to render emojis in Android.
The answer to this question is by using the EmojiCompat library from Google.
The
EmojiCompat support library aims to keep Android devices up to date with the latest emoji. It prevents your app from showing missing emoji characters in the form of ☐, which indicates that your device does not have a font to display the text. By using theEmojiCompat support library, your app users do not need to wait for Android OS updates to get the latest emoji.
This is a very clear explanation of the EmojiCompat library right from the Android Documentation. We will be using the same to show emojis in our application.
Setup the Library
First, you need to add the dependency for EmojiCompat and add it to the app-level build.gradle file. You can get the dependency here.
After syncing the project, you need to create an application class if not created already, and just add the following line in the onCreate method.
EmojiCompat.init(new BundledEmojiCompatConfig(this));
The above line initializes the library as soon as the application fires up, and keeps it throughout the application lifecycle.
And that is it, that is all you need to do to set up the library in your application. You will now be able to see the emojis in your application.
Now let’s see how we can create our own keyboard.
Creating our own keyboard
To show the keyboard, I will be using a famous library for bottom sheets. You can do this differently according to your use case.
This is how our final result would look like

We will be showing the emojis inside a RecyclerView. We won’t be looking at the code to set up the RecyclerView, but directly look into the code inside the RecyclerView adapter.
We first start by creating a list of HTML codes for emojis. You can find the list I created here. This list is not exhaustive, and you can add even more emojis here.
After we have the list and the basic code for the adapter, we will put emojis to TextView, yes just TextView.
Job Offers
Inside the ViewHolder of your RecyclerView adapter, simply use this line to show your emojis.
emojiTextView.text = EmojiCompat.get().process(Html.fromHtml(unicode))
unicode is the corresponding HTML code for the emoji. unicode is of type String.
Html.fromHtml(unicode)Returns displayable styled text from the provided HTML string with the legacy flags
And EmojiCompat processes this styled text as Emoji to put in the TextView.
This will create a RecyclerView for your emojis. Now we will see how we can save these emojis in our database on click.
Adding Clicks to Emojis
Inside your ViewHolder, add the following line to set the click listener to your Emoji view
itemEmoji.setOnClickListener {
    listener.emojiClicked(unicode)
}
emojiClicked is an interface method, which takes in a string as an argument.
We can simply store the string in our database, as this String is directly usable by Html.fromHtml to help render the Emoji.
You can then use these saved emoji strings to show reactions to the messages in your application.
override fun emojiClicked(unicode: String) {
    // Add code to store in your database
    // You can store the string directly
}
Well, this is it, this is how we create our own emoji keyboard.
In this blog, we saw how we can create a simple Emoji Keyboard, and store these emoji reactions in our database.


