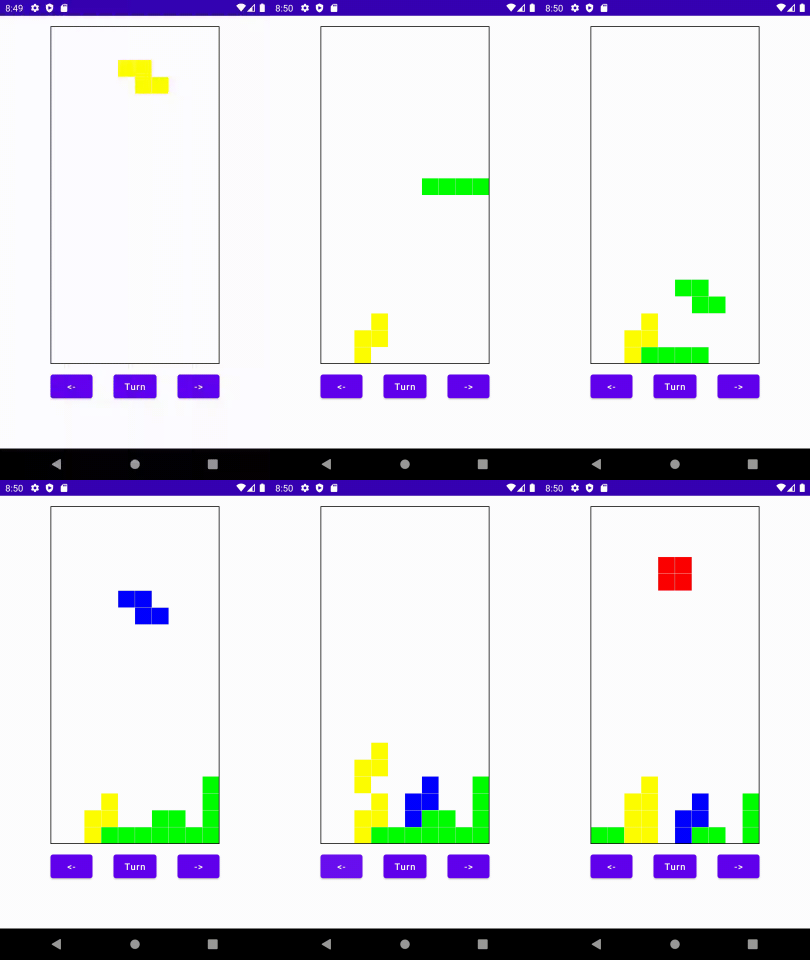
Disclaimer: In this article I will not share any of the operating logic of the Tetris® game. Even if they would be my reproduction based only on the game experience, I want to avoid sharing potentially copyrighted material. Furthermore, the purpose of this article is to show how thanks to Jetpack Compose it is possible to recreate small games and not the game of Tetris® itself.
The name Tetris® is owned by The Tetris Company, Inc.
When Jetpack Compose was released I started using it in small projects to discover its potential.
Over the last few days I have been focusing on the use of Canvases. While searching for an example project, to dig into Compose’s ability to redesign the scene based on a change of state, I stumbled upon the idea of creating a small game. That is why I’ve decided to replicate Tetris®!
Behind the mask
Tetris® is a game that takes place on a rectangular field divided into square blocks and is generally 20 blocks high and 10 blocks wide.
So, to represent the game state, I’ve selected a simple 20×10 matrix of integers. In particular, since each matrix cell can be occupied by a box, and each box can have different colors, I’ve decided to represent this cases as follows: an empty cell is defined by a 0 value, whereas each value greater than 0 indicates an occupied cell and the box color.
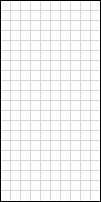
This is the playing field, in this state the matrix has all the cells valued at 0.
Paint it black
So the general concept is that while the logic relating to the game will update the matrix representing the position of the Compose blocks, you will only have to deal with drawing the playing field and its blocks on the screen.
To do this we can use the Canvas:
Canvas(
    modifier = Modifier
) {
    // this: DrawScope
}
This component allows us to draw what we want on the screen, from simple points to more complex geometric figures.
What we want to draw must be written in the lambda that we pass to the Canvas, inside the lambda we have access from the this reference to an instance of DrawScope on which we have access to some methods that we can use to draw.
Two examples of these methods are drawLine and drawRect.
| fun drawLine( | |
| color: Color, | |
| start: Offset, | |
| end: Offset, | |
| strokeWidth: Float = Stroke.HairlineWidth, | |
| cap: StrokeCap = Stroke.DefaultCap, | |
| pathEffect: PathEffect? = null, | |
| /*FloatRange(from = 0.0, to = 1.0)*/ | |
| alpha: Float = 1.0f, | |
| colorFilter: ColorFilter? = null, | |
| blendMode: BlendMode = DefaultBlendMode | |
| ) | |
| fun drawRect( | |
| color: Color, | |
| topLeft: Offset = Offset.Zero, | |
| size: Size = this.size.offsetSize(topLeft), | |
| /*@FloatRange(from = 0.0, to = 1.0)*/ | |
| alpha: Float = 1.0f, | |
| style: DrawStyle = Fill, | |
| colorFilter: ColorFilter? = null, | |
| blendMode: BlendMode = DefaultBlendMode | |
| ) |
In our case we will need to use only four parameters of the method:
- color
- topLeft
- size
- style
The color field expresses the color of what we are going to draw, while topLeft expresses the point from which to start drawing.
Size obviously determines the size of the rectangle we are going to draw, while style will determine the style of the drawing.
Let’s start with a simple red square
| @Preview | |
| @Composable | |
| fun DrawSquare() { | |
| Canvas(modifier = Modifier.size(200.dp)) { | |
| drawRect( | |
| color = Color.Red, | |
| size = size | |
| ) | |
| } | |
| } |
We note that from the DrawScope we can also access the dimensions of the Canvas and we can use it to size the square so that it occupies the entire space of the Canvas.
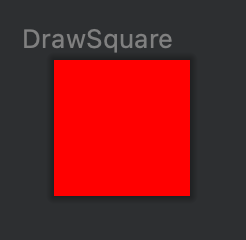
Let’s now try to draw two squares side by side.
| @Preview | |
| @Composable | |
| fun DrawSquare() { | |
| Canvas( | |
| modifier = Modifier | |
| .height(100.dp) | |
| .width(200.dp) | |
| ) { | |
| drawRect( | |
| color = Color.Red, | |
| size = Size(width = size.height, height = size.height), | |
| topLeft = Offset(x = 0f, y = 0f) | |
| ) | |
| drawRect( | |
| color = Color.Red, | |
| size = Size(width = size.height, height = size.height), | |
| topLeft = Offset(x = size.height, y = 0f) | |
| ) | |
| } | |
| } |
As you can see, we doubled the width of the canvas and called the drawRectmethod twice, to position the two squares we use the topLeft parameter. In the case of the first square we start the drawing from the point x = 0 and y = 0, for the second square instead we start from y = 0 but we have to move on the x axis by the length of the side of the first square drawn.
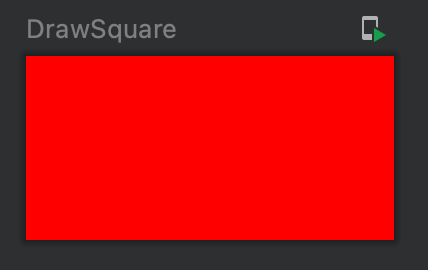
The edges of the two squares are not distinguishable because they have the same color, so let’s draw the edges.
| @Preview | |
| @Composable | |
| fun DrawSquare() { | |
| Canvas( | |
| modifier = Modifier | |
| .height(100.dp) | |
| .width(200.dp) | |
| ) { | |
| drawRect( | |
| color = Color.Red, | |
| size = Size(width = size.height, height = size.height), | |
| topLeft = Offset(x = 0f, y = 0f) | |
| ) | |
| drawRect( | |
| color = Color.Black, | |
| size = Size(width = size.height, height = size.height), | |
| topLeft = Offset(x = 0f, y = 0f), | |
| style = Stroke(width = 5f) | |
| ) | |
| drawRect( | |
| color = Color.Red, | |
| size = Size(width = size.height, height = size.height), | |
| topLeft = Offset(x = size.height, y = 0f) | |
| ) | |
| drawRect( | |
| color = Color.Black, | |
| size = Size(width = size.height, height = size.height), | |
| topLeft = Offset(x = size.height, y = 0f), | |
| style = Stroke(width = 5f) | |
| ) | |
| } | |
| } |
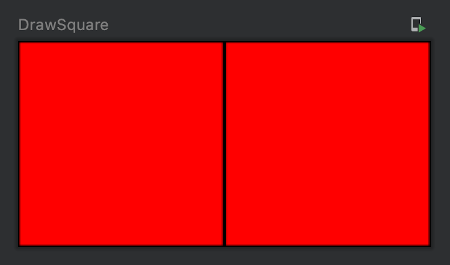
To draw the edges of the squares we called the drawRect method again but this time passing an instance of Stroke to the style parameter, in this way an empty rectangle is drawn whose edges have the thickness equal to the value of width passed to Stroke.
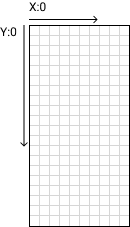
A small note, the coordinate system used to draw provides that the x axis moves from left to right while the y axis from top to bottom.
Let’s play
Now we know how to draw the squares that will form the basis of the Tetris®, so let’s create a simple extension that allows us to draw a square with edges.
| fun DrawScope.drawGameElement( | |
| squareColor : Color, | |
| borderColor : Color, | |
| offset : Offset, | |
| size : Size | |
| ) { | |
| drawRect( | |
| squareColor, | |
| topLeft = offset, | |
| size = size | |
| ) | |
| drawRect( | |
| borderColor, | |
| topLeft = offset, | |
| size = size, | |
| style = Stroke(width = 1f) | |
| ) | |
| } |
The last step is to create a canvas that given an array of integers you call the drawGameElement extension with an offset determined by the indices of the individual cells of the array.
| val state : State<Array<IntArray>> = gameViewModel.state.collectAsState() | |
| Canvas( | |
| modifier = Modifier | |
| .fillMaxHeight(0.8f) | |
| .aspectRatio(0.5f) | |
| .border(1.dp, Color.Black) | |
| ) { | |
| val squareDim = size.height / state.value.size | |
| state.value.forEachIndexed { y, it -> | |
| it.forEachIndexed { x, value -> | |
| if (value > 0) { | |
| drawGameElement( | |
| squareColor = when (value) { | |
| 1 -> Color.Red | |
| 2 -> Color.Blue | |
| 3 -> Color.Yellow | |
| 4 -> Color.Green | |
| else -> Color.Red | |
| }, | |
| borderColor = Color.White, | |
| offset = Offset( | |
| x = (x) * squareDim, | |
| y = (y) * squareDim | |
| ), | |
| size = Size( | |
| width = squareDim, | |
| height = squareDim | |
| ) | |
| ) | |
| } | |
| } | |
| } | |
| } |
Job Offers
Let’s break down the code:
The matrix representing the current state of the field is provided by the viewModel, each time there is a change the viewModel will update the matrix and the canvas will be recomposed.
val state : State<Array<IntArray>> = gameViewModel.state.collectAsState()
Now we need to calculate the dimensions of each single square, to do this we divide the height of the canvas by the number of rows in the matrix. Since we want to draw squares their height will be equal to their width so let’s avoid dividing the canvas width by the number of columns but keep in mind that we must make sure that the ratio between number of rows and number of columns must be equal to that between the height and width of the canvas.
val squareDim = size.height / state.value.size
After that, we need to call the drawGameElement extension for each cell of the matrix with value greater than 0, so we iterate first for each row and for each row we iterate for each column, we check that the cell value is greater than zero and if it is we call drawGameElement.
state.value.forEachIndexed { y, it ->
    it.forEachIndexed { x, value ->
        if (value > 0) {
            drawGameElement(
                    ...
            )
        }
    }
}
The last thing we have to do is define the color, offset and size of the squares.
For the color we simply associate a color to a cell value.
squareColor = when (value) {
    1 -> Color.Red
    2 -> Color.Blue
    3 -> Color.Yellow
    4 -> Color.Green
    else -> Color.Red
}
For the size we use the previously calculated size.
size = Size(
    width = squareDim,
    height = squareDim
)
Finally we have to calculate the offset of each square, to do this just multiply the index on the x axis and the index on the y axis of each cell by the length of the side of the square.
offset = Offset(
    x = (x) * squareDim,
    y = (y) * squareDim
)
I leave you an example of how it could be the ViewModel that updates the state of the composable, all the logic of the game is in the Field class.
| @HiltViewModel | |
| class GameViewModel @Inject constructor() : ViewModel() { | |
| private val field = Field() | |
| private val stateFlow = MutableStateFlow(field.getActualField()) | |
| val state : StateFlow<Array<IntArray>> = stateFlow | |
| init { | |
| viewModelScope.launch { | |
| while (!field.isGameEnded) { | |
| delay(500) | |
| // The tick method contains all the | |
| // operating logic of the game. | |
| field.tick() | |
| stateFlow.emit(field.getActualField()) | |
| } | |
| } | |
| } | |
| fun moveRight() { | |
| viewModelScope.launch { | |
| field.moveRight() | |
| stateFlow.emit(field.getActualField()) | |
| } | |
| } | |
| fun moveLeft() { | |
| viewModelScope.launch { | |
| field.moveLeft() | |
| stateFlow.emit(field.getActualField()) | |
| } | |
| } | |
| fun turn() { | |
| viewModelScope.launch { | |
| field.turnPiece() | |
| stateFlow.emit(field.getActualField()) | |
| } | |
| } | |
| } |


