

Snapwhat?
Snapshot testing (or screenshot testing, I will be using both terms interchangeably) is a type of testing which helps us ensure our UI does not change unintentionally.
A snapshot test consists of 2 steps:
- Record
- Verify
Record
When we are done building a piece of UI, whether it is a whole screen or just a button, we write our snapshot test and record. A screenshot is saved in our source code and it defines the baseline for our UI.
Verify
Most likely we will touch some code at a later point which might or might not change the UI from our original screenshot.
When verifying, the snapshot test takes a new screenshot and compares the two images. If they are not identical, our snapshot test fails.
“But what if I meant to change the UI? Won’t that break my snapshot test?”
Yes, it will. When intentionally changing the UI we just re-record.
As a nice bonus our pull request will show the before and after look, which makes our reviewing buddies happy!
 Who would have thought that designers could change their mind?
Let’s give it a (snap)shot
In my experience snapshot testing has been quite popular among iOS developers and rarely spoken about by Android developers. I haven’t worked on any project before where it was done for Android. One reason could be that for iOS the tooling is fantastic and it is easy to get started. (My colleagues use https://github.com/pointfreeco/swift-snapshot-testing). For Android, not so much, though I think things are improving.
Either way we got inspired by our iOS colleagues and wanted to try it out for ourselves. We were also starting to dabble with Jetpack Compose and thought it would be nice to start snapshot testing all our new Compose UI components.
The first step was finding the right library. Out of the few libraries we found only one of them mentioned Compose, so that was an easy choice:
https://github.com/pedrovgs/Shot
For the basics of how to write a screenshot test for Jetpack Compose check out the blog post from the author of the library here:
https://blog.karumi.com/jetpack-compose-screenshot-testing-with-shot/
Since this blog post already covers the basics I will focus on additional steps we’ve taken:
- Running the snapshot tests as part of CI/CD
- Dealing with screenshots recorded on different emulator architectures
- Making the tests fast and easy to write
Continuous Snapping
In our project we use Bitrise for CI/CD, but our approach should work for other setups as well. With Shot, you run the screenshot tests through a gradle task ./gradlew internalDebugExecuteScreenshotTests where internalDebug is your build variant.
If you, like us, have some non-screenshot UI tests already, you need to make things a bit more specific. We do this by using a naming convention, naming all our screenshot tests *ScreenshotTest and running the gradle command like this:
./gradlew internalDebugExecuteScreenshots -Pandroid.testIntrumentationRunnerArguments.tests_regex=.*ScreenshotTest.*
When you run locally, this command will run on whichever emulator or device you have running. When running as part of your CI/CD, you need to create and run the emulator first. In Bitrise you have a nice AVD manager step to do this:

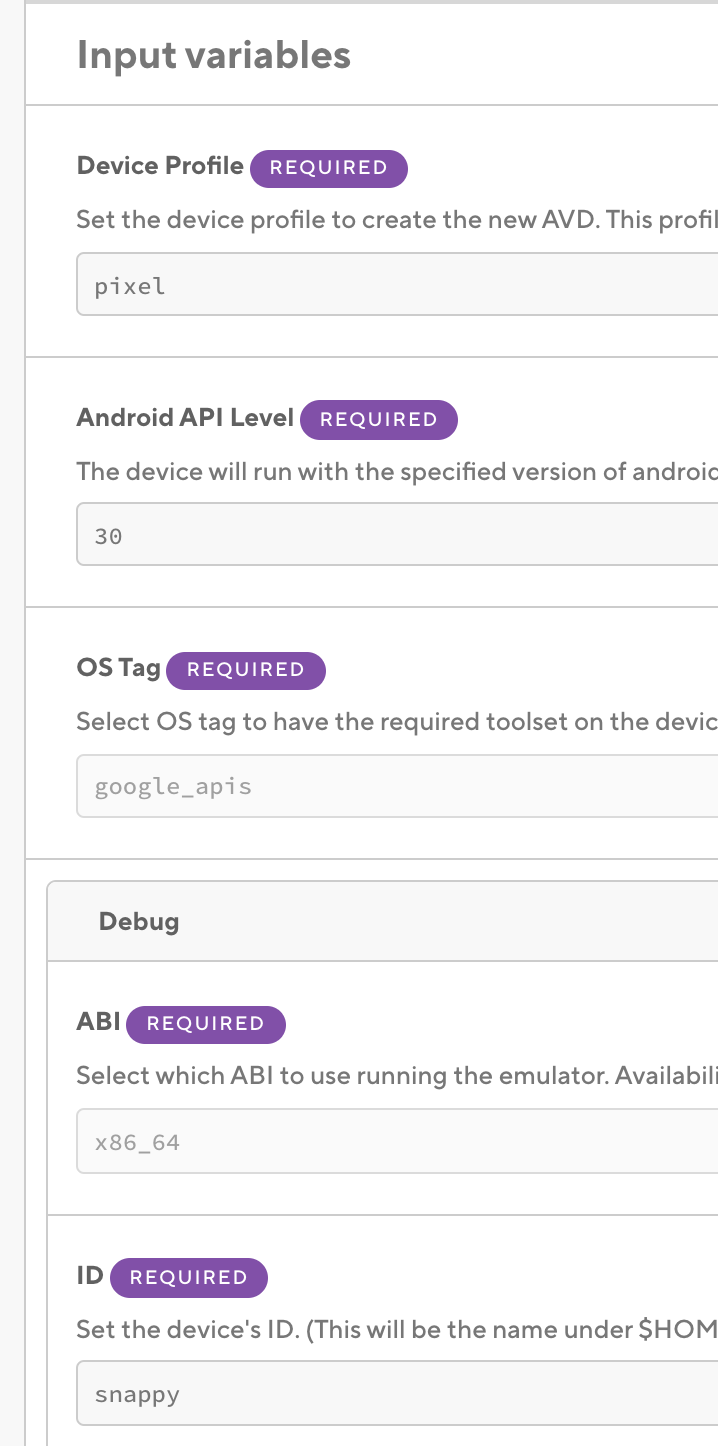
When we record screenshots locally it is important to use the same type of emulator, so we also have a script for creating our emulator, appropriately named snappy. (This could also be used in other CI/CDs without the AVD Manager step):
| if [ ! -d "$ANDROID_HOME" ] ; then | |
| echo "Cannot find \$ANDROID_HOME." | |
| exit | |
| fi | |
| if [ ! -d "$ANDROID_HOME/cmdline-tools" ]; then | |
| echo "Cannot find Android SDK Command-line Tools. Install them via SDK Manager > SDK Tools." | |
| exit | |
| fi | |
| if [[ $(uname -m) == 'arm64' ]]; then | |
| ARCHITECTURE='arm64-v8a' | |
| else | |
| ARCHITECTURE=$(uname -m) | |
| fi | |
| echo "Creating emulator with architecture: $ARCHITECTURE" | |
| "$ANDROID_HOME/cmdline-tools/latest/bin/avdmanager" "--verbose" "create" "avd" "--force" "--name" "snappy" "--device" "pixel" "--package" "system-images;android-30;google_apis;$ARCHITECTURE" "--tag" "google_apis" "--abi" "$ARCHITECTURE" "--sdcard" "512M" |
OUR VIDEO RECOMMENDATION


Jobs
This script has grown a bit over time to support my colleague getting a new Mac with Apple silicon (more on that later), but the important part happens on the last line. It creates an emulator with the same specs as the one from Bitrise.
After the AVD Manager step in Bitrise you have to wait for the emulator to be ready before running your screenshot tests. It took me a while to figure out why it was not working, because the error message you get is not very clear.
Of course there is a step for this:
 Patience is a virtue
Locally we run this script for running (verifying) the screenshot tests:
| ./scripts/run-emulator-for-snapshot-testing.sh & | |
| ./gradlew internalDebugExecuteScreenshotTests -Pandroid.testInstrumentationRunnerArguments.tests_regex=.*ScreenshotTest.* | |
| adb -s emulator-5554 emu kill |
The script for recording screenshots is very similar but with the record parameter:
| ./scripts/run-emulator-for-snapshot-testing.sh & | |
| ./gradlew internalDebugExecuteScreenshotTests -Precord -Pandroid.testInstrumentationRunnerArguments.tests_regex=.*ScreenshotTest.* | |
| adb -s emulator-5554 emu kill |
They both use this script for running the emulator:
| if [ ! -d "$ANDROID_HOME" ] ; then | |
| echo "Cannot find \$ANDROID_HOME." | |
| exit | |
| fi | |
| "$ANDROID_HOME/emulator/emulator" "@snappy" "-verbose" "-no-window" "-no-audio" "-no-boot-anim" "-netdelay" "none" "-gpu" "swiftshader_indirect" "-camera-back" "none" "-camera-front" "none" |
I have included a line to kill the emulator when the tests are done. Without this you would get a new emulator running every time you run the script (and the tests would run on all of them simultaneously).
We do not currently pay for the fastest machines in Bitrise, so unfortunately the pipeline is too slow (25–30 minutes) to run it for every pull request. Running the snapshots themselves is not too bad, but creating and starting the emulator is quite slow. When running locally, if you have created and run the emulator before it just takes 1–2 minutes to run our ~50 tests and this number is not going up a lot when adding new tests.
Instead of every pull request, we run the pipeline nightly and have made it post to a Teams channel when it fails. Not ideal, but good enough:
 Maybe I should be fixing our snapshot tests instead of writing blog posts?
Not all snaps are created equal
When comparing screenshots taken on emulators with different architectures there could be differences that are not visible to the human eye, but will still fail our snapshot test. My colleague’s new Apple silicon Mac cannot run an x86_64 emulator like my older Mac or Bitrise’s Ubuntu Docker image can.
Our sub-optimal solution to this is to add some tolerance to our snapshot tests. We let the tests succeed if the difference between the two screenshots are less than 2 %.
| shot { | |
| tolerance = 2 // 2% tolerance because screenshots look slightly different on arm64-v8a vs x86_64 emulators | |
| } |
This might lead to small unintended changes in the UI going undetected by the tests. This can be a real problem and we have already had a few cases where the screenshot tests did not catch a change in the UI:
- Changing one icon on a whole screen
- Slightly changing a margin
With the snap of a finger
Writing snapshot tests can get tedious and feel repetitive, so we want to make them easy to write and not feel like a chore.
With Jetpack Compose we regularly create previews of our components showing different configurations.
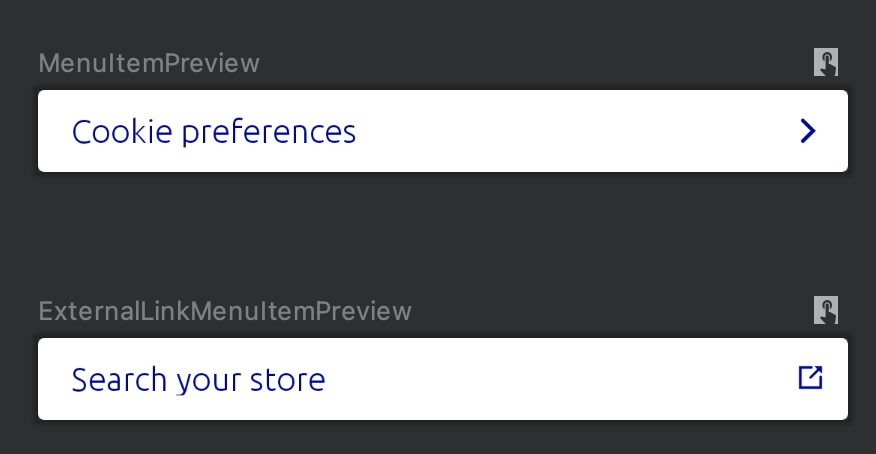
When creating snapshot tests we kind of want the same thing.
So we started creating snapshot tests of our previews:
With the philosophy of making a screenshot test of every preview, we can see that the screenshot tests will all look very similar.
For now we have created a live template in Android Studio to help write them faster.
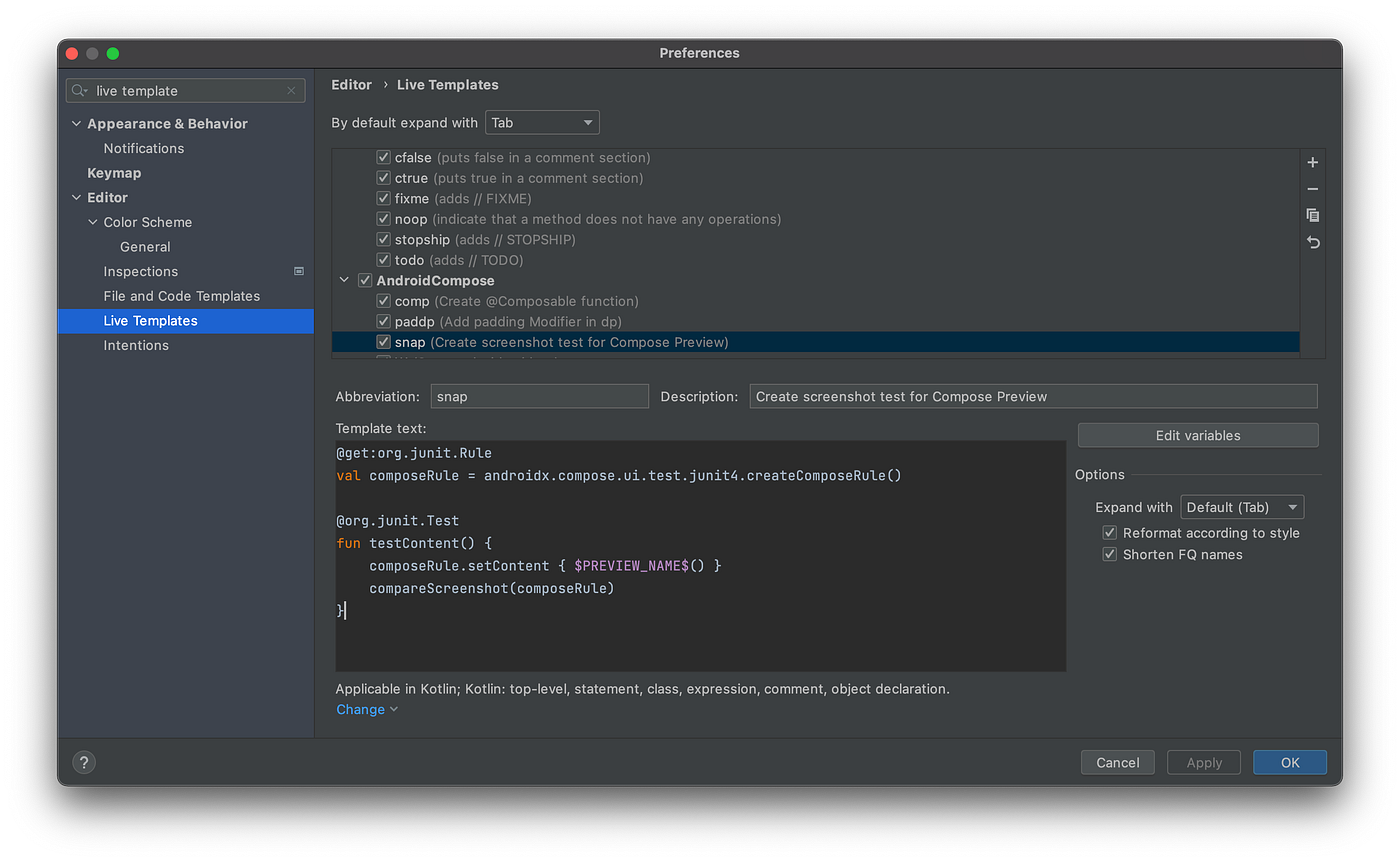
| @get:org.junit.Rule | |
| val composeRule = androidx.compose.ui.test.junit4.createComposeRule() | |
| @org.junit.Test | |
| fun testContent() { | |
| composeRule.setContent { $PREVIEW_NAME$() } | |
| compareScreenshot(composeRule) | |
| } |
Just write snap, hit tab and write the name of your preview. This is faster than writing them manually every time, but a further improvement could be making a script that generates a test for every preview annotation.
Conclusion
Snapshot testing is still a bit more cumbersome to set up for Android than iOS, and the library we use does not have great integration with Android Studio. You can’t easily run/record a single screenshot test with the play button, you have to use the gradle task.
 The Shot verification html report shows you when there are changes in your UI
But for me these benefits still make it worth it:
- We can be certain that our UI does not change unintentionally
- Our pull requests get nice previews of the new UI we made and the UI changes we did “for free”
- We can stop writing the type of Espresso tests that check if all the UI elements are shown on screen
 Not gonna miss these
Please leave a comment or reach out if you want to have a “snapchat”. If you have any questions, suggestions for improvements in our own setup or need any help setting this up for your own project. Either here or on Twitter: https://twitter.com/andersullnass.
Thanks to Alex from the Dutch Android User Group slack (https://twitter.com/alex_caskey) for a lot of help when I was setting this up originally and thanks to my colleague Cristan for working with me refining the way we do snapshot testing and for reviewing this blog post.


