To Achieve Two Layer Design Effortlessly
Introduction
Google Maps has always been one of my favorite apps. The two-layer design makes it so convenient for users to browse the map and find details at the same time. The expanding feature on the front layer makes the information flow so easily and the dragging gesture makes users feel like a magician themselves. 🙂
As an Android dev, I have been always wondering how much engineering work is behind the scenes for the magic to happen. That is probably true for the old Android XML View system. But my recent dive into Jetpack Compose changed my opinion completely, now that the backdrop implementation is given to us almost out of the box with Jetpack Compose.
My Use Case
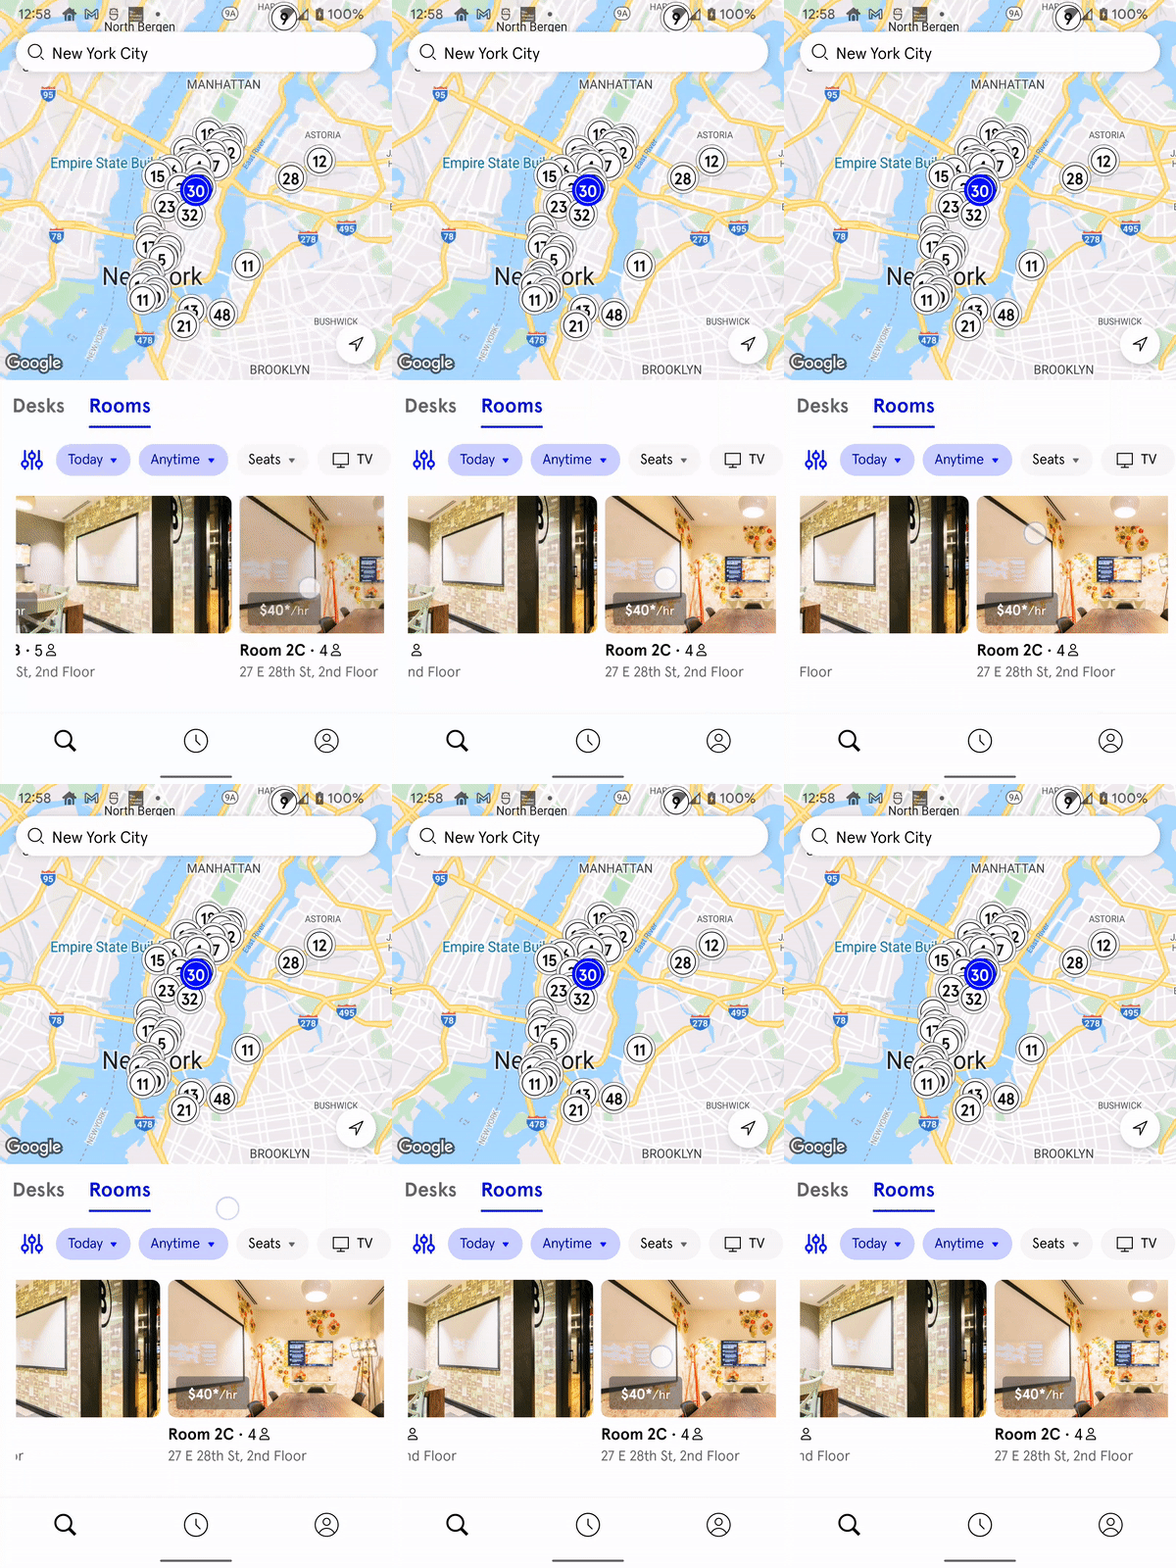
My company is a flexible workspace provider. Its app currently has the Discovery feature as the home screen, where the map browsing is on the top and the room scrolling is on the bottom. The room browsing can only support the horizontal scrolling. However, our enterprise users(part of our user base) only use one single office location, so they aren’t really interested in the map browsing. However, they all want the vertical scrolling of the room listing for easier discovery.

ONLY Horizontal Scrolling Currently
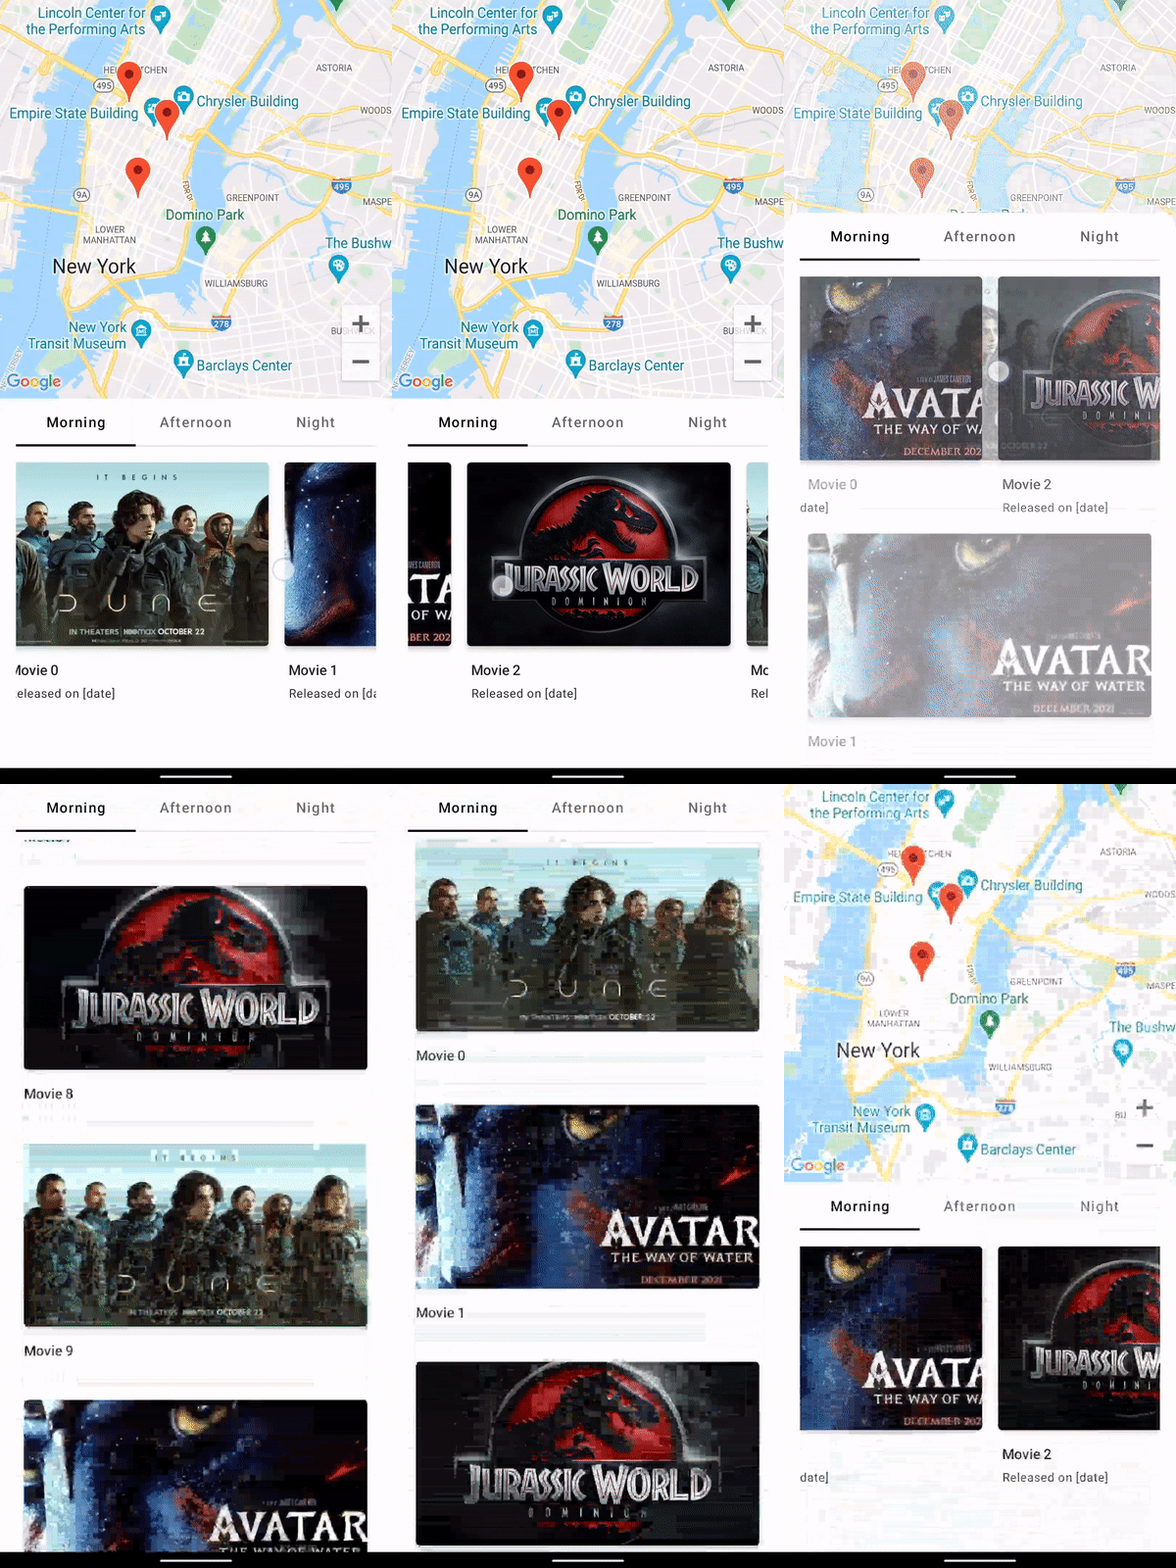
So the question is how to transition the current UI design into a full-screen vertical scrolling? Our Product and Design team asked us to do a quick prototype to explore the feasibility. Surprisingly, Jetpack Compose actually provides an out-of-box solution, called BackdropScaffold. Here is the result of the proof-of-concept. For demo purposes, I swapped the use case to Movie-Theater browsing but it is the same idea.

Prototype of 2-layer Design & Vertical Scrolling
Job Offers
Here is the source code repository for anyone interested: https://github.com/chenzhang2006/TheaterFinder
Quick Notes
It is pretty straightforward to customize the BackdropScaffold by following the reference document. But here are a few quick notes that I learned from my POC that could help speed up the learning curve a bit.
frontLayerScrimColor
This parameter not only defines the scrim color. If you pass Color.Unspecified, the “shielding” effect will be removed from the front layer in the Revealed state, so the front layer can be interacted with custom gestures. Without providing this parameter, the default behavior would “block” the front layer in the Revealedstate and any touch event would always trigger the front layer to pull up into the Concealed state.
Animations
All animations in this sample screen are around the BackdropScaffoldState. The snippet below is to drive the state updates to reveal the back layer:
| // BackdropScaffoldState to be observed by Compose Runtime | |
| val backdropState = rememberBackdropScaffoldState(BackdropValue.Concealed) | |
| //Launch coroutine to animate revealling backdrop | |
| LaunchedEffect(backdropState) { | |
| backdropState.reveal() | |
| } |
Launch Coroutine Effect to Animate Revealing Back Layer
This part is to calculate the alpha values as the state updates are observed:
| val backdropState = rememberBackdropScaffoldState(BackdropValue.Concealed) | |
| val offset by backdropState.offset | |
| val halfHeightDp = LocalConfiguration.current.screenHeightDp / 2 | |
| val halfHeightPx = with(LocalDensity.current) { halfHeightDp.dp.toPx() } | |
| //... | |
| // Current alpha for vertical list | |
| val verticalListAlpha = ((halfHeightPx - offset) / halfHeightPx).coerceIn(0f..1f) | |
| // Current alpha for horizontal list | |
| val horizontalListAlpha = (offset / halfHeightPx).coerceIn(0f..1f) |
Calculate alphas based on backdropState.offset
Maps for Compose
Accompanist for Compose
I used this library to hide the system status bar to maximize Map layout.
Sample Source Code
End
BackdropScaffold can be applied to many other use cases where the design for browse-to-detail or list-to-sublist pattern makes sense. It is also a great example to show how powerful & productive that Jetpack Compose can be.
To learn about Jetpack Compose itself, I would love to follow up with more posts to share some of my takes along the journey. Stay tuned and happy learning!
This article was originally published on proandroiddev.com on March 31, 2022


