

Flow of the Article:
- What is BLE?
- Fundamentals of BLE.
- Building Chat App with BLE.
What is BLE?
BLE stands for Bluetooth Low Energy. Bluetooth can handle a lot of data but quickly consumes battery life. Bluetooth Low Energy is used for applications that do not need to exchange large amounts of data and can run on battery power for years at a cheaper cost. Android provides built-in platform support for Bluetooth Low Energy (BLE) in the central role and provides APIs that apps can use to discover devices, query for services, and transmit information. BLE APIs help you to communicate with BLE devices smoothly with less battery consumption.
Fundamentals of BLE
For transmitting data between BLE-enabled devices you need to follow these steps:
- Mention the required permissions in Manifest.xml.
- they must first form a channel of communication.
- Then access BluetoothAdapter and scan for available BLE devices nearby.
- Once a device is found, the capabilities of the BLE device are discovered by connecting to the GATT server on the BLE device.
- Once the connection is established transmit data.
You need to know a few terms before moving forward
Profiles:
A profile is a specification of how a device works in a particular application. A device can implement more than one profile.
Listing a few Profiles:
- Advanced Audio Distribution Profile (A2DP)
2. Generic Attribute Profile (GATT)
3. Health Device Profile (HDP)
Generic Attribute Profile (GATT):
The GATT profile is a general specification for sending and receiving short pieces of data known as “attributes” over a BLE link. Using this profile we can transmit data between BLE devices.
Characteristic:
A characteristic contains a single value and optional descriptors that describe the characteristic’s value.
Descriptor:
Descriptors are defined attributes that describe a characteristic value. They can be used to describe the characteristic’s features or to control certain behaviors of the characteristic.
Service:
Service contains a collection of characteristics.
Advertisement:
Advertisement means when a BLE peripheral device broadcasts packets to every device around it. The receiving device can then act on this information or connect to receive more information.
Building Chat App with BLE
Note: When a user pairs their device with another device using BLE, the data that’s communicated between the two devices is accessible to all apps on the user’s device.
Here is the GitHub Link
Let’s build Chat App with BLE Apis
prerequisite: you need two android devices with BLE supported.
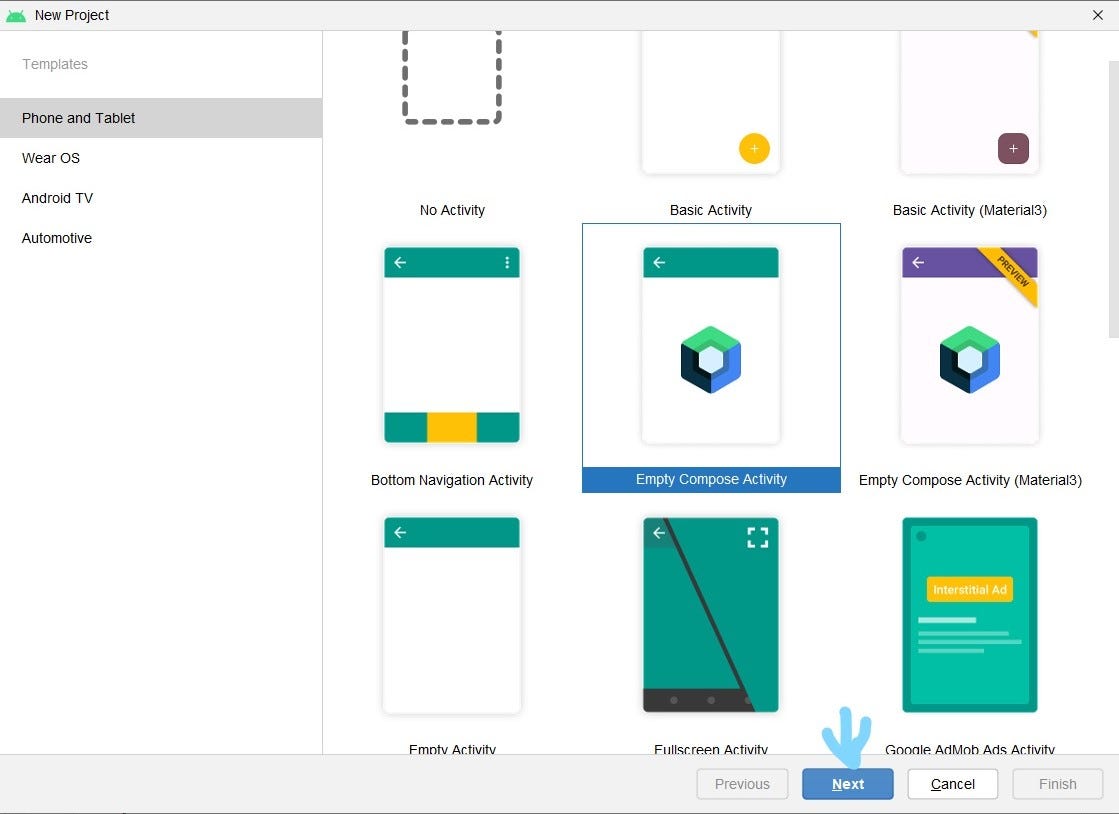
Step 1. Create an Android Project you can give any name
Step 2. First, we need to add Permissions plus we need to add ble feature which will be required.
| <uses-permission android:name="android.permission.BLUETOOTH"/> | |
| <uses-permission android:name="android.permission.BLUETOOTH_ADMIN"/> | |
| <uses-permission android:name="android.permission.ACCESS_COARSE_LOCATION" /> | |
| <uses-permission android:name="android.permission.ACCESS_FINE_LOCATION" /> | |
| <uses-permission android:name="android.permission.BLUETOOTH_CONNECT" /> | |
| <uses-permission android:name="android.permission.BLUETOOTH_SCAN" /> | |
| <uses-feature android:name="android.hardware.bluetooth_le" android:required="true"/> |
Step 3. Now, we need to ask for location permission.
for permission handling, I am using a library use this library by adding this in the app gradle file.
| implementation 'com.karumi:dexter:6.2.3' |
and now use this to ask for permission in onResume()
| override fun onStart() { | |
| super.onStart() | |
| Dexter.withContext(this) | |
| .withPermissions( | |
| Manifest.permission.ACCESS_COARSE_LOCATION, | |
| Manifest.permission.ACCESS_FINE_LOCATION | |
| ) | |
| .withListener(object : MultiplePermissionsListener { | |
| override fun onPermissionsChecked(report: MultiplePermissionsReport) { | |
| ChatServer.startServer(application, activity = this@MainActivity) | |
| viewModel.startScan() | |
| } | |
| override fun onPermissionRationaleShouldBeShown( | |
| permissions: List<PermissionRequest?>?, | |
| token: PermissionToken? | |
| ) { | |
| } | |
| }) | |
| .check() | |
| } |
Step 4. Now as you can see on Line 16 we will start the GATT server which will send data to the GATT client.
| fun startServer(app: Application, activity: ComponentActivity) { | |
| bluetoothManager = app.getSystemService(Context.BLUETOOTH_SERVICE) as BluetoothManager | |
| adapter = bluetoothManager.adapter | |
| if (!adapter.isEnabled) { | |
| _requestEnableBluetooth.value = true | |
| val takeResultListener = | |
| activity.registerForActivityResult(ActivityResultContracts.StartActivityForResult()) { result -> | |
| if (result.resultCode == -1) { | |
| Toast.makeText(activity, "Bluetooth ON", Toast.LENGTH_LONG).show() | |
| setupGattServer(app) | |
| startAdvertisement() | |
| } else { | |
| Toast.makeText(activity, "Bluetooth OFF", Toast.LENGTH_LONG).show() | |
| } | |
| } | |
| val intent = Intent(BluetoothAdapter.ACTION_REQUEST_ENABLE) | |
| takeResultListener.launch(intent) | |
| } else { | |
| _requestEnableBluetooth.value = false | |
| setupGattServer(app) | |
| startAdvertisement() | |
| } | |
| } |
OUR VIDEO RECOMMENDATION


Jobs
Here in startServer() method we get BluetoothAdapter from BluetoothManager and first we check if Bluetooth is enabled or disabled. if it is disabled then we will call Bluetooth to enable the dialog
| val intent = Intent(BluetoothAdapter.ACTION_REQUEST_ENABLE) | |
| takeResultListener.launch(intent) |
when the user enables it we will start the GATT server and then start advertising.
I will show the methods now.
| private fun setupGattServer(app: Application) { | |
| gattServerCallback = GattServerCallback() | |
| gattServer = bluetoothManager.openGattServer( | |
| app, | |
| gattServerCallback | |
| ).apply { | |
| addService(setupGattService()) | |
| } | |
| } | |
| private fun setupGattService(): BluetoothGattService { | |
| val service = BluetoothGattService(SERVICE_UUID, BluetoothGattService.SERVICE_TYPE_PRIMARY) | |
| val messageCharacteristic = BluetoothGattCharacteristic( | |
| MESSAGE_UUID, | |
| BluetoothGattCharacteristic.PROPERTY_WRITE, | |
| BluetoothGattCharacteristic.PERMISSION_WRITE | |
| ) | |
| service.addCharacteristic(messageCharacteristic) | |
| return service | |
| } | |
| private class GattServerCallback : BluetoothGattServerCallback() { | |
| override fun onConnectionStateChange(device: BluetoothDevice, status: Int, newState: Int) { | |
| super.onConnectionStateChange(device, status, newState) | |
| val isSuccess = status == BluetoothGatt.GATT_SUCCESS | |
| val isConnected = newState == BluetoothProfile.STATE_CONNECTED | |
| if (isSuccess && isConnected) { | |
| setCurrentChatConnection(device) | |
| } else { | |
| _deviceConnection.postValue(DeviceConnectionState.Disconnected) | |
| } | |
| } | |
| override fun onCharacteristicWriteRequest( | |
| device: BluetoothDevice, | |
| requestId: Int, | |
| characteristic: BluetoothGattCharacteristic, | |
| preparedWrite: Boolean, | |
| responseNeeded: Boolean, | |
| offset: Int, | |
| value: ByteArray? | |
| ) { | |
| super.onCharacteristicWriteRequest( | |
| device, | |
| requestId, | |
| characteristic, | |
| preparedWrite, | |
| responseNeeded, | |
| offset, | |
| value | |
| ) | |
| if (characteristic.uuid == MESSAGE_UUID) { | |
| gattServer?.sendResponse(device, requestId, BluetoothGatt.GATT_SUCCESS, 0, null) | |
| val message = value?.toString(Charsets.UTF_8) | |
| message?.let { | |
| _messages.postValue(Message.RemoteMessage(it)) | |
| } | |
| } | |
| } | |
| } |
So, now in this method first, I need a GATT server callback as all this process is async. In this callback, there are two methods implemented
onConnectionStateChange: this is called when any remote device is connected
onCharacteristicWriteRequest: this means a remote client has requested to write to a Local Characteristic.
Now setUpGattSerive() method we are creating a local service and adding two characteristics Message needs to have a Unique Id.
Now, let’s discuss startAdvertisement() method
| private fun startAdvertisement() { | |
| advertiser = adapter.bluetoothLeAdvertiser | |
| if (advertiseCallback == null) { | |
| advertiseCallback = DeviceAdvertiseCallback() | |
| advertiser?.startAdvertising(advertiseSettings, advertiseData, advertiseCallback) | |
| } | |
| } | |
| private class DeviceAdvertiseCallback : AdvertiseCallback() { | |
| override fun onStartFailure(errorCode: Int) { | |
| super.onStartFailure(errorCode) | |
| val errorMessage = "failed with error: $errorCode" | |
| Log.i(TAG,errorMessage) | |
| } | |
| override fun onStartSuccess(settingsInEffect: AdvertiseSettings) { | |
| super.onStartSuccess(settingsInEffect) | |
| Log.d(TAG, "successfully started") | |
| } | |
| } | |
| private fun buildAdvertiseSettings(): AdvertiseSettings { | |
| return AdvertiseSettings.Builder() | |
| .setAdvertiseMode(AdvertiseSettings.ADVERTISE_MODE_LOW_POWER) | |
| .setTimeout(0) | |
| .build() | |
| } | |
| private fun buildAdvertiseData(): AdvertiseData { | |
| val dataBuilder = AdvertiseData.Builder() | |
| .addServiceUuid(ParcelUuid(SERVICE_UUID)) | |
| .setIncludeDeviceName(true) | |
| return dataBuilder.build() | |
| } |
In this method again we will have an advertisement callback which will tell whether the advertising failed or was successful.
We have to mention two more things while starting the advertisement of this device. the advertisement setting how this advertisement will be transmitted to other devices nearby and then data to include while advertising this device. here we are advertising SERVICE_UUID and device name data included.
Step 5. Now we need to scan nearby devices for this we need a BluetoothScanner
| fun startScan() { | |
| scanFilters = buildScanFilters() | |
| scanSettings = buildScanSettings() | |
| if (!adapter.isMultipleAdvertisementSupported) { | |
| _viewState.value = DeviceScanViewState.AdvertisementNotSupported | |
| return | |
| } | |
| if (scanCallback == null) { | |
| scanner = adapter.bluetoothLeScanner | |
| _viewState.value = DeviceScanViewState.ActiveScan | |
| Handler().postDelayed({ stopScanning() }, SCAN_PERIOD) | |
| scanCallback = DeviceScanCallback() | |
| scanner?.startScan(scanFilters, scanSettings, scanCallback) | |
| } | |
| } | |
| private fun buildScanFilters(): List<ScanFilter> { | |
| val builder = ScanFilter.Builder() | |
| builder.setServiceUuid(ParcelUuid(SERVICE_UUID)) | |
| val filter = builder.build() | |
| return listOf(filter) | |
| } | |
| private fun buildScanSettings(): ScanSettings { | |
| return ScanSettings.Builder() | |
| .setScanMode(ScanSettings.SCAN_MODE_LOW_POWER) | |
| .build() | |
| } | |
| private inner class DeviceScanCallback : ScanCallback() { | |
| override fun onBatchScanResults(results: List<ScanResult>) { | |
| super.onBatchScanResults(results) | |
| for (item in results) { | |
| item.device?.let { device -> | |
| scanResults[device.address] = device | |
| } | |
| } | |
| Log.i(TAG, scanResults.toString()) | |
| _viewState.value = DeviceScanViewState.ScanResults(scanResults) | |
| } | |
| override fun onScanResult( | |
| callbackType: Int, | |
| result: ScanResult | |
| ) { | |
| super.onScanResult(callbackType, result) | |
| result.device?.let { device -> | |
| scanResults[device.address] = device | |
| } | |
| Log.i(TAG, scanResults.toString()) | |
| _viewState.value = DeviceScanViewState.ScanResults(scanResults) | |
| } | |
| override fun onScanFailed(errorCode: Int) { | |
| super.onScanFailed(errorCode) | |
| val errorMessage = "Scan failed: $errorCode" | |
| _viewState.value = DeviceScanViewState.Error(errorMessage) | |
| } | |
| } |
It is also similar to our advertisement. Here in this scan callback
we have three methods to implement
onScanResult: this is invoked when an advertisment has been found.
onBatchScanResults: this is just returns list of previously scanned devices.
onScanFailed: as you might have guessed it will return error code
Here in scanFilters we are looking specifically for the SERVICE_UUID which we mentioned while advertising at the GATT server, not anything else.
In scanSettings define how to do the scanning.
And when you get a device choose a device with which you want to communicate.
you can chat by the connectToChatDevice() method by passing that device instance.
| private fun connectToChatDevice(device: BluetoothDevice) { | |
| gattClientCallback = GattClientCallback() | |
| gattClient = device.connectGatt(app, false, gattClientCallback) | |
| } | |
| private class GattClientCallback : BluetoothGattCallback() { | |
| override fun onConnectionStateChange(gatt: BluetoothGatt, status: Int, newState: Int) { | |
| super.onConnectionStateChange(gatt, status, newState) | |
| val isSuccess = status == BluetoothGatt.GATT_SUCCESS | |
| val isConnected = newState == BluetoothProfile.STATE_CONNECTED | |
| if (isSuccess && isConnected) { | |
| gatt.discoverServices() | |
| } | |
| } | |
| override fun onServicesDiscovered(discoveredGatt: BluetoothGatt, status: Int) { | |
| super.onServicesDiscovered(discoveredGatt, status) | |
| if (status == BluetoothGatt.GATT_SUCCESS) { | |
| gatt = discoveredGatt | |
| val service = discoveredGatt.getService(SERVICE_UUID) | |
| messageCharacteristic = service.getCharacteristic(MESSAGE_UUID) | |
| } | |
| } | |
| } |
to connect to a device you need to call connectGatt() method and pass GattClient Callback.
onConnectionStateChange(): this will help you tell whether Gatt Client is Connected/Disconnected to/from a remote Gatt server. once connected to a Gatt Server we will discover services provided by the server.
onServiceDiscovered(): In this method, you will find the Services the Gatt Server provides. here we are interested in a service with UUID = SERVICE_UUID.
You are not done creating Bluetooth scanning and advertising.
Just make sure to call stopServer() otherwise the app will drain the battery.
| private fun stopAdvertising() { | |
| advertiser?.stopAdvertising(advertiseCallback) | |
| advertiseCallback = null | |
| } |
Now, We will focus on creating UI using Jetpack Compose
first, to observe live data as the state you need to add this dependency
| implementation 'androidx.compose.runtime:runtime-livedata:1.1.1' |
match the version with your compose version
Now, In MainActivit.kt . we have 3 states.
- BluetoothScanning State
- ConnectedDeviceConnection State.
- isChatUI open.
Using this we will show a scanning screen and once a device is selected show the chat screen.
| Surface( | |
| modifier = Modifier | |
| .fillMaxSize() | |
| .padding(10.dp), | |
| color = MaterialTheme.colors.background | |
| ) { | |
| val deviceScanningState by viewModel.viewState.observeAsState() | |
| val deviceConnectionState by ChatServer.deviceConnection.observeAsState() | |
| var isChatOpen by remember { | |
| mutableStateOf(false) | |
| } | |
| Box( | |
| contentAlignment = Alignment.TopCenter, | |
| modifier = Modifier.fillMaxSize() | |
| ) { | |
| if (deviceScanningState != null && !isChatOpen || deviceConnectionState == DeviceConnectionState.Disconnected) { | |
| Column { | |
| Text( | |
| text = "Choose a device to chat with:", | |
| fontSize = 20.sp, | |
| fontWeight = FontWeight.Bold | |
| ) | |
| Spacer(modifier = Modifier.height(10.dp)) | |
| DeviceScanCompose.DeviceScan(deviceScanViewState = deviceScanningState!!) { | |
| isChatOpen = true | |
| } | |
| } | |
| } else { | |
| ChatCompose.Chats() | |
| } | |
| } | |
| } |
This is the chat compose.
Simply used LazyColumn to show chats.
| @Composable | |
| fun Chats() { | |
| val message by ChatServer.messages.observeAsState() | |
| val inputvalue = remember { mutableStateOf(TextFieldValue()) } | |
| val messageList = remember { | |
| mutableStateListOf<Message>() | |
| } | |
| if (message != null && !messageList.contains(message)) { | |
| messageList.add(message) | |
| } | |
| if (messageList.isNotEmpty()) { | |
| Column(modifier = Modifier.fillMaxSize()) { | |
| Text( | |
| text = "Chat Now with ${ChatServer.currentDevice?.name ?: "Someone"}", | |
| fontSize = 20.sp, | |
| fontWeight = FontWeight.Bold | |
| ) | |
| Spacer(modifier = Modifier.height(10.dp)) | |
| Surface(modifier = Modifier | |
| .padding(all = Dp(5f)) | |
| .fillMaxHeight(fraction = 0.85f)) { | |
| ChatsList(messageList) | |
| } | |
| InputField(inputvalue) | |
| } | |
| } else { | |
| Column(modifier = Modifier.fillMaxSize(), horizontalAlignment = Alignment.CenterHorizontally) { | |
| Box( | |
| contentAlignment = Alignment.Center, | |
| modifier = Modifier.fillMaxSize(fraction = 0.85f) | |
| ) { | |
| Text(text = "No Chat History") | |
| } | |
| InputField(inputvalue = inputvalue) | |
| } | |
| } | |
| } |
This is the DeviceScan Compose.
Here depending on the Scan states, we will show the UI.
Once scan results is fetched we show the scanned devices in LazyColumn
| @Composable | |
| fun DeviceScan(deviceScanViewState: DeviceScanViewState, onDeviceSelected: () -> Unit) { | |
| when (deviceScanViewState) { | |
| is DeviceScanViewState.ActiveScan -> { | |
| Box( | |
| contentAlignment = Alignment.Center, | |
| modifier = Modifier.fillMaxSize() | |
| ) { | |
| Column(horizontalAlignment = Alignment.CenterHorizontally) { | |
| CircularProgressIndicator() | |
| Spacer(modifier = Modifier.height(15.dp)) | |
| Text( | |
| text = "Scanning for devices", | |
| fontSize = 15.sp, | |
| fontWeight = FontWeight.Light | |
| ) | |
| } | |
| } | |
| } | |
| is DeviceScanViewState.ScanResults -> { | |
| ShowDevices(scanResults = deviceScanViewState.scanResults, onClick = { | |
| Log.i(TAG, "Device Selected ${it!!.name ?: ""}") | |
| ChatServer.setCurrentChatConnection(device = it!!) | |
| ChatServer.currentDevice = it | |
| onDeviceSelected() | |
| }) | |
| } | |
| is DeviceScanViewState.Error -> { | |
| Text(text = deviceScanViewState.message) | |
| } | |
| else -> { | |
| Text(text = "Nothing") | |
| } | |
| } | |
| } |
And That is it.
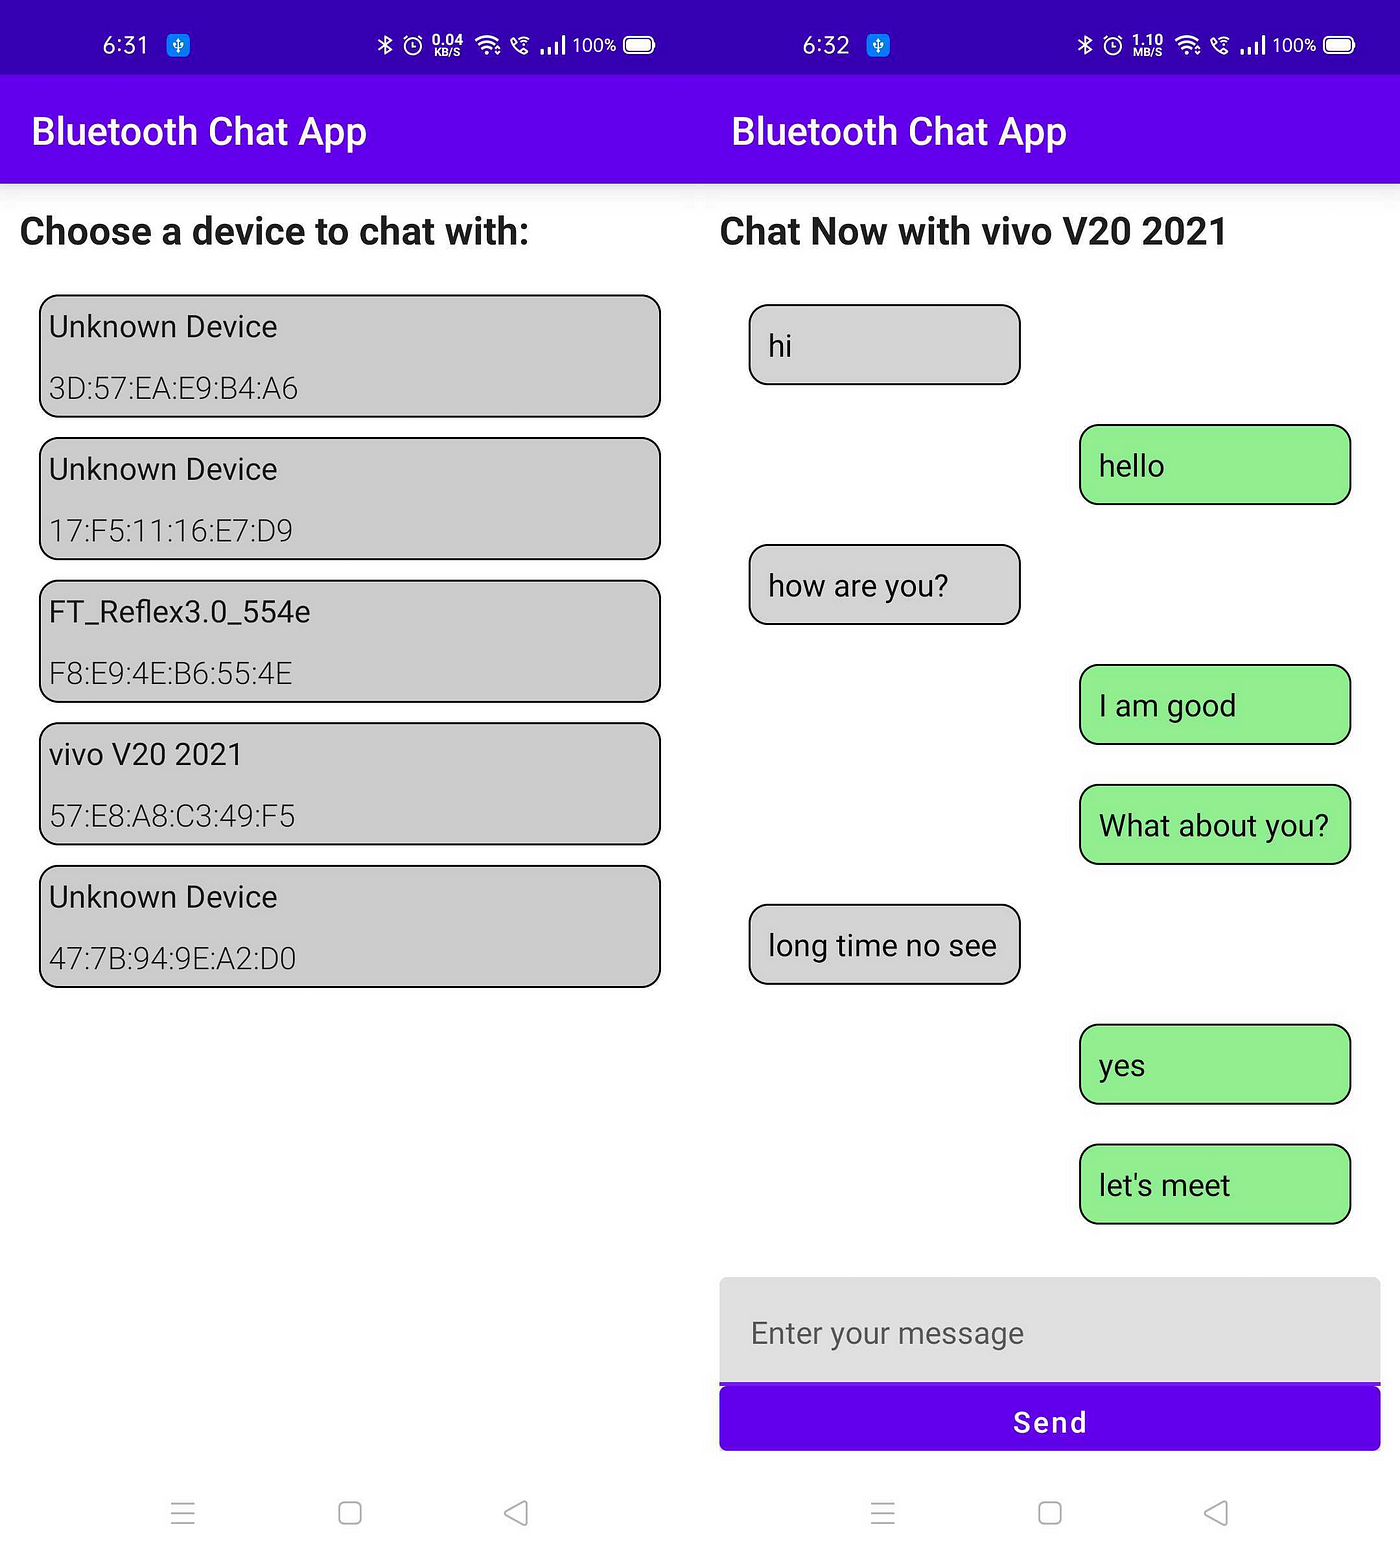
Here is the Output UI.
It will first prompt you to enable Bluetooth

Then You will get a list of BLE devices having service matching out SERVICE_UUID.
This is the DeviceScan Screen.
Now, On click of any device. Chat Screen will open. You need to install this app on another android device as well and select this device to chat.
That’s it
To learn more about BLE check out this
Thank You for reading
This article was originally published on proandroiddev.com on October 29, 2022


