

Hi, Folks! Maybe most of us developers were involved at least once in developing a chat app, from the frontend or backend side. But how many managed to develop the whole thing with minor efforts?
So let’s see how to develop a simple chat service multiplatform ready, starting with an Android app developed with Jetpack Compose.
- Together we will see how to manage the registration/login flow with 3rd party providers in an easy way and without our own server.

- How to develop a chat (send, receive, edit and delete messages).
- How to create a poll in order to organize a lunch with our friends/colleagues!
REPOSITORY
BEFORE START
The project itself DOESN’T require specific services onboard on the device and a HUAWEI device, but with 2 exceptions for Auth Service:
- HUAWEI ID login: if you want to integrate it in your app, it REQUIRES HMS Core onboard, which is an app that you can find and install through AppGallery store (no HUAWEI device needed);
- Google login: if you want to integrate it in your app, it REQUIRES GMS onboard.
Instead you could try a custom standalone OAUTH2 approach passing the token to the AUTH SERVICE:

SETUP
Everything starts from the official Huawei Developers website, where we register and access the developer console -> link
Here you can follow the basic guide to setup your project and app -> link
Then enable the following services: Auth Service and, if you want HUAWEI ID login support, Account Kit.
link
THREE ELEMENTS
We need only threelements from the HMS arsenal in order to create this project:
– Auth Service, to manage the registration/login flow with third party providers and/or custom login token and/or anonymous account in case we want to access authenticated service capabilities without an user login;
– Cloud DB, as cloud database to store and retrieve data in a smooth way;
– Cloud Functions, to orchestrate the business logic among the platforms, the Auth Service and the Cloud DB.
AUTH SERVICE
On developer console, Auth Service section, we can enable the login providers we want to support.
In this project I managed to use HUAWEI ID, Google and Facebook login.
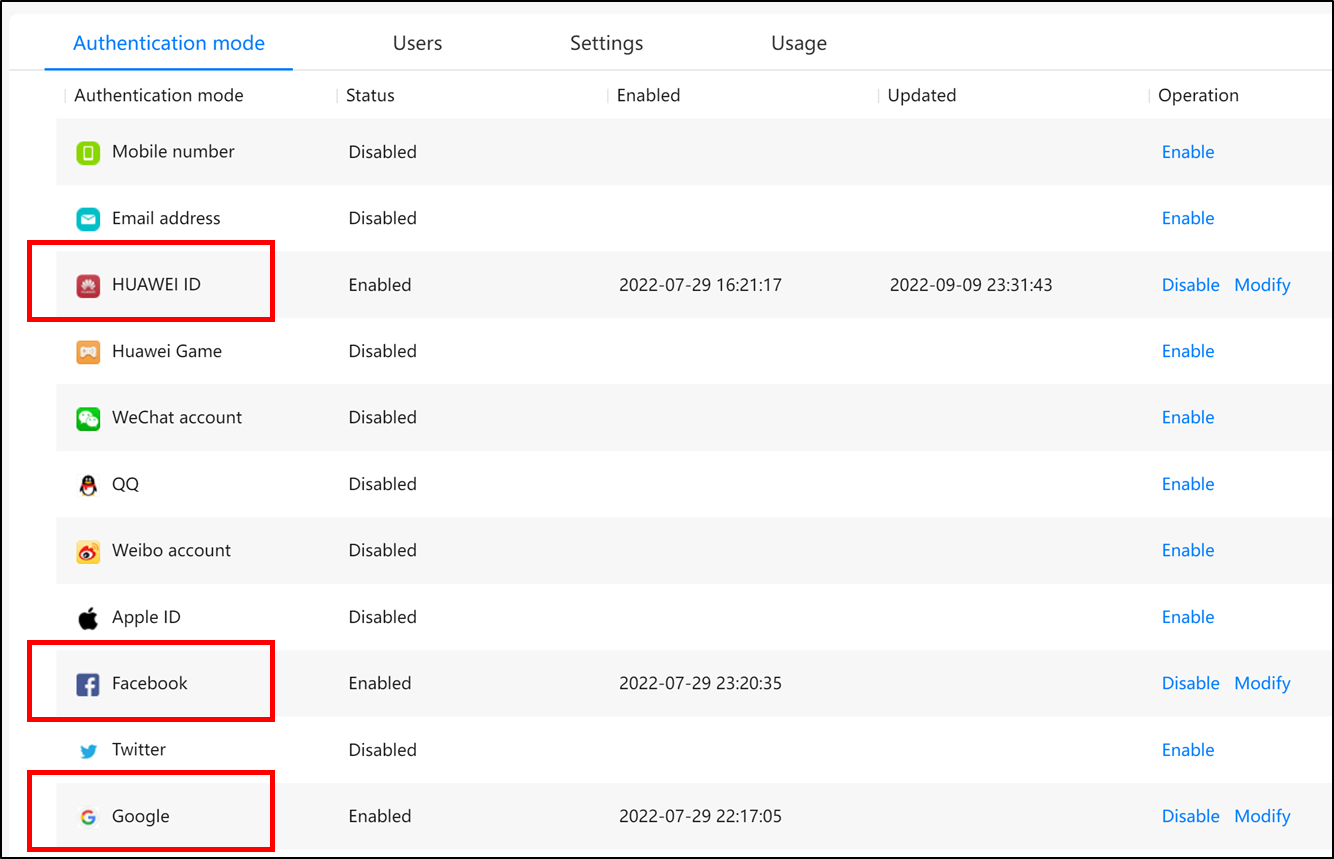
Here you just click on ‘Enable’ adding the requested information to link Auth Service to the specific Login provider.
CLOUD DB
OUR VIDEO RECOMMENDATION


Jobs
In order to store and retrieve the data from our chat app we will use the Cloud DB service.
In the related section we will create our Object Types, which in database related words we can intend as tables.
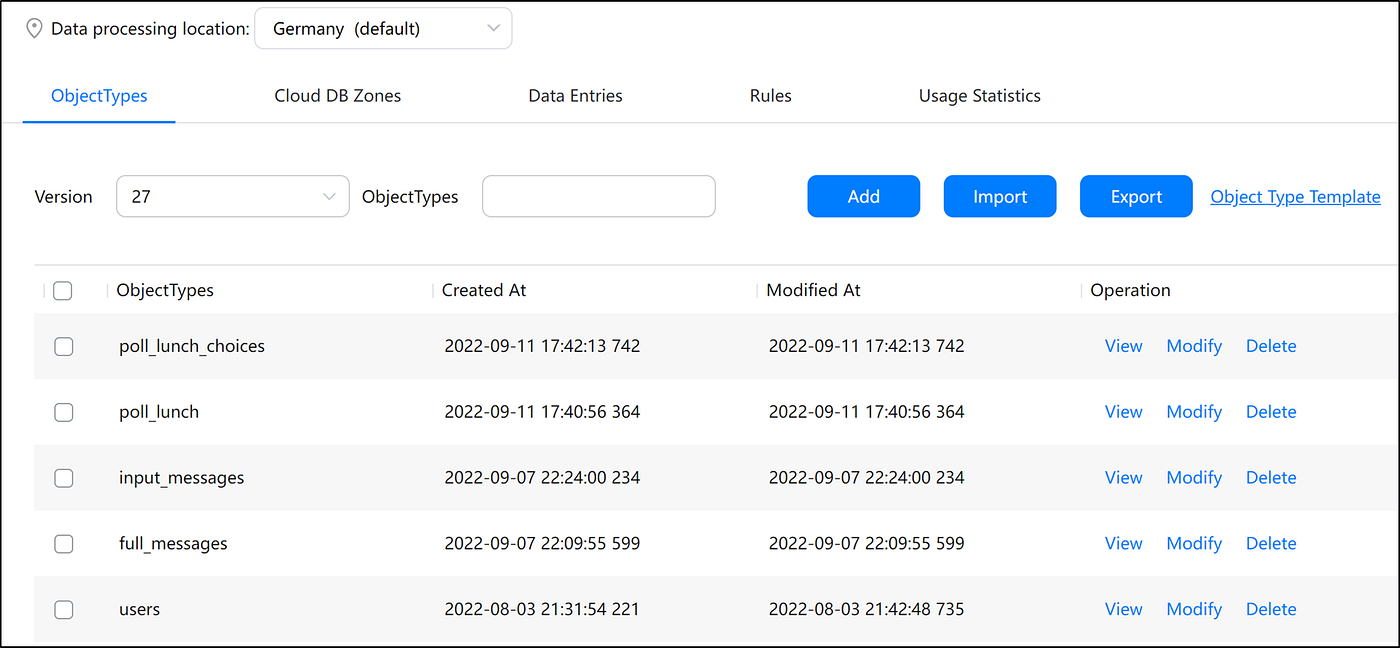
Here we can add the Object Type fields which support all the common types and then decide at least 1 mandatory primary key and optionally if to encrypt or not that specific field, a default value and if it’s nullable.

Here we need to decide which kind of user can access that Object Type and which operations can be managed.

Finally, by clicking on ‘Export’ button, we can export the Object Type in the supported format for our project where ‘Android’ is for our Android app and ‘serverSDK’ is for our Cloud Functions.
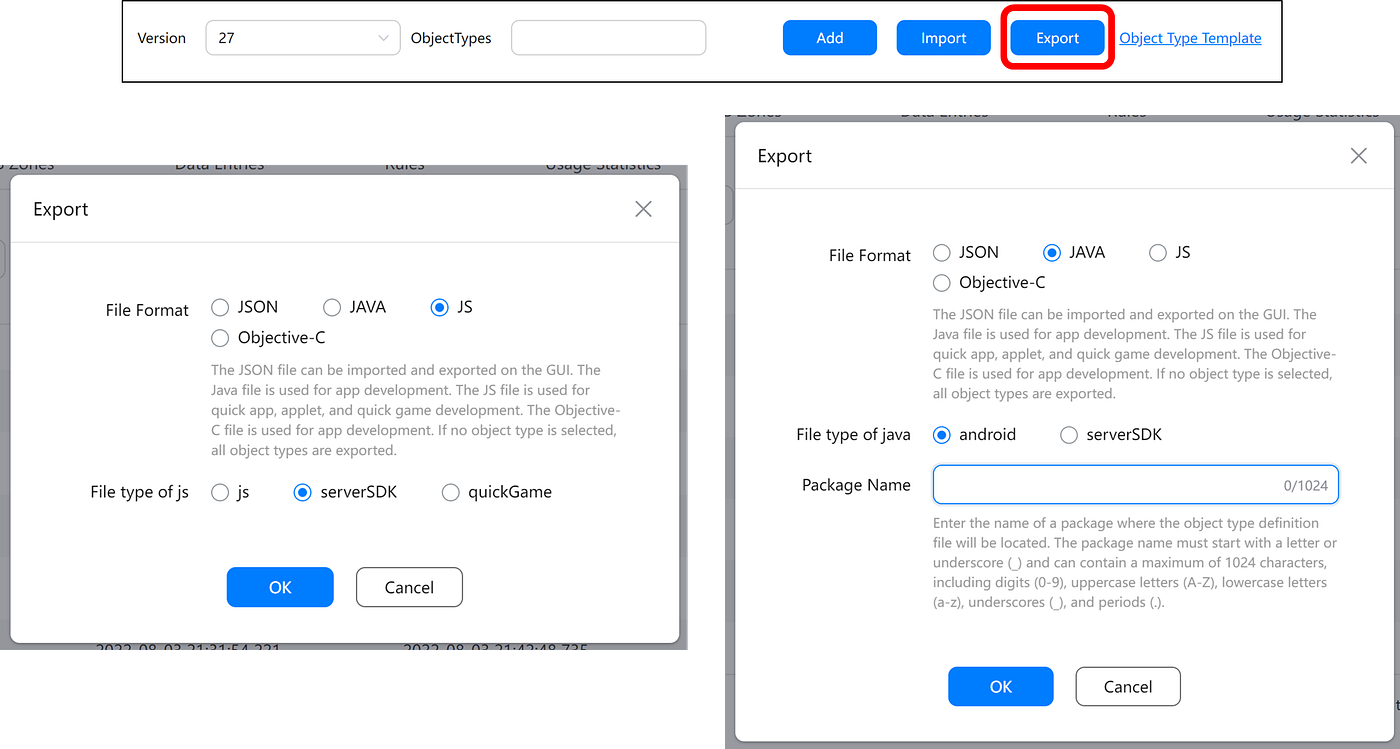
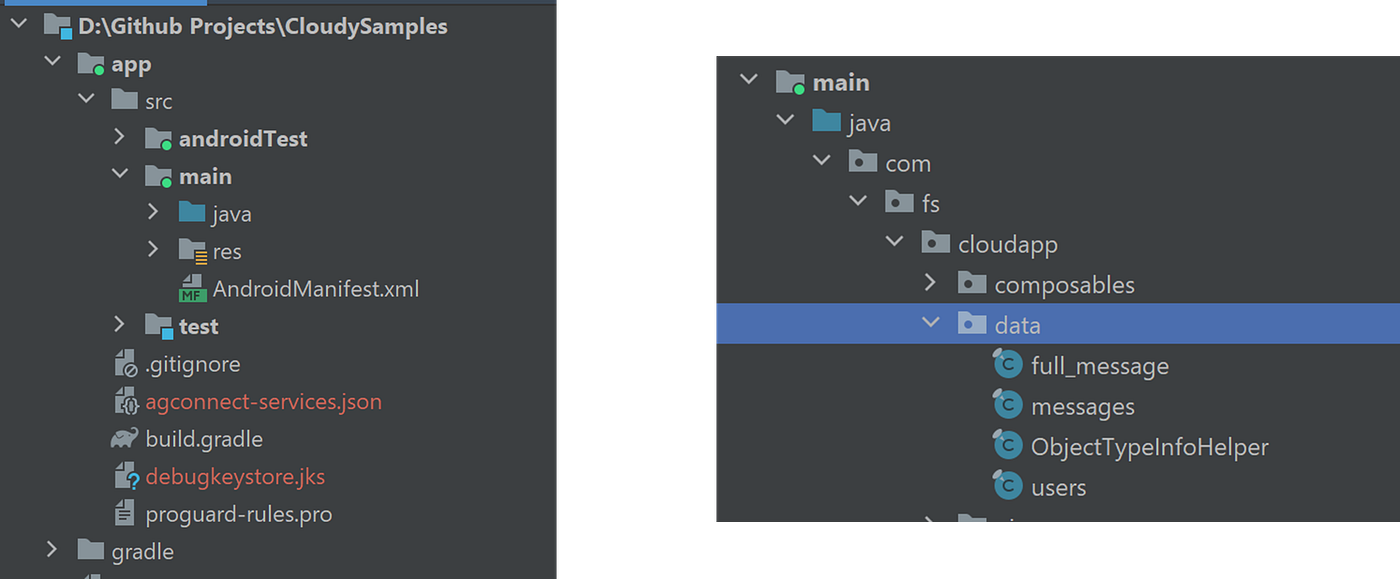
With the ‘Export’ feature we will export not only the Object Types but also the ObjectTypeInfoHelper which is a wrapper class collecting the info of all the Object Types in our project. We will put all those files together in the same folder in our project. Then the ‘agconnect-services.json’ to download from the developer console and to put in the root folder of your project.
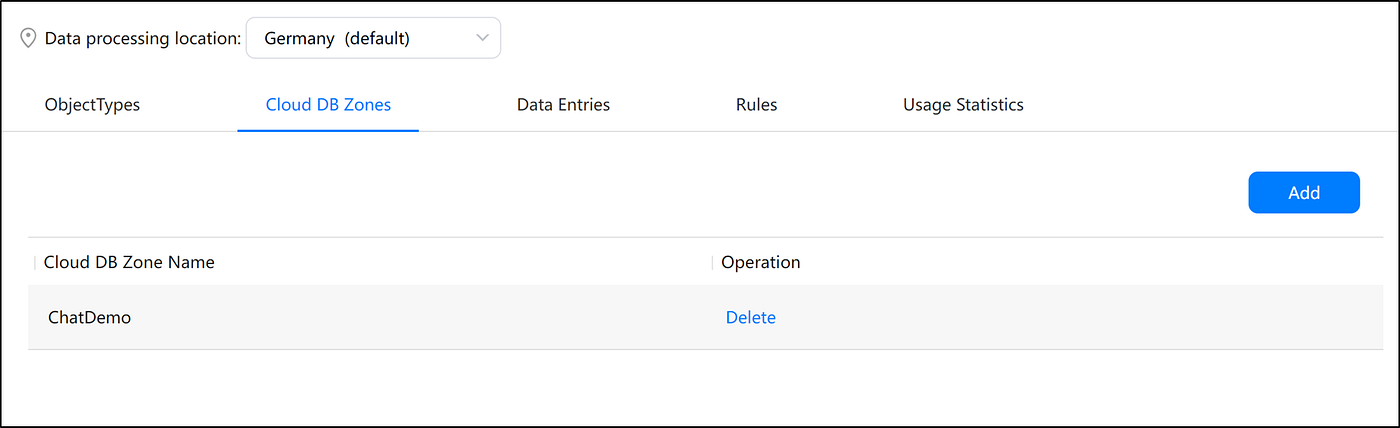
Now that we have the Object Types, we need to create the ‘zone’ where the data will be stored and retrieved. We can create multiple zones. Just click on ‘Add’ button and choose the name of the Cloud DB Zone.
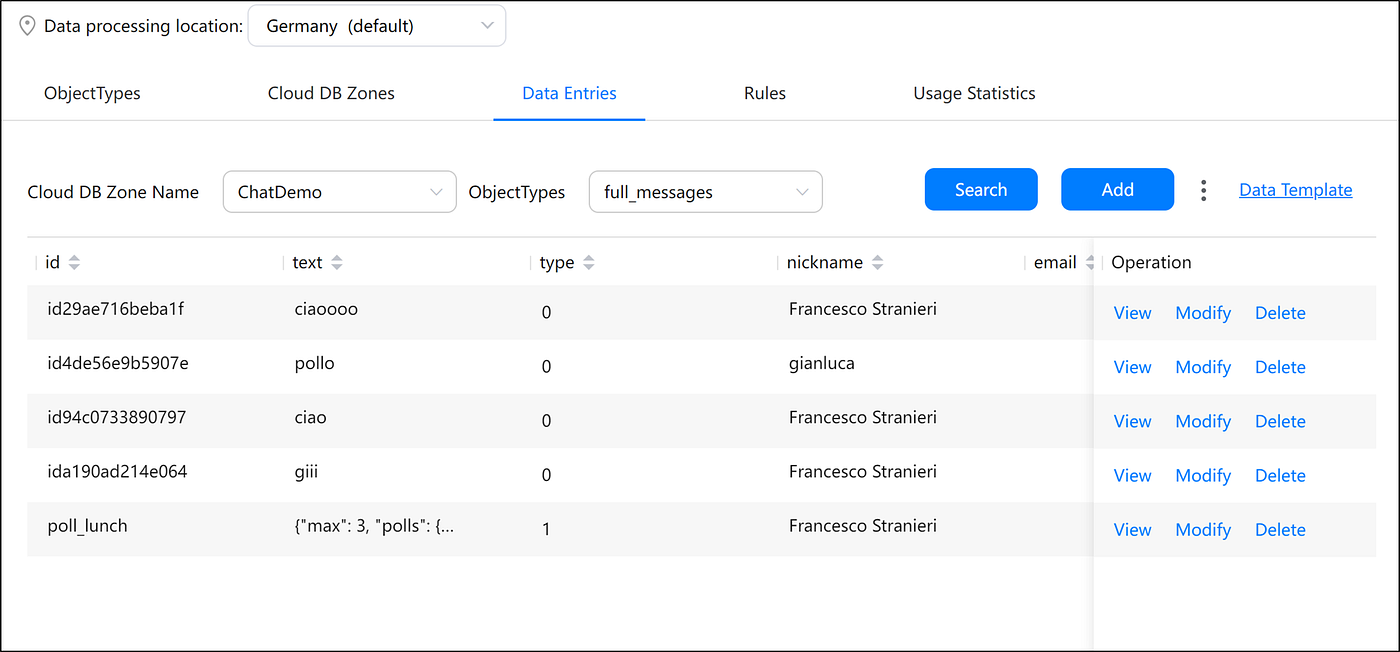
Finally, in order to check the data we stored, we can go on ‘Data Entries’ tab, choose the Cloud DB Zone and the specific Object Type. We can optionally modify and delete records too.
CLOUD FUNCTIONS
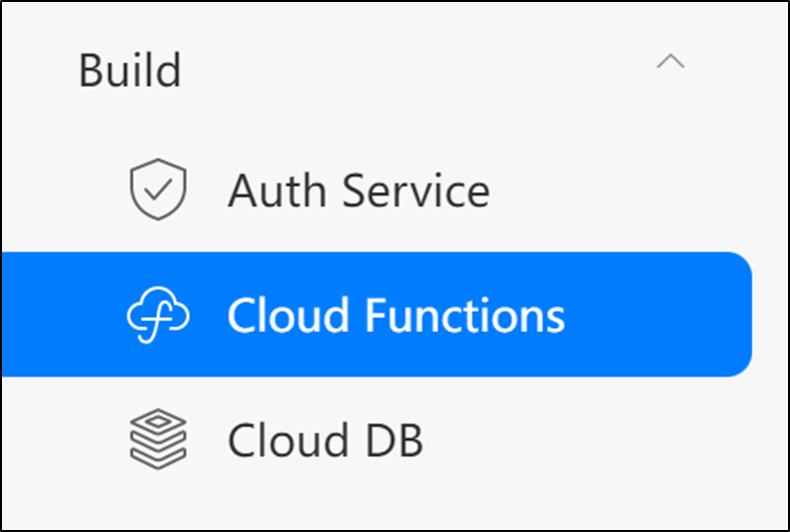
Finally we can explore the last service we need for this awesome serverless chat: the Cloud Functions.
We need them in order to orchestrate the business logic between the app, the DB and the authentication service.
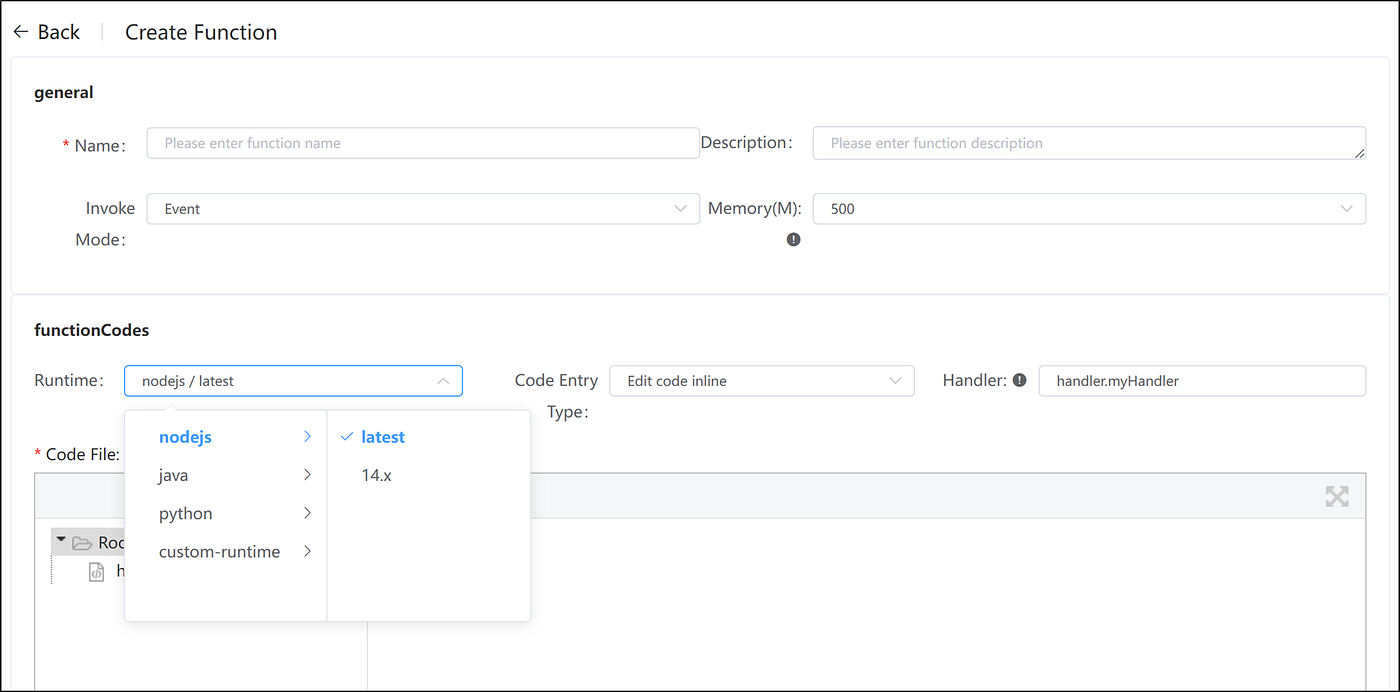
So we access the related section on the developer console and click on ‘Add’ button in order to create a new function.
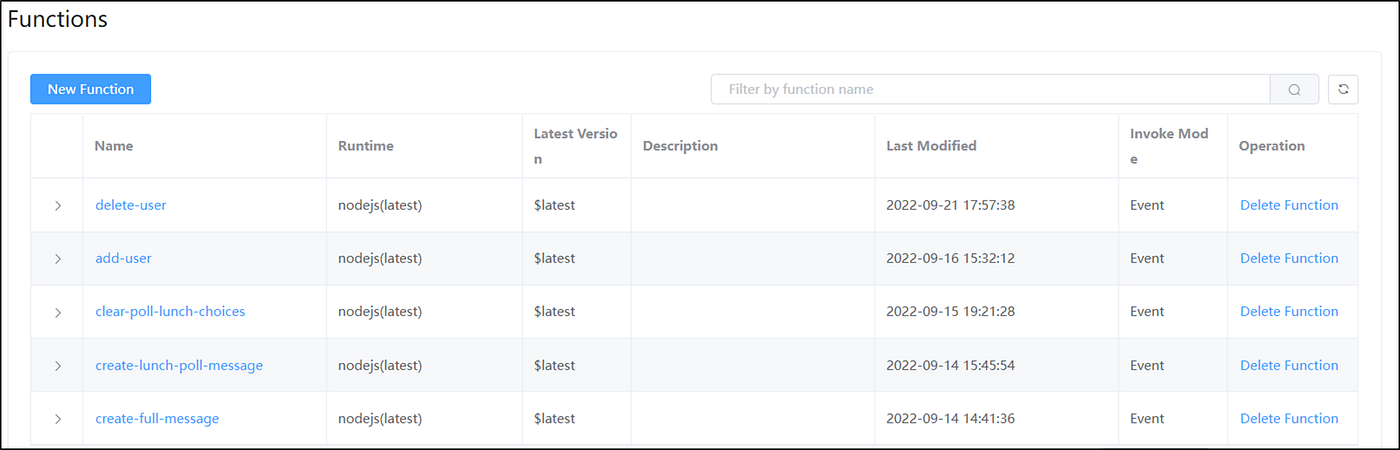
Here we can optionally choose the memory to serve the function, the runtime (for this project I used nodejs but also Java and Python are supported) and if we want to develop it with the editor embedded in the console or upload the cloud function project through the console or CLI.
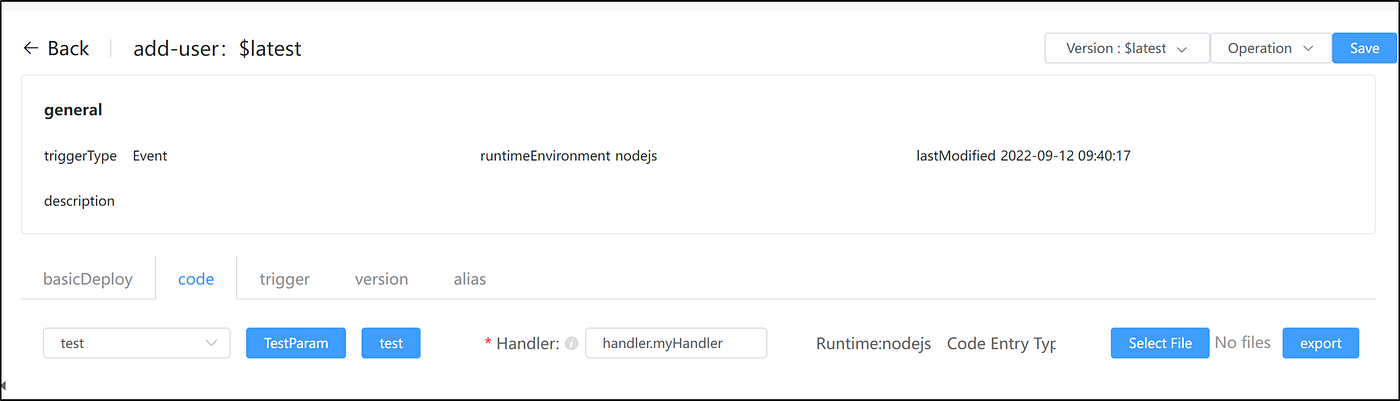
Once we developed and uploaded our Cloud Function, we can test it adding a custom test parameter.
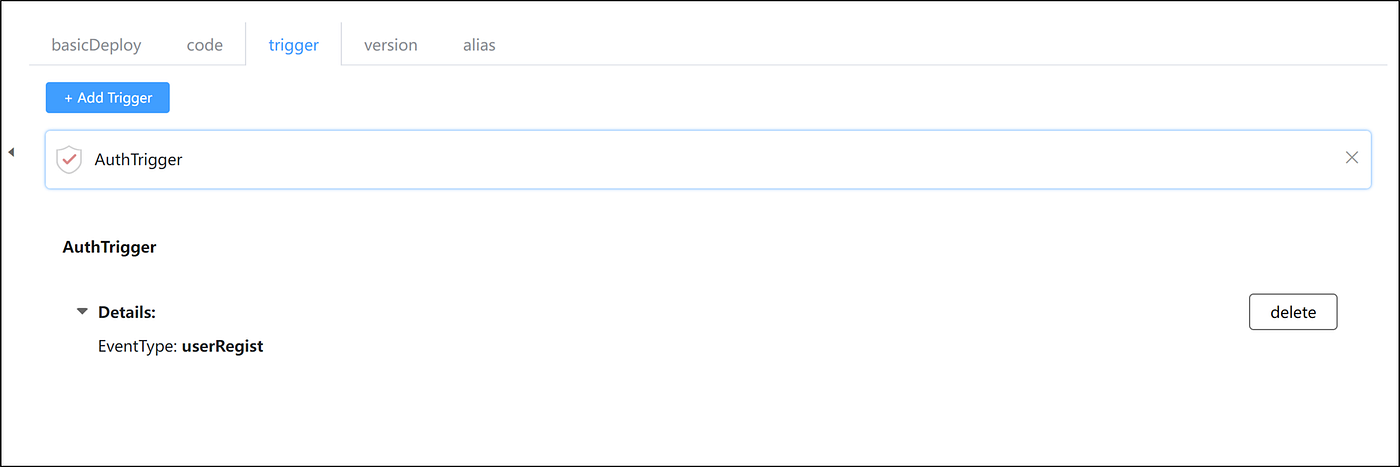
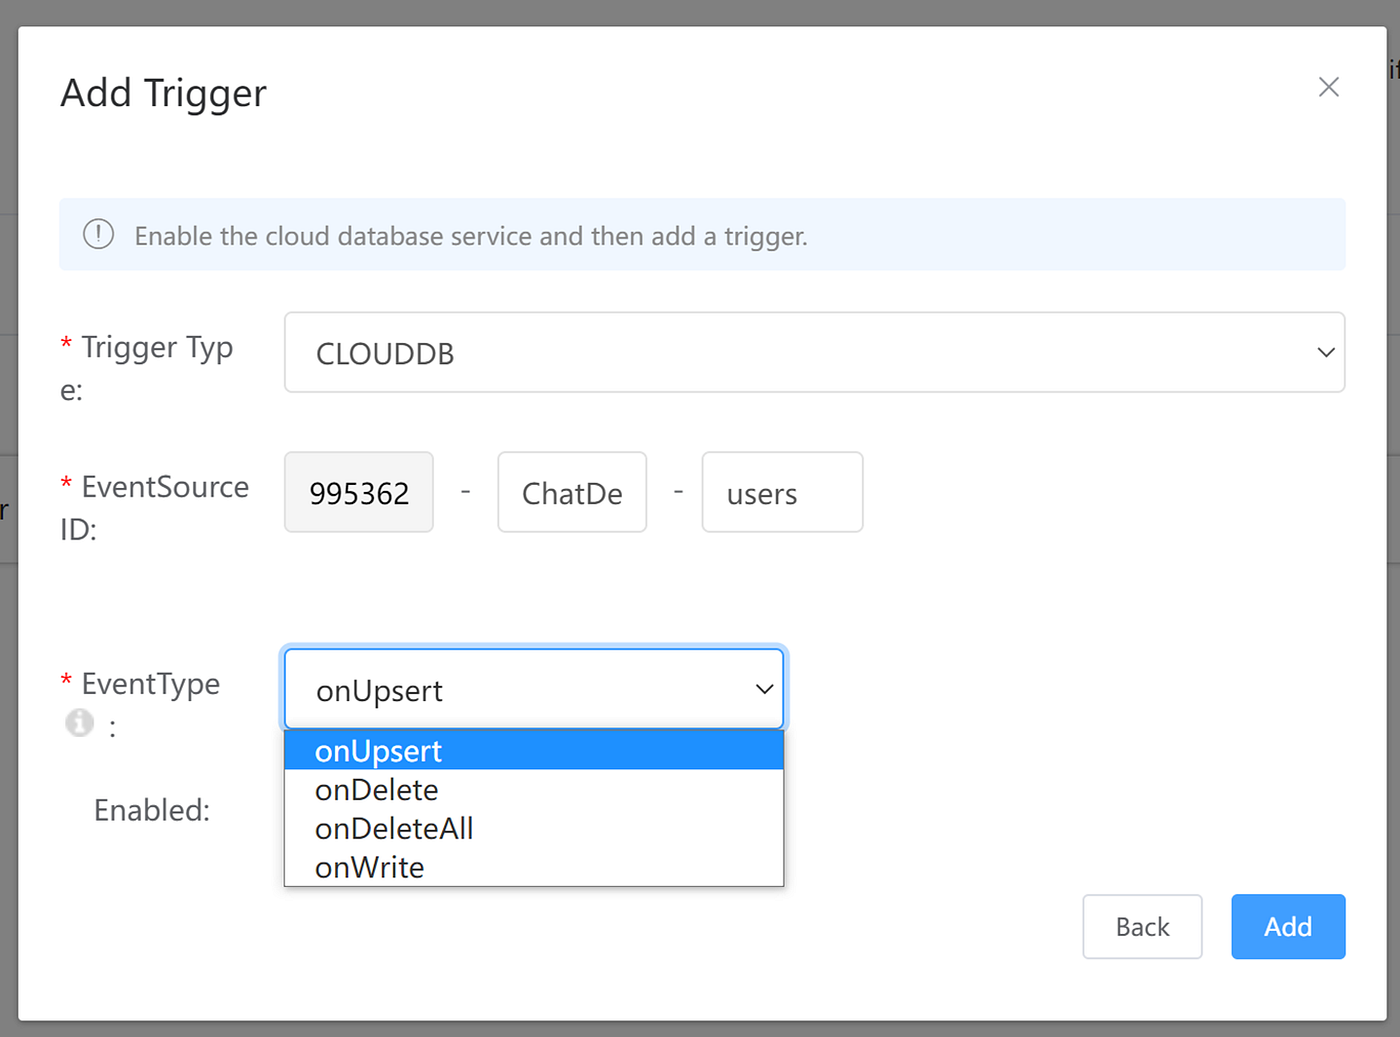
We can also add a trigger to the Cloud Function in order to fire it automatically with a specific event.
Many triggers are supported, for example combined with Auth Service, Cloud DB and also CRON triggers which are fired every interval we have set up.
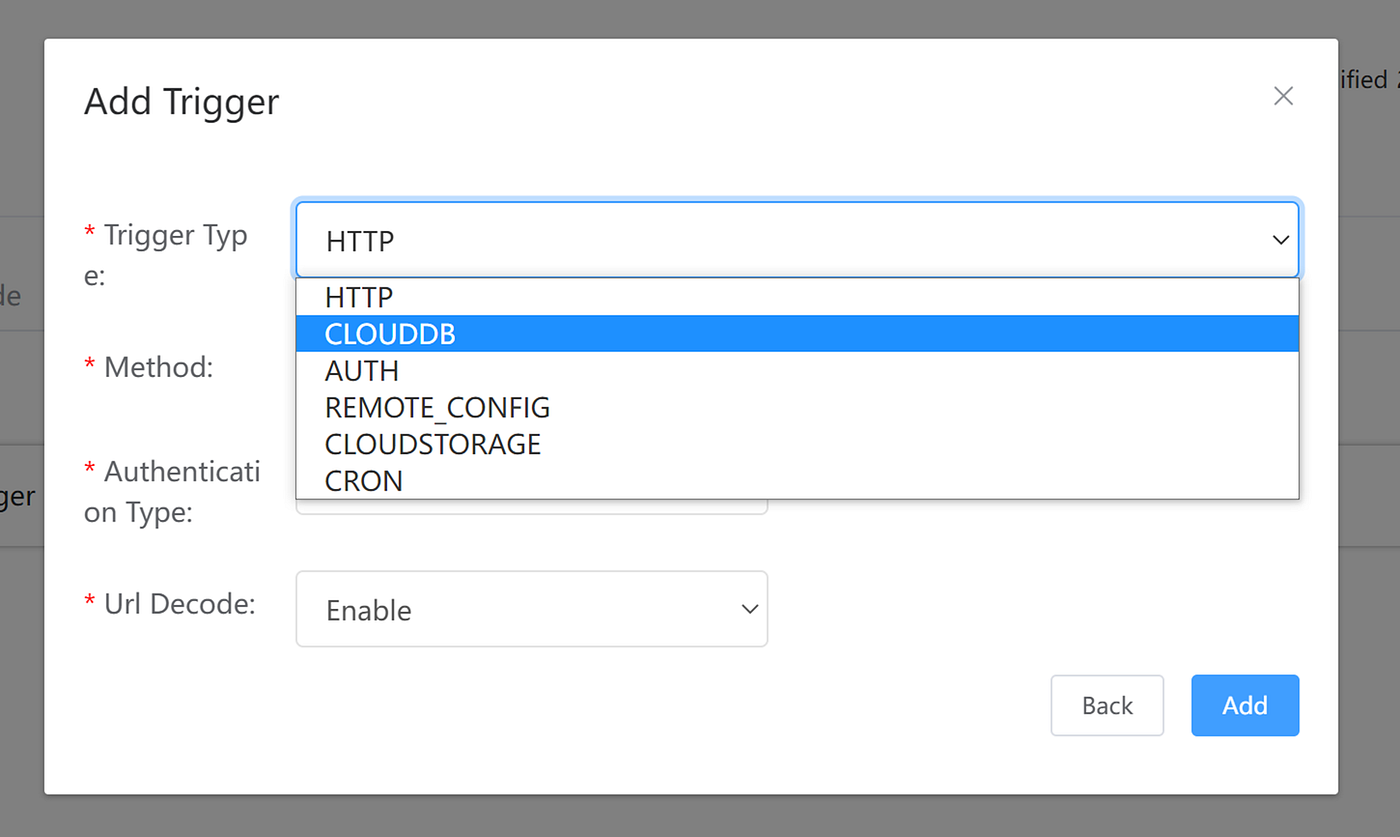
For example with Cloud DB triggers we can choose the Cloud DB Zone and ObjectType we want to operate on and the specific Event Type.
The Event Type supported are ‘onUpsert’ which is fired every time there’s a new record or an updated one; ‘onDelete’ and ‘onDeletAll’ on records deletion and finally ‘onWrite’ for create/update/delete operations on Cloud DB.
AUTHENTICATION FLOW
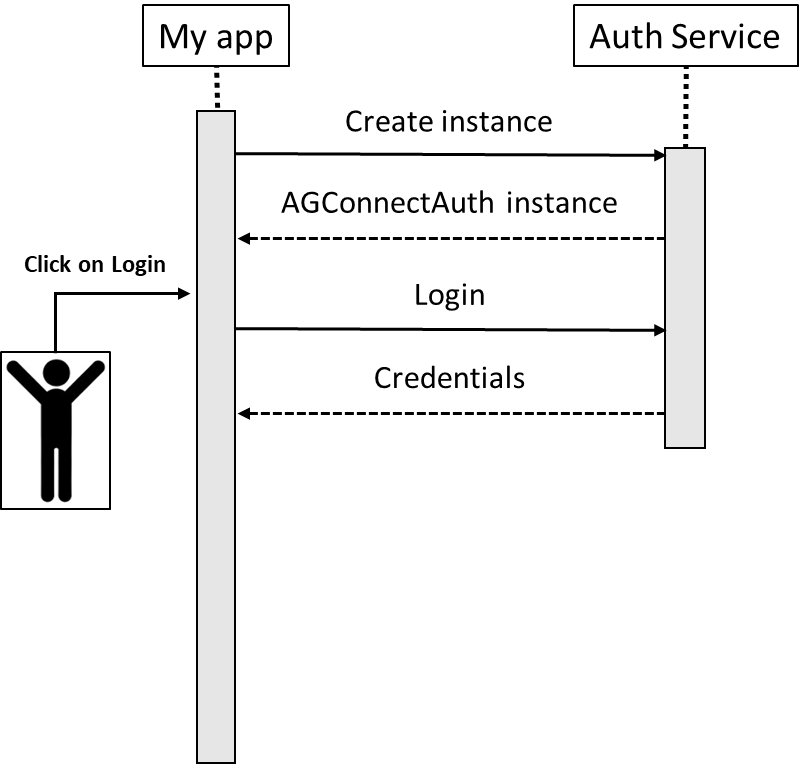
So let’s see the first flow, which is the Authentication Flow, regarding login/registration, starting from the app side.
In the very begin we will create an instance of AGConnectAuth in order to use all the Auth Service features.
Then when the user will click on a login provider button, like Google Login one, we will call the login function asking credentials from the Auth Service which will manage the whole login provider flow.
UI ANDROID
Let’s see the UI part, where I used Jetpack Compose, we just use the login provider specific SDK with its own branded button.
For example with Google we will instantiate a SignInButton into the Compose AndroidView which is used to instantiate custom views.
@Composable
 private fun GoogleLoginButton(…) {
     AndroidView(
         modifier = Modifier.wrapContentSize(),
         factory = { context ->
             SignInButton(context).apply {
                 setOnClickListener { onClickLogin() }
             }
         })
 }
Since the app is using a MVVM Pattern, we have a ViewModel to manage the whole Authentication Flow and its name is AuthViewModel.
Once the button has been clicked, the login function will be called passing the activity context in order to manage activity results and an Auth Service constant value related to the Google Login Provider.
GoogleLoginButton {
     authViewModel.login(
         activity = currentActivity,
         credentialType = AGConnectAuthCredential.Google_Provider
     )
 }
We create the AGConnectAuth instance in the very begin of the app.
var authInstance: AGConnectAuth = AGConnectAuth.getInstance()
     private set
The login function will pass the parameters to the function signIn.
fun login(activity: Activity, credentialType: Int) {
     authInstance.signIn(activity, credentialType).addOnSuccessListener {
         updateState(state.value.copy(loggedIn = true))
     }.addOnFailureListener {
updateState(state.value.copy(failureOutput = it))
     }
 }
In order to manage the UI changes I used the MutableStateFlow which is updated in the signIn function callbacks.
private val mState = MutableStateFlow(value = AuthState())
val state: StateFlow<AuthState>
    get() = mState
...
data class AuthState(
     val loggedIn: Boolean = false,
     val failureOutput: Exception? = null,
     val previousInstanceAlive: Boolean = false
 )
BACKEND
Now it’s the time of the backend part.
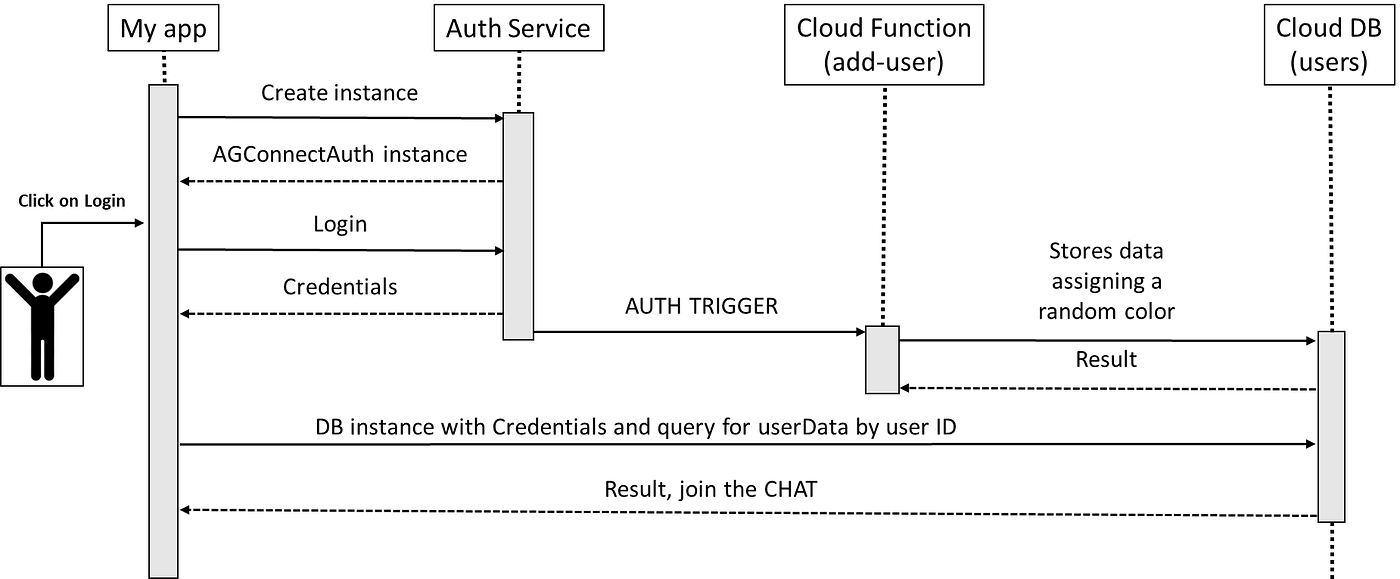
When we obtain the Auth Service credentials for the successful login in the app, there will be fired a Cloud Function (add-user) thanks to the AUTH TRIGGER previously configured with the event onLoginSuccess. So every time there’s a successful login, that trigger will be called. The Cloud Function, add-user, will store the user data in the Cloud DB users ObjectType together with a random color in order to distinguish the users in the chat. Finally the app will check if the Cloud DB has that data available and if so, the user will join the chat.
Let’s see how to develop a Cloud Function.
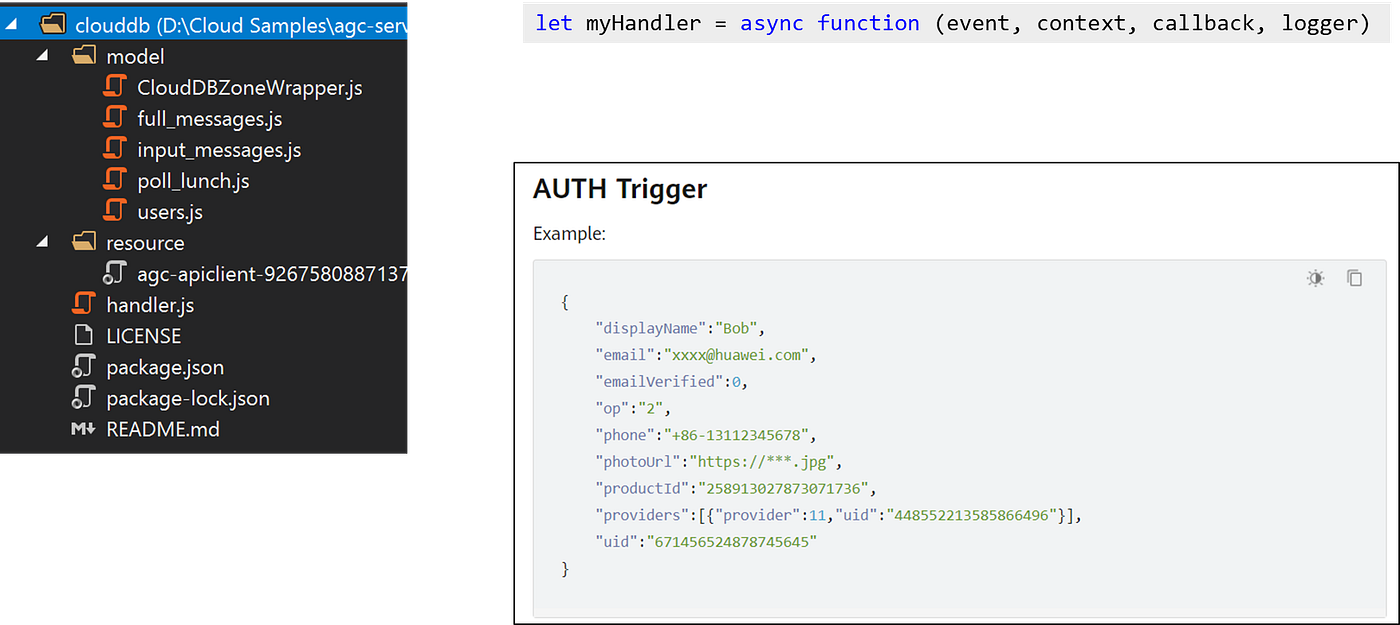
Like for the app, you need to have all the Object Types files and the agc credentials file in a folder of the project. Then we have a ‘handler.js’ file to create and which will contain the starter function of our project. The function will have 4 parameters: event with all the data related to the trigger, which reference can be found on the official documentation; context of the function; callback to send the results; logger to write logs messages.
In ‘add-user’ Cloud Function we need to access the Cloud DB users Object Type which has only authenticated users access permissions. Indeed we need to initialize the AGCClient with the path to our agc credentials file in the project. Once we have the AGCClient instance, we pass that to Cloud DB in order to access it. Now we just need to configure the Cloud DB Zone to access and we are ready.
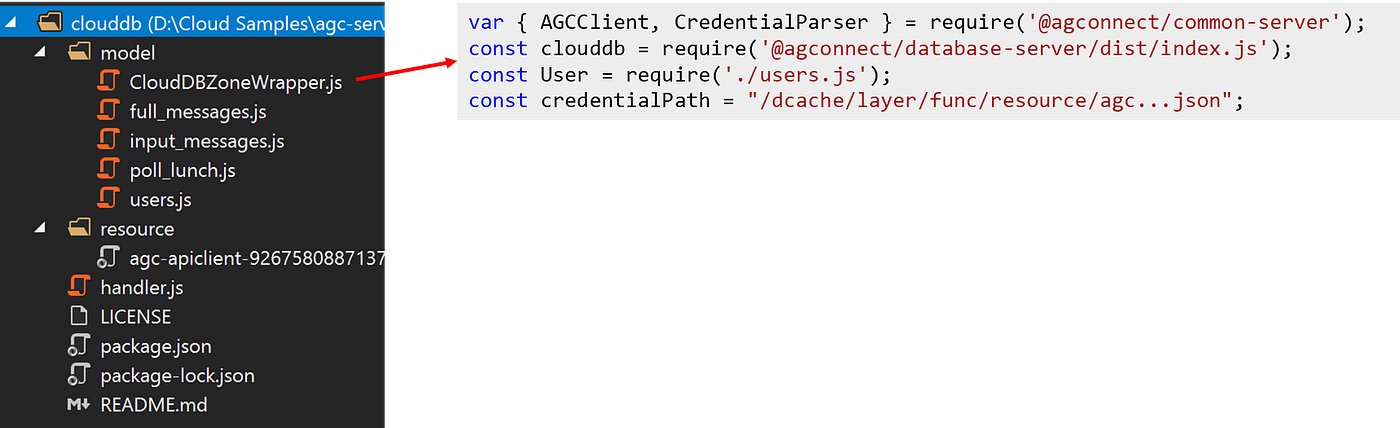
if (!AGCClient.INSTANCES.has(AGCClient.DEFAULT_INSTANCE_NAME)) {
    var credential = CredentialParser.toCredential(credentialPath);
    AGCClient.initialize(credential);
}
const agcClient = AGCClient.getInstance();
clouddb.AGConnectCloudDB.initialize(agcClient);
const cloudDBZoneConfig = new clouddb.CloudDBZoneConfig('ChatDemo');
this.cloudDBZoneClient = clouddb
                         .AGConnectCloudDB
                         .getInstance(agcClient)
                         .openCloudDBZone(cloudDBZoneConfig);
Once we have finished with our business logic, we want to store the user data we got from the AUTH TRIGGER in the users Object Type, so we just need to invoke ‘executeUpsert’ passing the userData as array.
async addUser(userData) {
…
let users = [];
users.push(userData);
try {
  const resp = await this.cloudDBZoneClient.executeUpsert(userData);
  this.logger.info('The number of upsert users is: '+ resp);
} catch (error) {
  this.logger.error('addUser=> '+ error);
}
}
Now we are ready for the CHAT FLOW! Thanks!
This article was originally published on proandroiddev.com on November 08, 2022


