

In the story we will see what we need and how to create a workflow to build, sign and create Android release using Github Actions.
Photo by Roman Synkevych on Unsplash
To summarize the questions we will answer in this story.
- How to Build and Sign release build?
- How to set environment variables via
workflowwhich are being used insidegradlefile? - How to create/upload release and tag over
Github? - How to retrieve
Version Namefrom appgradlefile and use it insideworkflowfortagandreleasename?
This is the 2nd story in the series about Github Actions. The first story explains basics about Github Actions and creating an Android Lint workflow, you can read the story from the link below.
👉 Android Lint workflow using Github Actions
This story expects some basic understanding about Github Actions. If you are not familiar with Github Actions, you can read the previous blog post about Github Actions.
In this story we will need to store some sensitive information to use inside Github workflows . Github recommends storing such information via Github secrets, so before moving forward let’s see what is Github secrets.
Github Secrets.
Github Secrets allows you to store sensitive information inside your Github organisation, repository or repository environment.
High level points about Github secrets
Github Secretsstore information in Key/Value pairs.- You can provide
Github Secretsat organisation, repository and environment level. - Same key in
environmentwill have precedence overrepositoryandrepositorykey/value secret will have precedence overorganisationallevel Github secrets. Github Secretsare directly accessible in sideGithub Workflows
We will be using repository level Github Secrets. Following are steps to create repository level Github Secrets,
- Navigate to the
Settingsof the particular repository. - Inside the
Securitysection on the left side, click onSecrets and Variables. - From the drop-down click on
Actions, this will openGithub Secretsview where you can see the optionNew Repository Secretto create secrets.
To read more about creating Github Secrets you can read from official documentation.
Let’s see the process now
1. Generate Release Signing key and keystore
In order to build and sign a release version of the App we need to have Release Keystore, username, password and alias. If you have not created before you can use the official documentation to create.
2. Encode keystore(.jks file)
Once keystore, username, password and alias are created for release signing, we want to store all this sensitive information in Github Secrets and access them inside workflows directly from Github Secrets.
This way we don’t need to store such information directly inside Github repo which will be a problem if its public Github repo even if its not public repository its better to use Github Secrets.
Keystore is a file with extension (.jks), in order to store it on Github Secrets we will base64 encode it and the resulting base64 string will be stored inside Github Secrets .
To encode the file we can use the following command
base64 -i <in-file> -o <outfile>
After performing the base64 encoding the resulting file will be txt file.
e.g
base64 -i /Development/release-keys/release-keystore.jks -o /Development/release-keys/release-keystore-base64.txt
In the above example the decoded keystore file release-keystore-base64.txt contains text. We will copy the text from the file and add as Github Secrets and in Github Workflow we will get from Github Secrets and decode it.
3. Github Secrets
We will add base64 encoded keystore file text, username, password and Alias created in the previous step inside Github Secrets.
Github secrets looks like below.
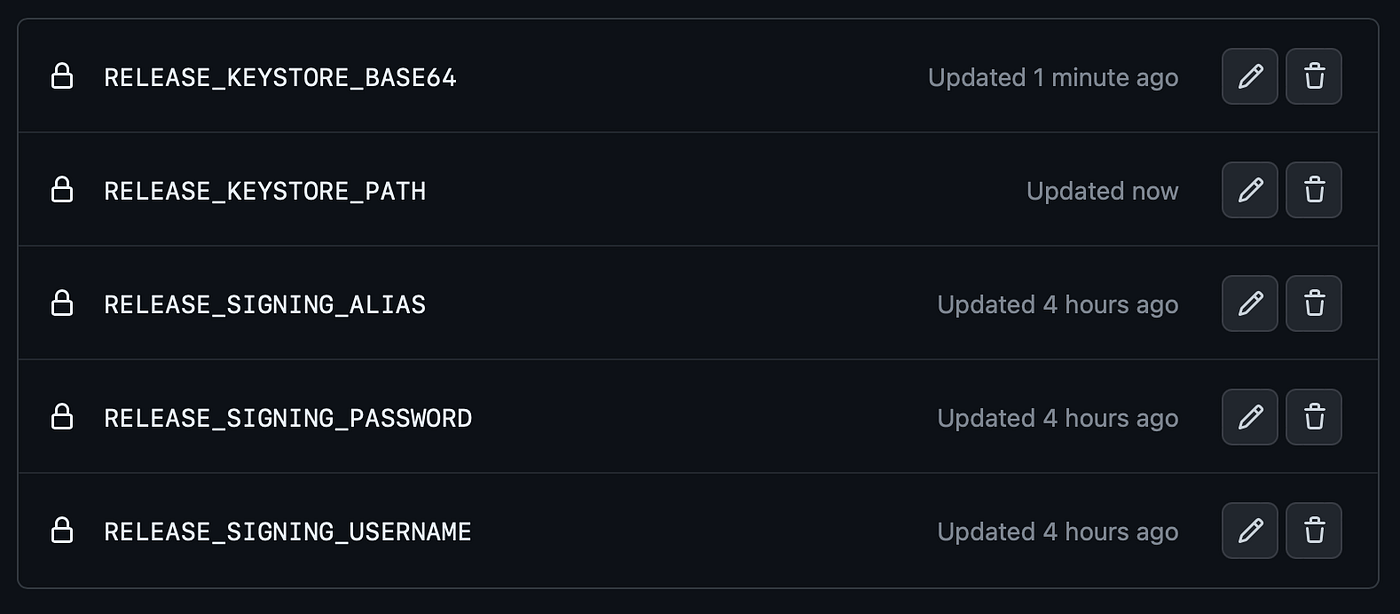
RELEASE_KEYSTORE_BASE64 is containing base64 encoded Keystore text. Other keys are straightforward except RELEASE_KEYSTORE_PATH. In RELEASE_KEYSTORE_PATH we are storing the path we want to use for the decoded Keystore, please set it to keystore.jks .
4. Add Signing Keystore in build.gradle.
In app level build.gradle add signingConfigs for release build as below.
android {
    signingConfigs {
        release {
            storeFile file("keystore.jks")
            storePassword System.getenv("RELEASE_SIGNING_PASSWORD")
            keyPassword System.getenv("RELEASE_SIGNING_PASSWORD")
            keyAlias System.getenv("RELEASE_SIGNING_ALIAS")
        }
    }
In signingConfigs for release build, we are setting storePassword , keyPassword and keyAlias from environment variable that we will set via our Github workflow which we will create in next steps.
5. Github workflows
Everything is available to create Github workflow.
5.1 Trigger Event
We want to trigger the workflow whenever code is pushed to the main branch.
| name: Release Signing | |
| run-name: Release Build Signing | |
| on: | |
| push: | |
| branches: | |
| - 'main' |
OUR VIDEO RECOMMENDATION


Jobs
5.2 Permission to workflow
We want to give permission to workflow in order to create Release over Github
| permissions: | |
| contents: write |
It enables the workflow to create the release over Github which will come later in the workflow.
5.3 Setup code and gradle wrapper.
We want to checkout code and enable gradle wrapper as below.
| jobs: | |
| release-signing-build: | |
| name: Release Signing Build | |
| runs-on: ubuntu-latest | |
| steps: | |
| - uses: actions/checkout@v3 | |
| - name: setup JDK 17 | |
| uses: actions/setup-java@v3 | |
| with: | |
| java-version: '17' | |
| distribution: 'temurin' | |
| cache: gradle | |
| - name: Grant execute permission for gradlew | |
| run: chmod +x gradlew |
5.4 Decode Keystore
As mentioned earlier to build and sign the release build, we have to decode the Keystore which was encoded base64 and store it to the location specified inside release signing configuration inside gradle.
| - name: Decode Keystore | |
| env: | |
| ENCODED_KEYSTORE: ${{ secrets.RELEASE_KEYSTORE_BASE64 }} | |
| DECODED_KEYSTORE_PATH: ${{ secrets.RELEASE_KEYSTORE_PATH }} | |
| run: | | |
| echo $ENCODED_KEYSTORE > keystore_base64.txt | |
| base64 -d keystore_base64.txt > $DECODED_KEYSTORE_PATH |
5.5 Build and Sign Release Bundle
Build and sign the release build with the signing configurations.
| - name: Sign and Build Release Bundle | |
| env: | |
| RELEASE_KEYSTORE_PATH: ${{ secrets.RELEASE_KEYSTORE_PATH }} | |
| RELEASE_SIGNING_PASSWORD: ${{ secrets.RELEASE_SIGNING_PASSWORD }} | |
| RELEASE_SIGNING_USERNAME: ${{ secrets.RELEASE_SIGNING_PASSWORD }} | |
| RELEASE_SIGNING_ALIAS: ${{ secrets.RELEASE_SIGNING_ALIAS }} | |
| run: | |
| ./gradlew bundleRelease |
workflow is first setting environment variables which will be read inside app build.gradle signing configurations as mentioned in Step 4 above.
./gradlew bundleRelease is building only release bundle , if you want to build apk as well you can use command ./gradlew assembleRelease .
5.6 Retrieve Version Name.
In the next steps we want to create a release over Github , in order to do that we need the version name specified in build.gradle to create a tag and release name.
version_name is an ext property inside build.gradle which can be used to set a variable inside gradle using task as below.
tasks.register("appVersionName") {
    println rootProject.ext.version_name
}
In the workflow step below we are retrieving the Version Name from gradle variable appVersionName and setting and environment variable version_name so it can be used throughout workflow using statement ${{ env.version_name }}
| - name: Retrieve Version | |
| run: | | |
| echo "::set-output name=VERSION_NAME::$(${{github.workspace}}/gradlew -q appVersionName)" | |
| id: android_version | |
| - name: Get version | |
| run: | | |
| echo "version_name=${{steps.android_version.outputs.VERSION_NAME}}" >> $GITHUB_ENV |
5.7 Create Release over Github.
In the last step we want to create a release over Github. The following step in the workflow will achieve that.
| - name: Create Release on Github | |
| uses: softprops/action-gh-release@v1 | |
| env: | |
| GITHUB_TOKEN: ${{ secrets.GITHUB_TOKEN }} | |
| with: | |
| tag_name: v${{env.version_name}} | |
| name: Release - ${{env.version_name}} | |
| generate_release_notes: true | |
| prerelease: true | |
| files: app/build/outputs/bundle/<<yourAppName>>/<<YourAppNameAndVariant>>.aab |
Using softprops Github Action to achieve that. ${{env.version_name}} is the environment variable used to get the versionName configured in the previous step.
For the bundle file path please specify YourAppName and YourAppNameWithVariant , you can check when you create a normal build from Android Studio.
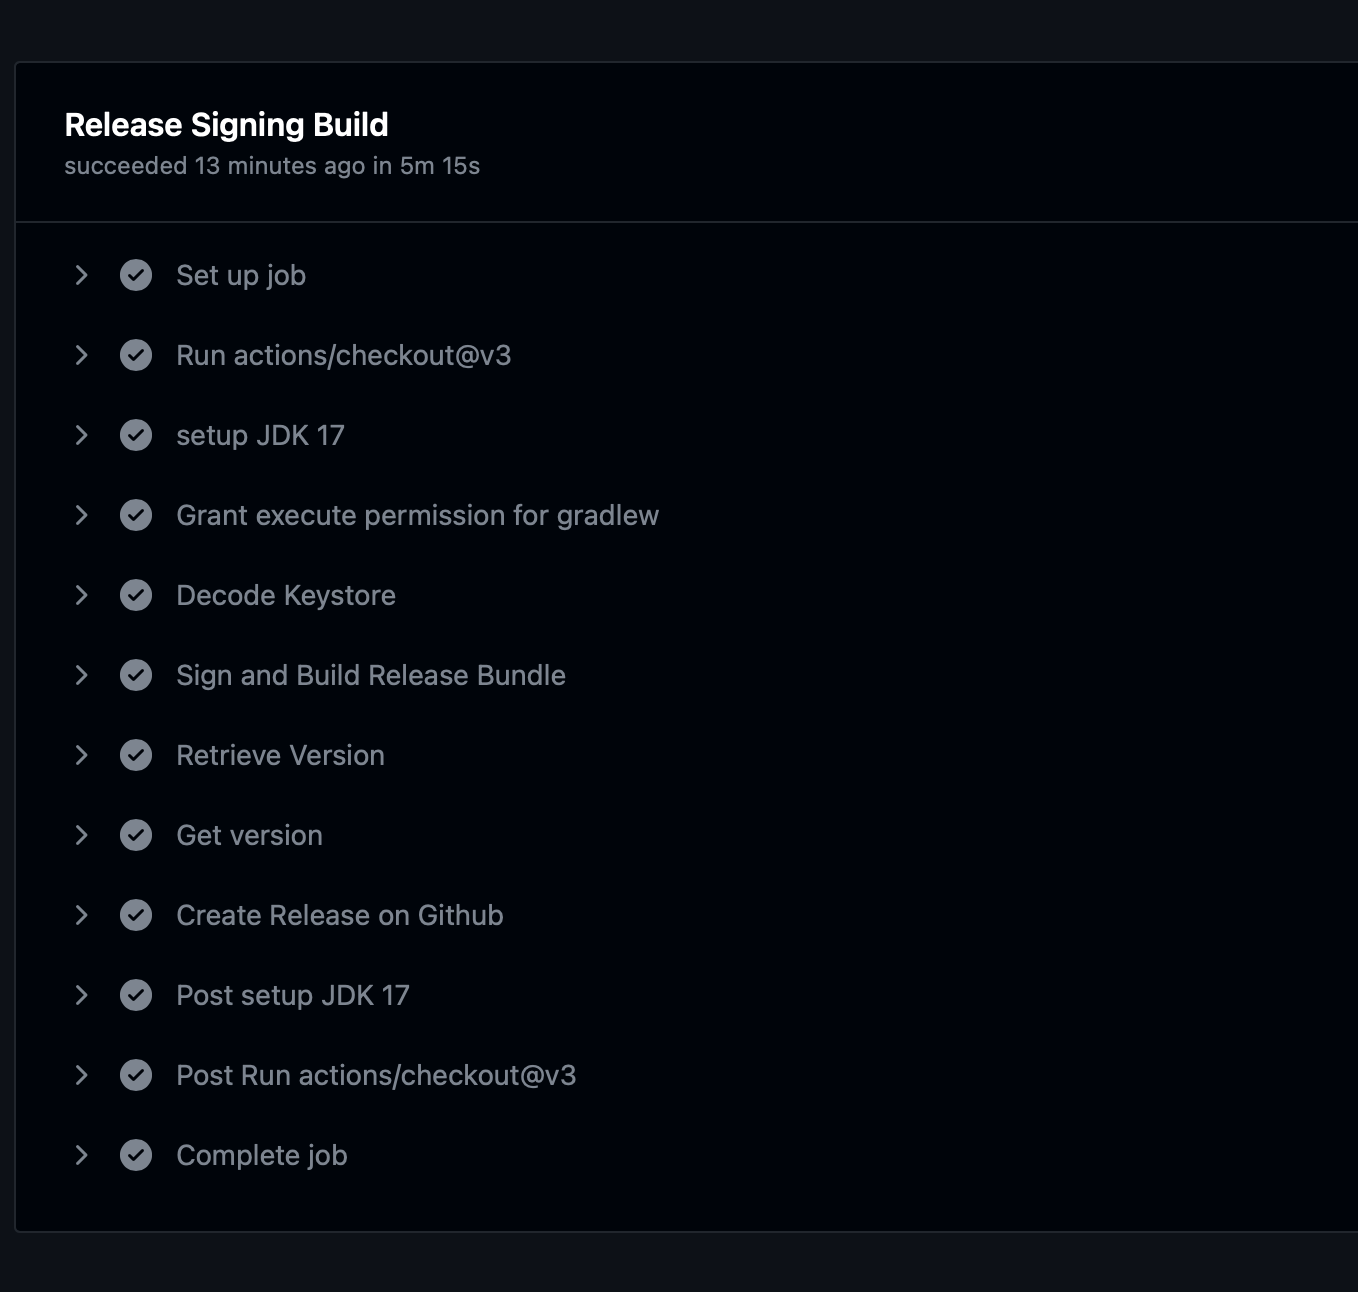
Workflow run overview.
Let’s see the workflow execution logs
Tag and Release over Github
Below is the view from the Release and Tag section from Github, after this workflow executed successfully.


That’s it for now, I hope you liked it.
💡 In the next story I will show how to keep Version code updated using workflow.
Remember to follow and 👏 if you like it 🙂
— — — — — — — — — — —
This article was previously published on proandroiddev.com


