

Finessing Subtle and Refined Aesthetics in User Interfaces through Canvas within Compose
Photo by Jan Kopřiva on Unsplash
Introduction
In the realm of Android UI development, Jetpack Compose has redefined how we approach user interfaces. Beyond the realm of pre-built components, the Canvas composable offers a gateway to create custom graphics, animations, and visualizations that push the boundaries of innovation. By harnessing the power of direct drawing, developers can breathe life into their applications and craft experiences that resonate with users on a visual and interactive level.
Getting Started with Canvas
The Canvas composable is a blank canvas that enables you to draw, paint, and animate directly within your Compose UI. To integrate it into your project, use the following syntax —
import androidx.compose.foundation.Canvas

@Composable
fun CustomCanvasExample() {
    Canvas(
        modifier = Modifier.fillMaxSize()
    ) {
        // Your drawing code here
    }
}
Drawing Shapes and Paths
The Canvas composable provides a variety of drawing functions for creating basic shapes and complex paths. Here are some examples —

Canvas with Rectangle, Circle and Custom Path
Canvas(
    modifier = Modifier
        .fillMaxSize()
        .background(SampleColors.lighterPink)
        .padding(10.dp)) {
    // Draw a rectangle
    drawRect(color = SampleColors.lightPink)

    // Draw a circle
    drawCircle(color = SampleColors.darkPink, radius = 400f)

    // Draw a custom path
    val path = Path().apply {
        moveTo(600f, 1200f)
        lineTo(800f, 800f)
        lineTo(350f, 400f)
        lineTo(160f, 25f)
        close()
    }
    drawPath(
        path = path,
        brush = Brush.horizontalGradient(
            listOf(
                SampleColors.lightBlue,
                SampleColors.lighterPink
            )
        )
    )
}
Custom Data Visualizations
The Canvas composable is a powerful tool for creating data visualizations. Let’s say you want to create a simple temperature bar chart —

Simple Bar Chart using Canvas with drawRect
@Composable
fun Chart(){
  val temperatureData = listOf(
      DataPoint(20f, SampleColors.lighterPink),
      DataPoint(45f, SampleColors.lightBlue),
      DataPoint(130f, SampleColors.darkPink),
      DataPoint(80f, SampleColors.lightPink),
      DataPoint(65f, Color.Cyan)
  )

   BarChart(data = temperatureData)
}

data class DataPoint(val value: Float, val color: Color)

@Composable
fun BarChart(data: List<TemperaturePoint>) {
    val maxBarValue = data.maxOf { it.value }
    Canvas(
        modifier = Modifier.fillMaxSize()
              .background(Brush
                    .horizontalGradient(
                        listOf(
                          Color.White,
                          Color.Red,
                          Color.Yellow))
              .padding(20.dp)
    ) {
        val maxBarHeight = size.height
        val barWidth = size.width / data.size

        data.forEachIndexed { index, dataPoint ->
            val barHeight = (dataPoint.value / maxBarValue) * maxBarHeight
            drawRect(
                color = dataPoint.color,
                topLeft = Offset(index * barWidth, size.height - barHeight),
                size = Size(barWidth, barHeight)
            )
        }
    }
}
Animating with Canvas
Animating with the Canvas composable involves changing properties over time. Here’s a simple example of animating a circle’s position —

Moving Circles using Animatable with Canvas and drawCircle
OUR VIDEO RECOMMENDATION


Jobs
@Composable
fun MovingCircles() {
    val position = remember { Animatable(0f) }

    LaunchedEffect(Unit) {
        position.animateTo(
            targetValue = 550f,
            animationSpec = tween(durationMillis = 3000)
        )
    }

    Canvas(
        modifier = Modifier.fillMaxSize().background(Color.Black)
    ) {
        drawCircle(color = Color.Red, center = Offset(position.value, 500f), radius = 50f)
        drawCircle(color = Color.Blue, center = Offset(position.value, 700f), radius = 80f)
        drawCircle(color = Color.Magenta, center = Offset(position.value, 1000f), radius = 150f)
        drawCircle(color = Color.Yellow, center = Offset(position.value, 1400f), radius = 190f)
    }
}
Explanation —
Animatable — Thepositionvariable is created using theAnimatableclass, which is a utility to manage animatable values. It initializes the position at 0f, which will be the starting point of the animation.animateTo— Inside theLaunchedEffect, theposition.animateTofunction is used to animate thepositionvalue to a target value (550fin this case). The animation duration is set to 3000 milliseconds using thetweenanimation specification, resulting in a smooth transition over 3 seconds.- Drawing Circles — Multiple
drawCirclefunctions are used to draw circles of different colors (Color.Red,Color.Blue, etc.). Thecenterparameter of each circle is set toOffset(position.value, yCoordinate)to achieve the horizontal movement effect based on the changingpositionvalue.
In summary, the MovingCircles composable creates an animation where circles of different colors move horizontally across the screen,adding a dynamic and visually engaging element to your UI. We can further edit this code to change the speed for each circle’s movement, have different end target values, etc!
Advanced Techniques — Particles and Effects
Particle System Example —
Creating a particle system using the Canvas composable is an advanced technique that adds dynamism to your UI. A particle system consists of small elements (particles) that move independently and collectively creating visual effects like fire, smoke, or confetti.
In the ParticleSystem example, we start by defining a Particle class that holds a position and velocity. The particles list is maintained as a mutableStateListOf in Compose. We use a LaunchedEffect to update particle positions in a loop, simulating their movement.
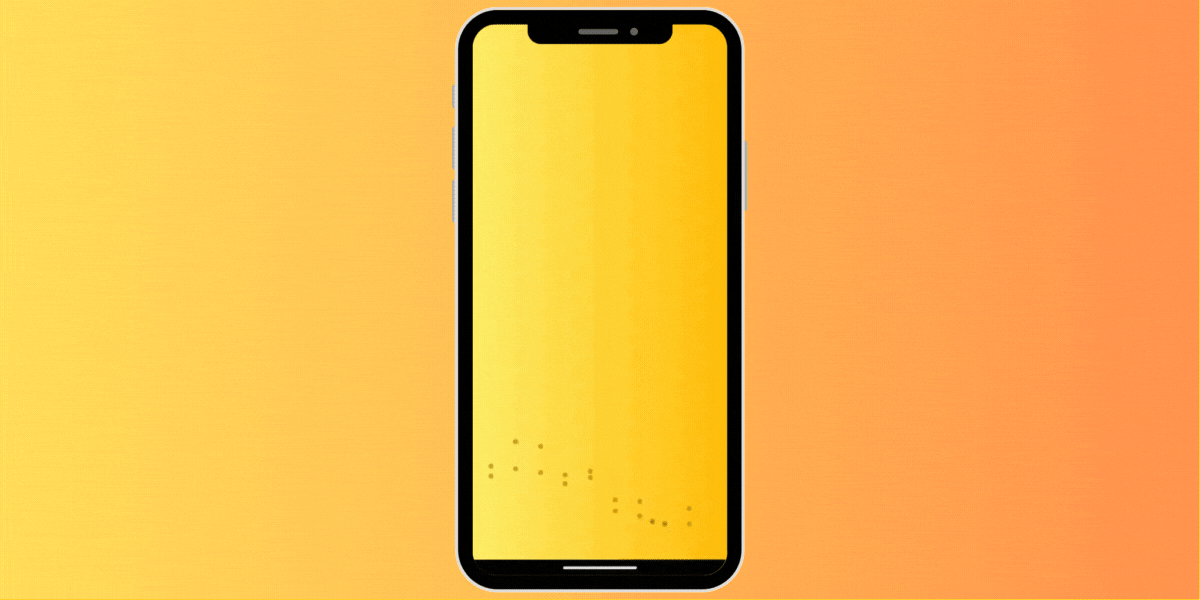 Particle System with Canvas
data class Particle(
    val position: Offset,
    val velocity: Offset
)

@Composable
fun ParticleSystem(particles: List<Particle>) {
    val mutableParticles = remember { mutableStateListOf<Particle>() }
    mutableParticles.addAll(particles)

    var counter = 0

    LaunchedEffect(Unit) {
        while (true) {
            val particlesCopy = ArrayList(mutableParticles.map { it.copy() })
            particlesCopy.forEachIndexed { index, particle ->
                mutableParticles[index] =
                    particle.copy(position = particle.position + particle.velocity)
            }
            delay(16L)
            counter += 1

            // modify as needed or change the condition to something like
            // when all particles are out of bounds of the screen
            if (counter > 3000) {
                break
            }
        }
    }

    Canvas(
        modifier = Modifier
            .fillMaxSize()
            .background(Brush.horizontalGradient(listOf(SampleColors.yellow, SampleColors.gold)))
    ) {
        mutableParticles.forEach { particle ->
            drawCircle(color = SampleColors.brown, alpha = 0.6F, center = particle.position, radius = 10f)
        }
    }
}
Note — Sample data and colors are available with the complete code for all the examples in the gist provided at the end of the article.
Performance Considerations
Photo by Josh Calabrese on Unsplash
When working with the Canvas composable and custom graphics, it’s essential to consider performance. Complex graphics, animations, and data visualizations can impact frame rates and responsiveness.
Optimization Tips —
- Culling: Draw only what’s visible on the screen. Calculate the visible area and draw elements within that region.
- Hardware Acceleration: Leverage hardware acceleration for improved performance. Jetpack Compose does this by default, but ensure your custom drawings are optimized for hardware acceleration.
- Bitmap Reuse: Reuse bitmaps whenever possible. Avoid creating new bitmaps repeatedly, as it can lead to memory consumption.
- Simplify Drawings: Avoid over complicating drawings with excessive layers or detail. Simplified drawings render faster.
- Reduce Redraws: Minimize unnecessary redraws by caching drawn elements and updating them only when necessary.
Near to Real World Example
The Canvas composable isn’t limited to graphics; it’s also used in creating interactive and immersive game experiences directly within your app. Let’s look at a simple game concept — a bouncing ball.
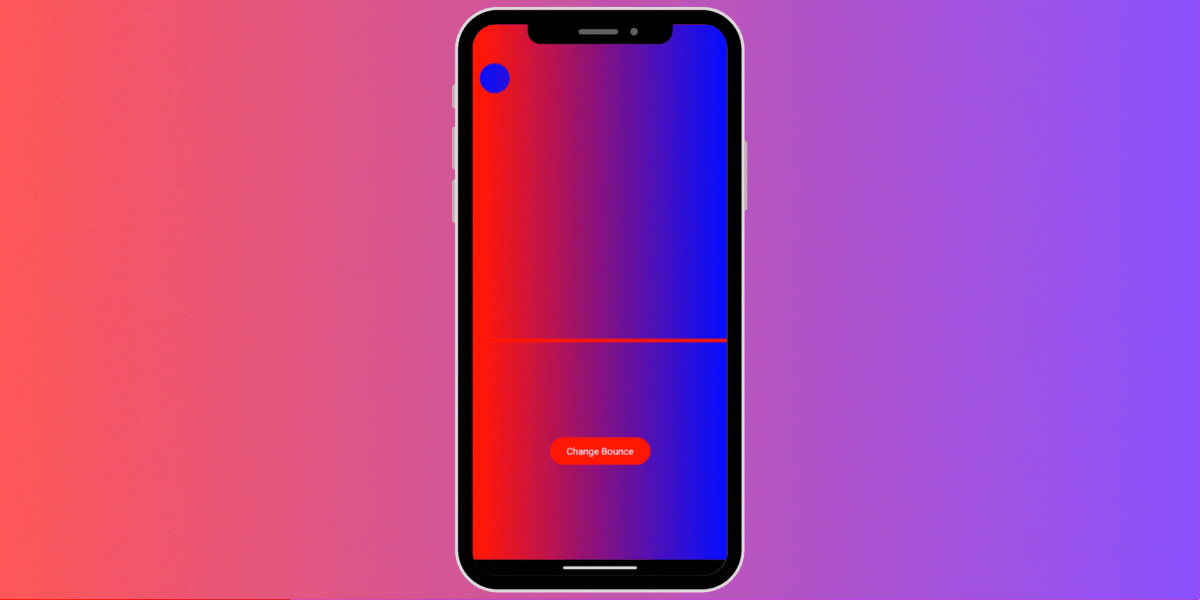 Bouncing Ball Game
@Composable
fun BouncingBallGame() {
    val position = remember { mutableStateOf(Offset(300f, 0f)) }
    val velocity = remember { mutableStateOf(Offset(3f, 3f)) }

    LaunchedEffect(Unit) {
        while (true) {
            position.value += velocity.value
            // change > condition to size of screen,
            // here just using a static value for demo purposes
            if (position.value.x < 0f || position.value.x > 1000f) {
                velocity.value = Offset(-velocity.value.x, velocity.value.y)
            }
            if (position.value.y < 0f || position.value.y > 1200f) {
                velocity.value = Offset(velocity.value.x, -velocity.value.y)
            }
            delay(16L)
        }
    }

    Column(
        modifier = Modifier.background(
            brush = Brush.horizontalGradient(
                listOf(
                    Color.Red,
                    Color.Blue
                )
            )
        )
    ) {
        Canvas(
            modifier = Modifier
                .height(460.dp)
                .fillMaxWidth()
        ) {
            drawCircle(
                brush = Brush.horizontalGradient(listOf(Color.Blue, Color.Red)),
                center = position.value,
                radius = 60f
            )
        }

        Divider(thickness = 5.dp, color = Color.Red)

        Column(
            modifier = Modifier.fillMaxSize(),
            horizontalAlignment = Alignment.CenterHorizontally,
            verticalArrangement = Arrangement.Center
        ) {
            Button(
                colors = ButtonDefaults.buttonColors(containerColor = Color.Red),
                onClick = {
                    val random = (-1..1).random()
                    if (random != 0) {
                        velocity.value += Offset(random * 10f, random * 10f)
                    }
                },
            ) {
                Text(text = "Change Bounce")
            }

            Text(
                text = "Velocity: ${velocity.value.x}, ${velocity.value.y}",
                color = Color.White,
            )
        }
    }
}
Key Concepts —
- Position and Velocity State — The ball’s position (
position) and velocity (velocity) are defined as mutable state using themutableStateOffunction. Thepositionstate variable controls the ball’s movement on the canvas. Velocity does not necessarily need to be a state variable unless we are using it (ex. displaying velocity in aText).
Text(
  text = "Velocity: ${velocity.value.x}, ${velocity.value.y}",
  color = Color.White,
)
- LaunchedEffect Animation Loop — The
LaunchedEffectis used to create an infinite animation loop. Inside the loop, the ball’s position is updated by adding the velocity to it. When the ball reaches the screen edges, its velocity is reversed to simulate bouncing. - Canvas Composable: The
Canvascomposable is used to draw the bouncing ball. ThedrawCirclefunction is used to draw the ball at the current position with a gradient brush. - Change Bounce Button — The
Buttonallows users to change the ball’s velocity, simulating a change in bounce behavior.
Conclusion
As we wrap up, remember that the world of Canvas is a place of both opportunity and responsibility. May your digital creations be elegantly subtle, inviting users to engage and enjoy. The Canvas in Jetpack Compose is your canvas to innovate and inspire.
Every line drawn and animation crafted impacts your app’s performance. Balancing aesthetics and efficiency is crucial, ensuring that user experiences remain smooth. Continue exploring, pushing boundaries, and enhancing UI design with Jetpack Compose. Your creative journey is limitless.
Closing Remarks
If you liked what you read, please feel free to leave your valuable feedback or appreciation. I am always looking to learn, collaborate and grow with fellow developers.
If you have any questions feel free to message me!
Here is the link to the gist containing all the previously mentioned code snippets, sample data and colors used.
Follow me on Medium for more articles — Medium Profile
Connect with me on LinkedIn for collaboration — LinkedIn Profile
Also, you’re welcome to follow me on Twitter for more updates and insights — Twitter Profile
Happy Composing!
This article was previously published on proandroiddev.com


