Let’s remember
In the first part, we covered the basics of Canvas and the initial shapes for our animation. If you want to refresh your knowledge, here is the link.
Appearance Animation
Now, we’ve reached the most important and complex part of this animation! We need to add draggability and a bouncy animation when a component appears.
Firstly, let’s add the appearance. For this purpose, we need an Animatable float that will control the animation progress and a LaunchedEffect that will trigger this animation at the start.
I am text block. Click edit button to change this text. Lorem ipsum dolor sit amet, consectetur adipiscing elit. Ut elit tellus, luctus nec ullamcorper mattis, pulvinar dapibus leo.
| val animateFloat = remember { Animatable(0f) } | |
| LaunchedEffect(key1 = items) { | |
| animateFloat.animateTo( | |
| targetValue = 1f, | |
| animationSpec = spring( | |
| dampingRatio = Spring.DampingRatioMediumBouncy, | |
| stiffness = Spring.StiffnessVeryLow | |
| ) | |
| ) | |
| } |
Here I’ve added spring animation to add a bounce effect. The next step will be to pass this value to drawCircle info and multiply it by the value we want to see animated.
...
scale(scale = iconScale * animationValue, pivot = pathBounds.topLeft)
...
fontSize = textStyle.fontSize * animationValue
...
radius = innerCircleRadius.toPx() * animationValue

Draggability
The next step in the animation will be to add draggability. For this we need three variables, that we will use to save the state of the current position of the component.
| // current drag angle | |
| var angle by remember { mutableStateOf(0f) } | |
| // start angle of a new drag | |
| var dragStartedAngle by remember { mutableStateOf(0f) } | |
| // variable in which we will need to calculate difference between old drag position and new | |
| var oldAngle by remember { mutableStateOf(angle) } |
Now we need to add pointerInput to catch draggable events and change the position of our circles. This is the whole code for this, but let me explain the main parts.
Job Offers
The atan2 function is utilized to determine the angle of the starting point of the drag gesture. Applying the modulus operation ensures that the resulting angle remains within the range of 0 to 360 degrees. Subsequently, we store the initial angle (dragStartedAngle) to facilitate the calculation of the new angle later on.
During the drag operation, we again utilize the atan2 function to ascertain the current position of the user’s scroll relative to the circleCenter. We then compute the difference between the current dragged angle and the starting angle. By adding this difference to the stored initial angle (oldAngle), we obtain the updated angle for the canvas.
In the end we just need to add this angle to our angle calculations for each circle:
val angleInDegrees = (i * distance + angle - 90)

Click Listeners
Also, we need to add click listeners to these elements. We will save all center offsets with items inside the additional map
| val glovoUiItems = remember { mutableStateMapOf<Offset, GlovoItem>() } | |
| // ... | |
| val mainCircleOffset = Offset(x = circleCenter.x, y = circleCenter.y) | |
| glovoUiItems[mainCircleOffset] = mainItem | |
| // ... | |
| val currentOffset = Offset( | |
| x = mainCircleRadius.toPx() * cos(angleInRad) + circleCenter.x, | |
| y = mainCircleRadius.toPx() * sin(angleInRad) + circleCenter.y | |
| ) | |
| glovoUiItems[currentOffset] = item |
In each recalculation, we need to clean this map because circles change the position after dragging, so at the top of the drawScope function I’ve added this line.
glovoUiItems.clear()
The last element of this feature is to add another pointer input, draw a rectangle around our circle center position, check that the click was done inside this rectangle, and trigger the method with an item from the map.
| Canvas(modifier = modifier.pointerInput(true) { | |
| detectTapGestures { clickOffset -> | |
| glovoUiItems.forEach { item -> | |
| val rect = Rect(item.key, innerCircleRadius.toPx()) | |
| if (rect.contains(clickOffset)) { | |
| onGoalClick(item.value) | |
| } | |
| } | |
| }} | |
| // ... |
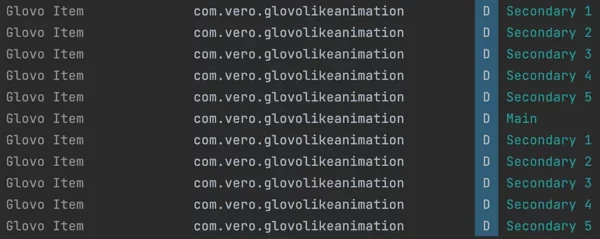
Here is the test of the click listeners.
| GlovoLikeAnimation( | |
| onGoalClick = { item -> | |
| Log.d("Glovo Item", item.title) | |
| }, | |
| mainItem = GlovoItem("Main", defaultPath), | |
| items = listOf( | |
| GlovoItem("Secondary 1", defaultPath), | |
| GlovoItem("Secondary 2", defaultPath), | |
| GlovoItem("Secondary 3", defaultPath), | |
| GlovoItem("Secondary 4", defaultPath), | |
| GlovoItem("Secondary 5", defaultPath), | |
| ) | |
| ) |

Conclusion
In the final part of the article, we added circle draggability and appearance animations using Jetpack Compose. Here, I have implemented the basics to allow you to experiment and learn more about Canvas and animations. You can play around with edge cases, such as what happens if there are too many items or how to make the animation fancier. (Maybe in the future I’ll write the third part and make all these animations closer to the original)
If you want to see the whole implementation, you can find it in the link below.
https://github.com/AndreVero/GlovoLikeAnimation?source=post_page—–15c2f3bea505——————————–
Learn a little bit more about sine and cosine here:
https://www.youtube.com/watch?v=DLGcwASUFRg&t=163s
This article is previously published on proandroiddev.com


