

Ditch the jarring contrast of dark system bars against your vibrant app visuals. Edge-to-edge drawing in Jetpack Compose lets you transform those bars into chameleons, adapting to your UI’s colors and textures. Watch as they melt into the background, creating a unified canvas that captivates users.
While edge-to-edge with Jetpack Compose is a breeze for most screens, dialogs require a dash of finesse to truly camouflage those system bars and deliver a seamless, immersive experience. No matter where users encounter these interactive pop-ups, they’ll be whisked away to a place where boundaries vanish and content reigns supreme!
Setting up edge to edge
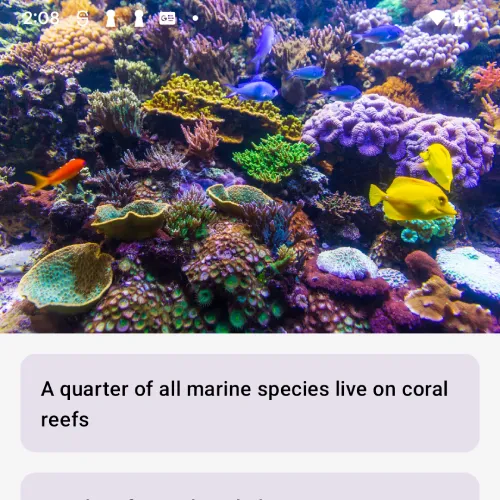
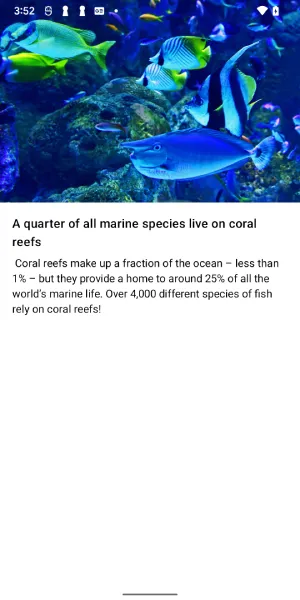
Let’s first start with a basic screen, a nice header image of some lovely clown fish. But unfortunately, with an ugly grey status bar at the top!
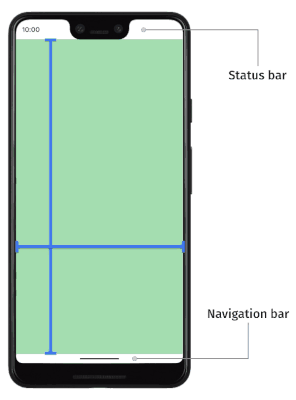
What we want to do is expand the content to be drawn under the top status bar and under the navigation bar at the bottom to give that an immersive experience while still allowing the user to see their normal status bar content and icons.
To do this we just need to add a simple enableEdgeToEdge() from androidx.activity (version 1.8.0-alpha03 and later) at the top of onCreate in the MainActivity. This might be somewhat familiar if you used SystemUIController prior to the deprecation of Accompanist.
| class MainActivity : ComponentActivity() { | |
| override fun onCreate(savedInstanceState: Bundle?) { | |
| super.onCreate(savedInstanceState) | |
| // Add this line to enable edge-to-edge | |
| enableEdgeToEdge() | |
| setContent { | |
| MainScreen() | |
| } | |
| } | |
| } |
One thing we also need to do, is remove any status bar controlling from the Material Theme definition (sometimes this is added as part of the Android Studio new project template). This is the common cause of finding enableEdgeToEdge not working.
| @Composable | |
| fun Theme( | |
| darkTheme: Boolean = isSystemInDarkTheme(), | |
| dynamicColor: Boolean = true, | |
| content: @Composable () -> Unit | |
| ) { | |
| ... | |
| // Remove this: | |
| val view = LocalView.current | |
| if (!view.isInEditMode) { | |
| SideEffect { | |
| (view.context as Activity).window.statusBarColor = colorScheme.primary.toArgb() | |
| ViewCompat.getWindowInsetsController(view)?.isAppearanceLightStatusBars = darkTheme | |
| } | |
| } | |
| // end removal | |
| ... | |
| MaterialTheme( | |
| colorScheme = colorScheme, | |
| typography = Typography, | |
| content = content | |
| ) | |
| } |
Giving this a try…
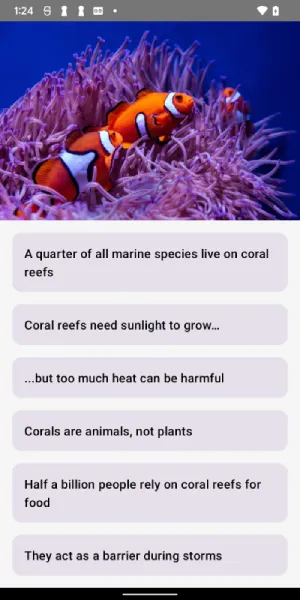
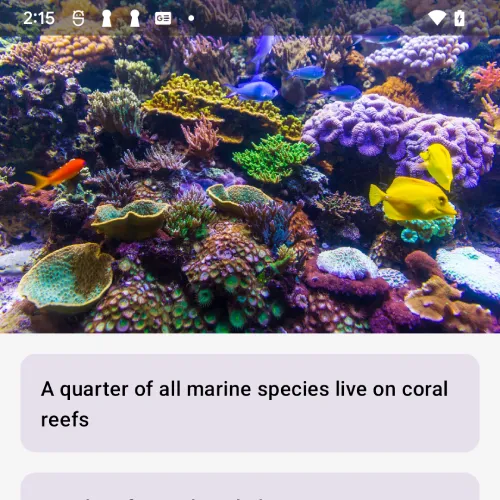
There, nice and easy, the app looks so much better with the top status bar and the bottom navigation bar blending into the background. It is easy to see the white status bar icons on the image!
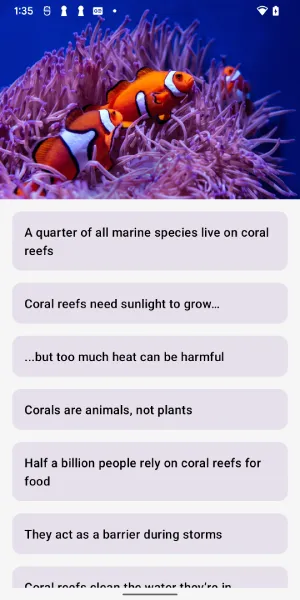
But there is an issue, my device is currently in dark mode, if I switch it to light mode we can see the status bar is not so easy to read:
What is happening here is that enableEdgeToEdge() by default sets the statusBarStyle to SystemBarStyle.auto(Color.TRANSPARENT, Color.TRANSPARENT) which means that the icon color will change depending if the device is in dark or light mode (white icons for dark mode, black for light mode).
If you know that the image behind the status bar will look best with either light or dark icons on top you can specifically set which icon type in the activity using the specific light or dark styles:
enableEdgeToEdge(statusBarStyle = SystemBarStyle.light(Color.TRANSPARENT, Color.TRANSPARENT))
or
enableEdgeToEdge(statusBarStyle = SystemBarStyle.dark(Color.TRANSPARENT))
You can also set the same for the navigationBarStyle.
Styling the scrim
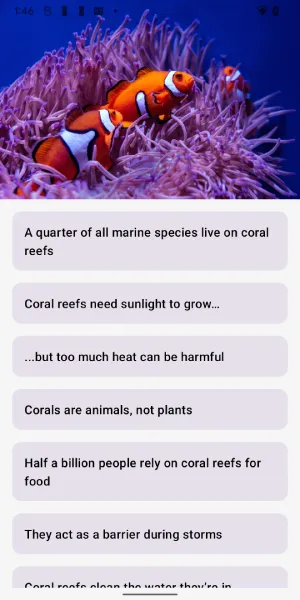
In the above example images we can see that the status bar, while it is visible and we can select the icons color, if we have a more complex image it might still be hard to see the icons or read the time. The status bar is a bit too camouflaged!
For this, we can add a scrim beneath the status bar, replacing the Color.TRANSPARENT values above with an integer android.graphics.Color
enableEdgeToEdge(statusBarStyle = SystemBarStyle.dark(Color.parseColor(“#801b1b1b”)))
Now the status bar is the right level of camouflaged — readable but not taking away from the app beauty.
The problem with dialogs
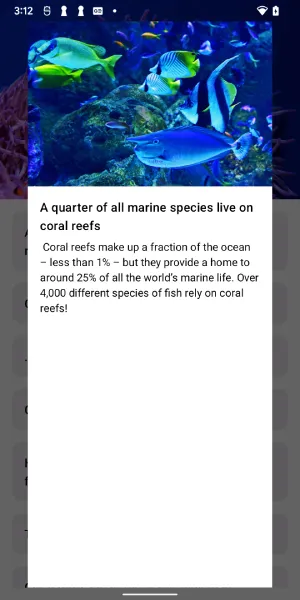
This seems all good until you try and load some content in a dialog.
Using Dialog
So if we have enableEdgeToEdge set up in the main activity and show content in a Dialog object we don’t get an edge-to-edge dialog, despite in the code adding fillMaxSize to the modifiers:
| showDialog?.let { | |
| Dialog(onDismissRequest = { showDialog = null }) { | |
| FactDetail(items[it], Modifier.fillMaxSize()) | |
| } | |
| } |
OUR VIDEO RECOMMENDATION


Jobs
The reduction in width here is due to the platformDefaultWidth being applied, we can fix that by passing in DialogProperties to the dialog with this disabled:
| showDialog?.let { | |
| Dialog( | |
| onDismissRequest = { showDialog = null }, | |
| properties = DialogProperties(usePlatformDefaultWidth = false) | |
| ) { | |
| FactDetail(items[it], Modifier.fillMaxSize()) | |
| } | |
| } |
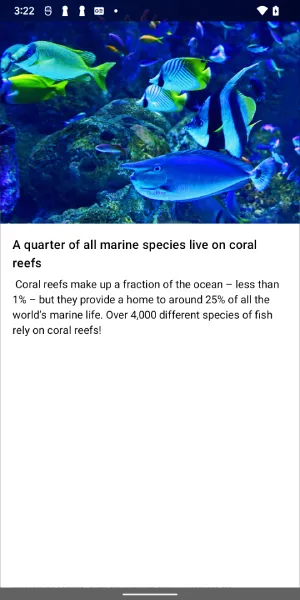
So now at least we have full width. But what about the status bar and navigation bar?
If we look super closely at the status bar, we can see that there is a semi transparent scrim and we can see through to the image underneath. This is not ideal!

So the enableEdgeToEdge functionality does not work here.
There is another DialogProperties argument, decorFitsSystemWindows which in the documentation implies that this will allow WindowInsets to be toggled, yet it does not change the status bar. There are some issues raised that are still in an unfixed & won’t fix state to request that these properties be expanded to allow this.
True Edge-to-Edge Dialogs
We can work around this by doing the following:
- Find Activity and Dialog window (they are 2 different windows) and apply the edge-to-edge flags from the activity window to the dialog window, this will allow dialog window to draw under system bars.
- Update the dialog view parent layout params to match full screen using a
SideEffect.
Credit for this idea goes to this StackOverflow answer from doolle89 — note, in this answer the transparency of the system bars was implemented via SystemUIController prior to the deprecation of Accompanist. The enableEdgeToEdge method on the activity covers this now.
| showDialog?.let { | |
| Dialog( | |
| onDismissRequest = { showDialog = null }, | |
| properties = DialogProperties( | |
| usePlatformDefaultWidth = true, | |
| decorFitsSystemWindows = false | |
| ) | |
| ) { | |
| // Step 1: Find the windows | |
| val activityWindow = window | |
| val dialogWindow = (LocalView.current.parent as? DialogWindowProvider)?.window | |
| val parentView = LocalView.current.parent as View | |
| SideEffect { | |
| if (activityWindow != null && dialogWindow != null) { | |
| // Step 2: Get and apply the activity attributes to the dialog parent view | |
| val attributes = WindowManager.LayoutParams() | |
| attributes.copyFrom(activityWindow.attributes) | |
| attributes.type = dialogWindow.attributes.type | |
| dialogWindow.attributes = attributes | |
| parentView.layoutParams = LayoutParams( | |
| activityWindow.decorView.width, | |
| activityWindow.decorView.height | |
| ) | |
| } | |
| } | |
| FactDetail(items[it], Modifier.fillMaxSize()) | |
| } | |
| } |
Note, in order for this to work we have to switch back to using the platformDefaultWidth.
Now we have a fully edge-to-edge dialog!
Navigation Destination Dialogs
You might be wondering, can the same be applied to dialog destinations navigated to via a NavHost. Why yes it can!
| dialog( | |
| "detail/{index}", | |
| dialogProperties = DialogProperties( | |
| usePlatformDefaultWidth = true, | |
| decorFitsSystemWindows = false | |
| ) | |
| ) { backStackEntry -> | |
| val activityWindow = window | |
| val dialogWindow = (LocalView.current.parent as? DialogWindowProvider)?.window | |
| val parentView = LocalView.current.parent as View | |
| SideEffect { | |
| if (activityWindow != null && dialogWindow != null) { | |
| val attributes = WindowManager.LayoutParams() | |
| attributes.copyFrom(activityWindow.attributes) | |
| attributes.type = dialogWindow.attributes.type | |
| dialogWindow.attributes = attributes | |
| parentView.layoutParams = LayoutParams( | |
| activityWindow.decorView.width, | |
| activityWindow.decorView.height | |
| ) | |
| } | |
| } | |
| backStackEntry.arguments?.getInt("index")?.let { | |
| FactDetail(items[it], Modifier.fillMaxSize()) | |
| } | |
| } |
It works exactly the same!
Make it reusable
As always, we want to make sure code can be reused in lots of places. The above code will only work from an Activity where window is available. Adding some helper functions to extract the window from the Context, we can extract this out to a reusable function that can be called wherever we construct the dialog.
| @Composable | |
| fun getActivityWindow(): Window? = LocalView.current.context.getActivityWindow() | |
| private tailrec fun Context.getActivityWindow(): Window? = | |
| when (this) { | |
| is Activity -> window | |
| is ContextWrapper -> baseContext.getActivityWindow() | |
| else -> null | |
| } | |
| @Composable | |
| fun SetDialogDestinationToEdgeToEdge() { | |
| val activityWindow = getActivityWindow() | |
| val dialogWindow = (LocalView.current.parent as? DialogWindowProvider)?.window | |
| val parentView = LocalView.current.parent as View | |
| SideEffect { | |
| if (activityWindow != null && dialogWindow != null) { | |
| val attributes = WindowManager.LayoutParams() | |
| attributes.copyFrom(activityWindow.attributes) | |
| attributes.type = dialogWindow.attributes.type | |
| dialogWindow.attributes = attributes | |
| parentView.layoutParams = FrameLayout.LayoutParams( | |
| activityWindow.decorView.width, | |
| activityWindow.decorView.height | |
| ) | |
| } | |
| } | |
| } |
| dialog( | |
| "detail/{index}", | |
| dialogProperties = DialogProperties( | |
| usePlatformDefaultWidth = true, | |
| decorFitsSystemWindows = false | |
| ) | |
| ) { backStackEntry -> | |
| SetDialogDestinationToEdgeToEdge() | |
| backStackEntry.arguments?.getInt("index")?.let { | |
| FactDetail(items[it], Modifier.fillMaxSize()) | |
| } | |
| } |
Dynamically change the status bar icon color
Don’t get too excited, this is going to be bad news for dialogs.
What if you are not sure about what color to set the icons to until runtime or if it changes depending on the image you want to show?
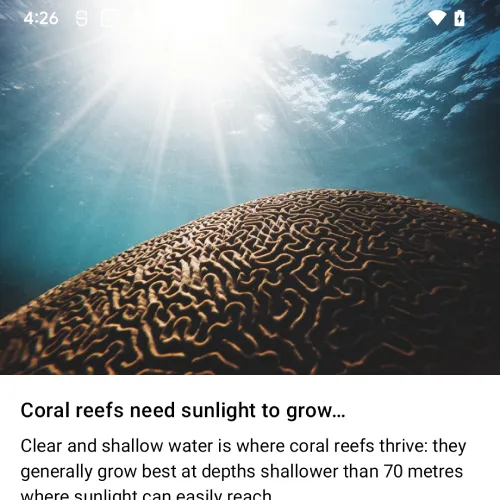
For example, this sunlight image does not work at all well with white colored icons:
Unfortunatly at this stage (at least from my investigation) calling enableEdgeToEdge again with different SystenBarStyle values will not alter the dialog. It will affect the activity screen underneath but not the dialog itself. To be able to modify this you can go back to using SystemUIController but given the deprecation of Accompanist this option is limited. Hopefully this will be fixed in the future!
So now you can camouflage your status bars and focus on building beautiful UIs no matter whether your content is in a dialog or not!
All the code from this post can be found on my Github:
This article was previously published on proandroiddev.com


